Priorities are used to define the level of urgency associated with a Work Order and also automatically apply to any Task added to a Work Order. When a mobile user receives a Task on the Zinier Mobile App, the Priority is also shown in the Task list so that the user completing the task will understand its level of urgency.
Priorities also play an important role in SLAs through the use of Priority Time Frames.
Priorities are used in a number of places across the platform. When setting up Priorities for the first time, you should be particularly mindful of their relationship to the following modules:
|
Module |
Relationship |
|---|---|
|
Priorities are used to define the level of urgency associated with a Work Order and also automatically apply to any Task added to a Work Order. |
|
|
SLAs (Service Level Agreements) allow you to specify your contractually agreed upon response time and resolution time when completing a Work Order for a customer. Using a concept we call Priority Time Frames, SLAs tie a particular Response Time and Resolution Time to the particular Priority you set when creating a Work Order. By adding different time frames to different Priorities, it is possible to track your operation adherence to contract terms that may differ based on Work Order Priority. When an SLA is assigned to a Work Order, keep in mind that Response Time and Resolution Time for any task associated with that Work Order will also be measured against the SLA. As a result, make sure you have created the different Priorities you want to associate with the Priority Time Frames before you create your SLAs. |
|
|
Mobile Tasks |
When a mobile user receives a Task on the Zinier Mobile App, the Priority is also shown in the Task list so that the user completing the task will understand its level of urgency. |
-
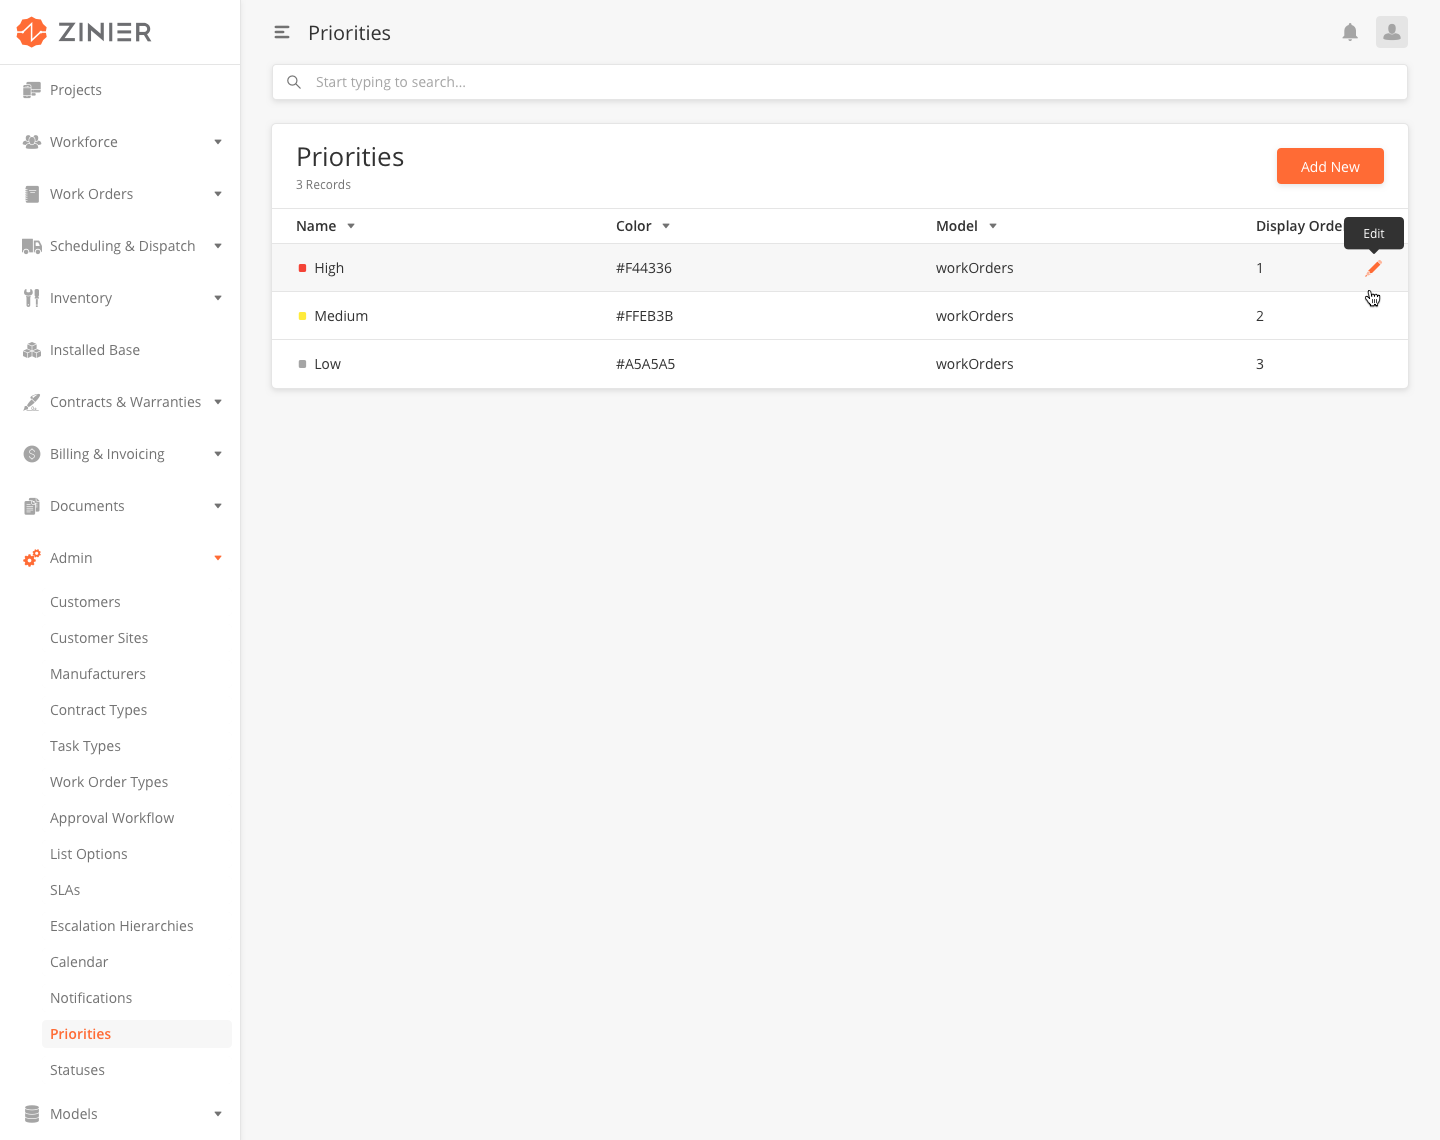
From the main page, click Add New to open the side panel.
-
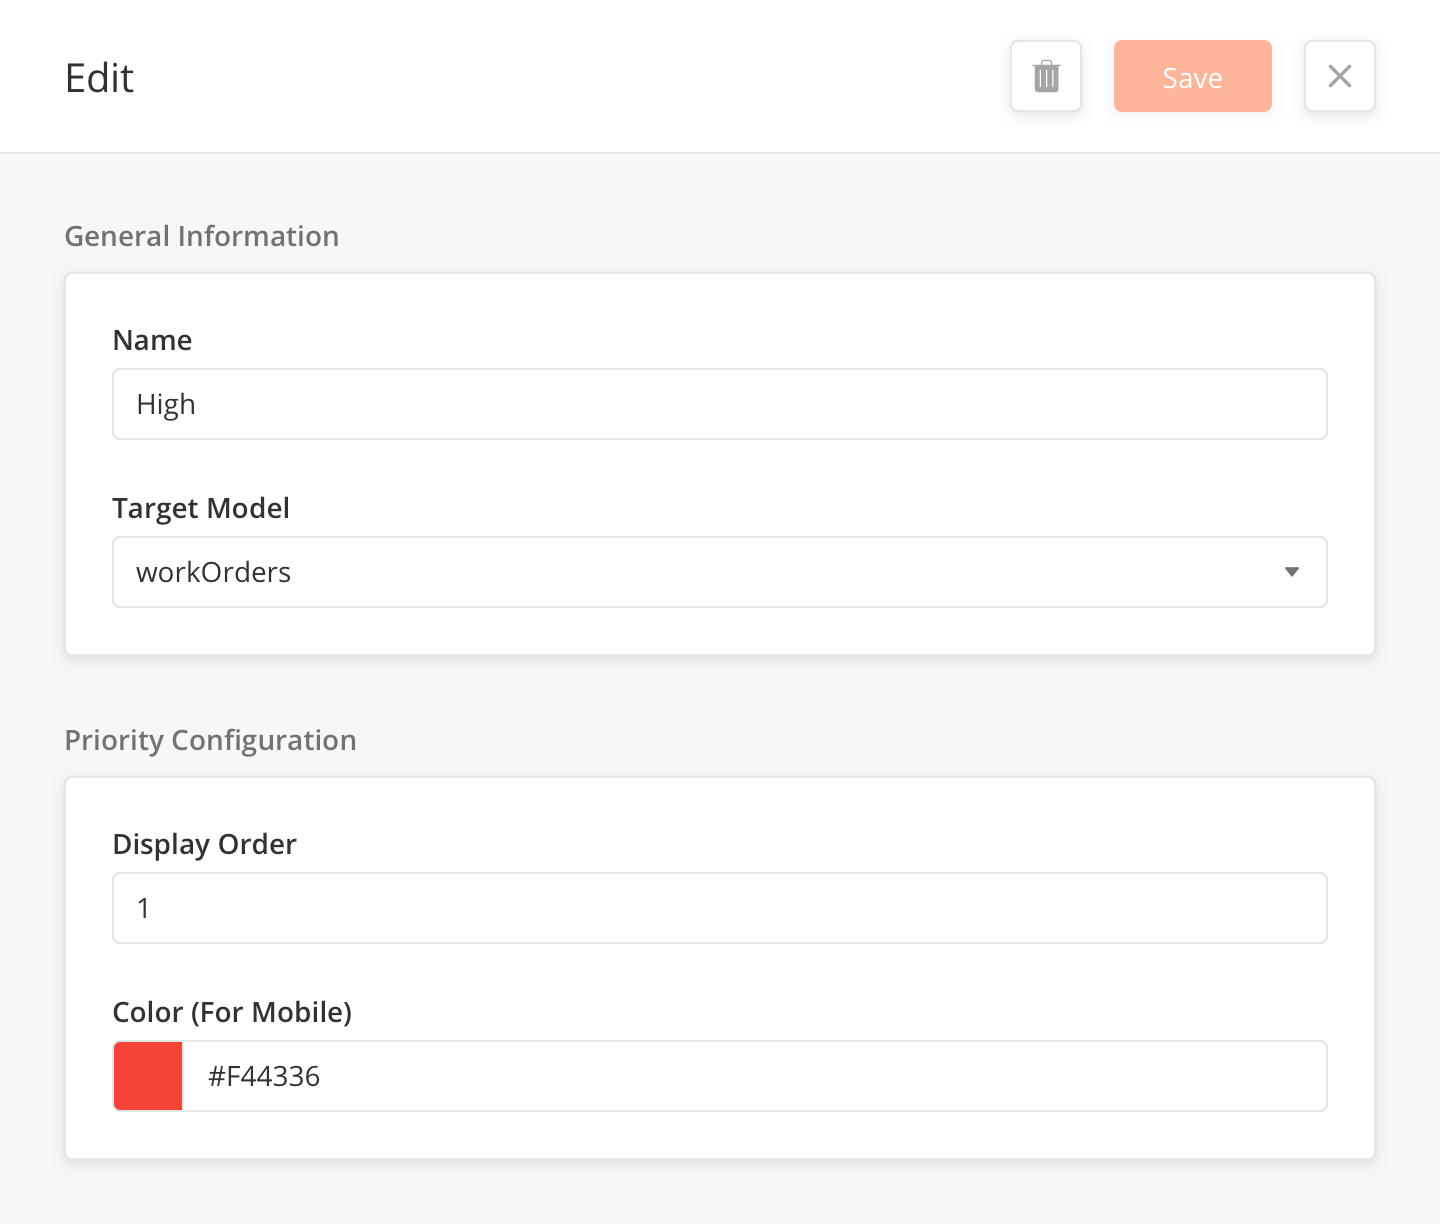
Enter the Name and Description of the Priority.
-
Select the Target Model to associate it with this Priority. The model dictates the Field Service Elements product you want to associate to the Priority. Usually, you will select "workOrders" but for more complex configurations, you may need to select a custom model.
-
Enter an integer in the Display Order filed to set the order in which the Priority is displayed in the dropdown menu when creating a new Work Order. The drop-down menu is organized from lowest integer to the highest integer, with "1" being placed at the top of the drop-down menu.
-
Click Save.
You can edit or delete a Priority by hovering over the row of the desired Priority from the main page table and clicking the Edit icon. When you click Edit, the side panel will appear. Edit the information and click Save, or click the trash bin icon on the top navigation to delete the record.
|
Field Name |
Description |
Example |
Source (Module) |
|---|---|---|---|
|
Name |
Name of the priority, it usually indicates the urgency. |
High |
|
|
Target Model |
The model dictates the Field Service Elements product you want to associate to the Priority. Usually, you will select "workOrders" but for more complex configurations, you may need to select a custom model. |
workOrders |
Models |
|
Display Order |
Display Order sets the order in which Priorities are displayed in the drop-down menu of the sidepanel used when creating a new Work Order. The drop-down menu is organized from lowest integer to the highest integer, with "1" being placed at the top of the drop-down menu. Enter a digit greater than 0. If "Priority 1" has a display order value of 1 and "Priority 2" has a display order value of 2, "Priority 1"will be displayed at the top of the drop-down menu. |
1 |
|
|
Color (For Mobile) |
Select the color or enter the hex color code that appears in the task list next to the priority in the Zinier App. |
#F44336 |
|
Relevant Field(s) |
Source (Module) |
Relationship |
Example |
|---|---|---|---|
|
Priority |
This determines which Priority level the time frame applies to. When a Work Order (or Task) of this Priority level is created, it will assume the SLA properties list below. |
Based on the terms of your SLA agreement with your customer, you have set 7 days as the Response Time and for Work Order with Priority = Low, and 24 hours for a Work Order with Priority = High. |
|
|
Operation Hours |
The calendar determines the operational hours associated with the Priority Time Frame. The operational days/hours associated with the calendar you select are then used to calculate adherence to the SLA. |
If your SLA agreement dictates that Work Orders of High Priority must be responded to at all hours (24/7), you would use a calendar with 24/7 hours of operation. |
Statuses are used across Field Service Elements mainly to indicate the status of a record within an Approval Workflow. New statuses can be created and applied to any of the products that have Approval Workflows:
-
Work Orders
-
Tasks
-
Contracts
-
Invoices
When used in conjunction with Approval Workflows, Statuses indicate how a record progresses through the workflow. When you add a Transition to an Approval Workflow, you will specify which Group of users should receive the record when it changes from one status to another (i.e. transitions from "Pending Approval" to "Approved"). So it is important to map out and create a Statuses that correspond to each transition of your approval workflows.
Statuses are also used in certain system modules to indicate the state of the record. For example, when a User is invited to join Zinier, the User records contains a Status to indicate whether or not the user has joined the platform (i.e. "Invited" or "Active").

Statuses are used in a number of places across the platform. When setting up Statuses for the first time, you should be particularly mindful of their relationship to the following modules:
|
Module |
Relationship |
|---|---|
|
Statuses play a critical role in Approval Workflows. When you add a Transition to an Approval Workflow, you will specify which Group of users should receive the record when it changes from one status to another (i.e. transitions from "Pending Approval" to "Approved"). So it is important to map out and create a Statuses that correspond to each transition of your approval workflows. |
|
|
Statuses are used to indicate at what stage the Work Order is within its Workflow. Additionally, the when the status of the Work Order changes, it will move it to a different module and make it visible to users within the Groups associated with that module. For example, when a Work Order status transitions from "Pending Approval" to "Completed" (which happens when the Approval Group approves the Work Order), it moves from the "Work Order Approval" module to the "Completed Work Orders" module. |
|
|
Statuses are used to indicate at what stage the Task is within its lifecycle. For example, when a Task status transitions from "Not Assigned" to "Scheduled" that indicates that the Task has been assigned to a user and scheduled. When the Task status is "Dispatched" that indicates that the Task has been launched to the assigned user's mobile device. |
|
|
Statuses are used to indicate at what stage the Assets is within its lifecycle. For example, when an Asset's status transitions from "Not Assigned" to "Scheduled" that indicates that the Task has been assigned to a user and scheduled. |
|
|
Statuses are used to indicate at what stage the Contract is within its Workflow. For example, when a Contract status transitions from "Draft" to "Pending Approval", it moves from the "Contracts" module to the "Approval" module for review by a user in the Approval Group. |
|
|
Statuses are used to indicate at what stage the Invoice is within its Workflow. For example, when an Invoice's status transitions from "Pending Payment" to "Paid" this indicates that payment has been received. |
-
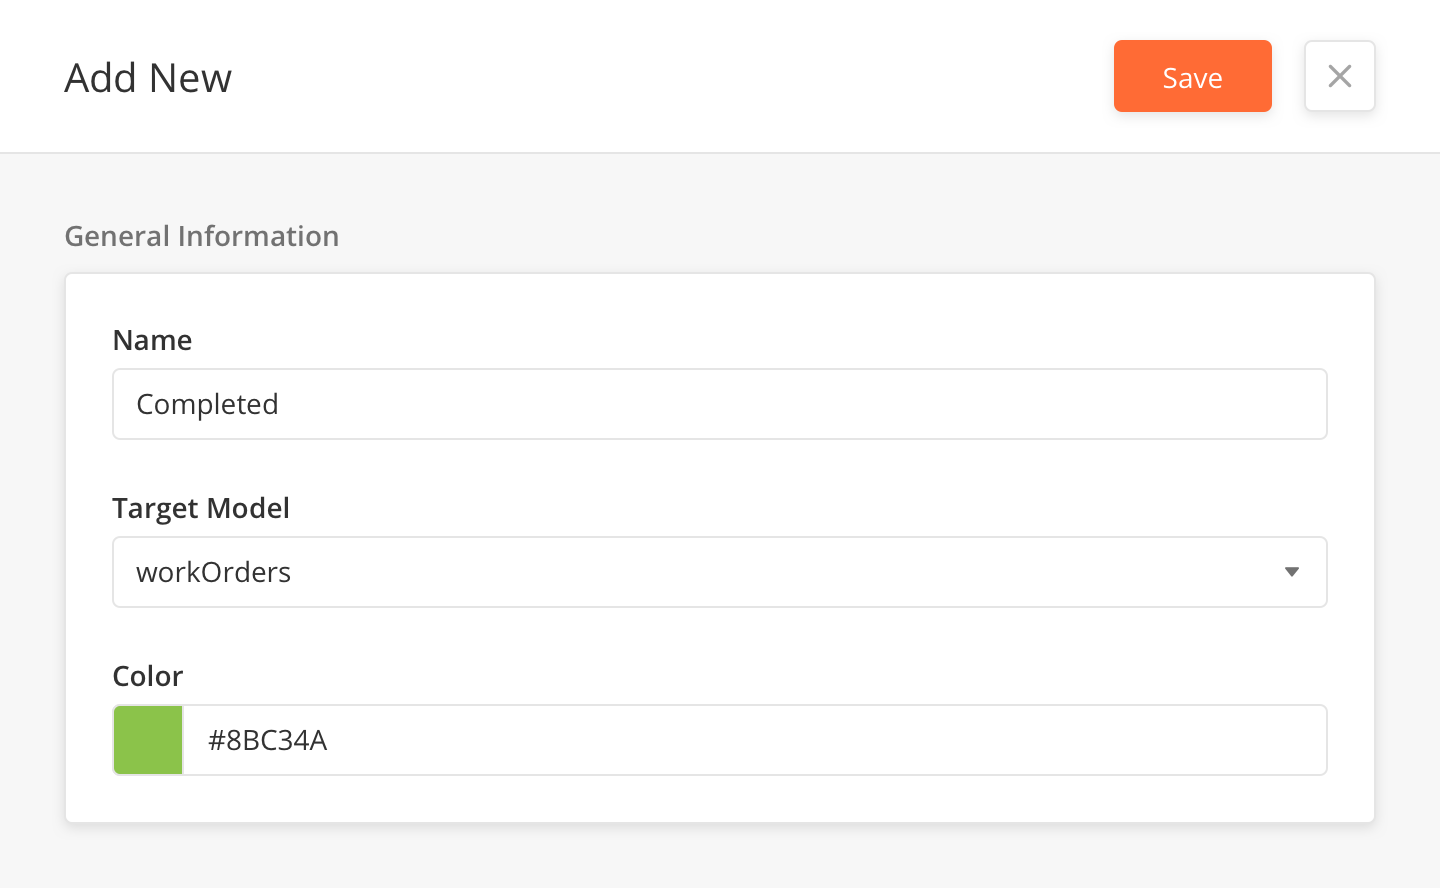
From the main page, click Add New to open the side panel.
-
Enter the Name of the Status.
-
Select the Target Model to indicate which Field Service Elements product you want to associate to the Status with
-
Select the Colour or manually enter the hex code.
-
Click Save.
You can edit or delete a Status by hovering over the row of the desired Status from the main page table and clicking the Edit icon. When you click Edit, the side panel will appear. Edit the information and click Save, or click the trash bin icon on the top navigation to delete the record.
|
Field Name |
Description |
Example |
|---|---|---|
|
Name |
Name of the status |
Not Assigned |
|
Target Model |
The model dictates the Field Service Elements product you want to associate to the Status. The products and default model names are listed below (for more complex configurations, you may need to select a custom model):
|
workOrders |
|
Color |
Select the Color or enter the hex code that appears in the task list next to the priority in the App. |
#F44336 |
Status Actions are used to define which actions can be done by the web or mobile users within a workflow. All status actions are associated with models present in the system, and multiple actions be applied to any model in the system. New actions can be created anytime and associated in a model to be used for status transition in a workflow from one status to another when that action is completed.
Status Actions are used with the configuration of status and status transitions to define the steps in a workflow. An action configuration essentially defines the transition of the workflow from one status to another.
|
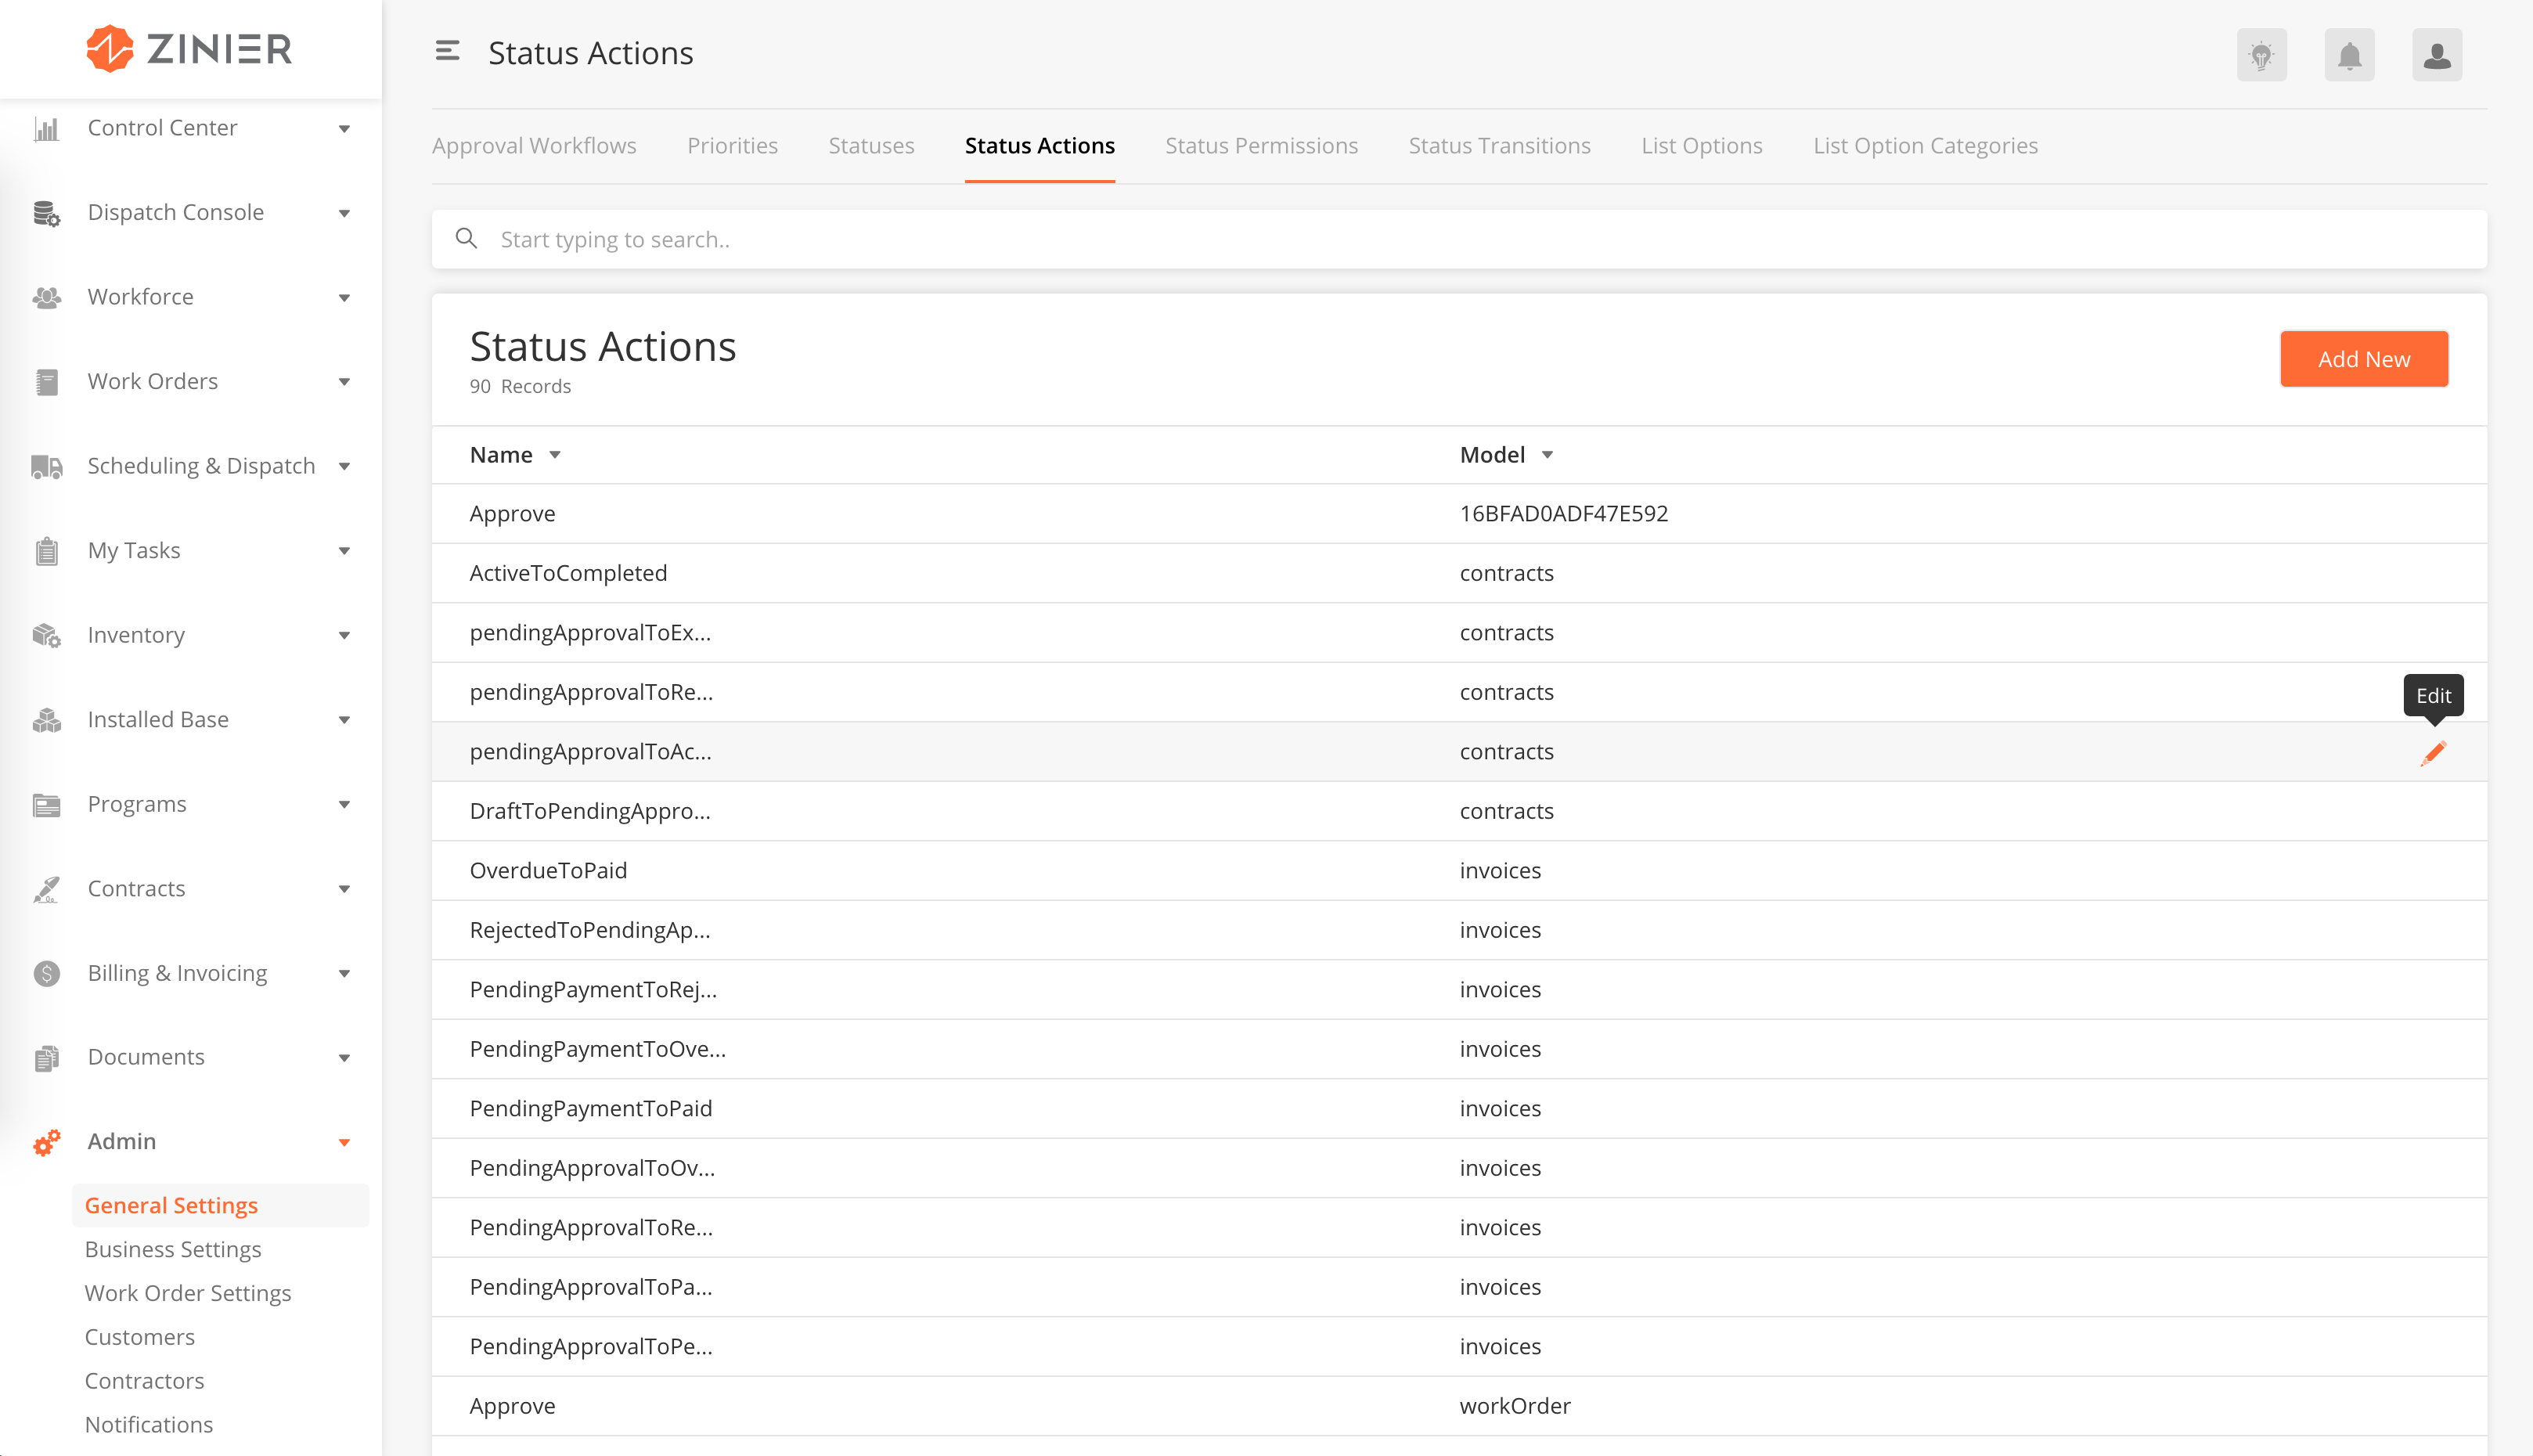
From the Main Table you can:
-
View the list of available actions that are defined in the system, along with the models that are associated with them.
-
View the details of any action in a side panel by clicking on the Edit row action button.
-
Add new status action by clicking on Add New.
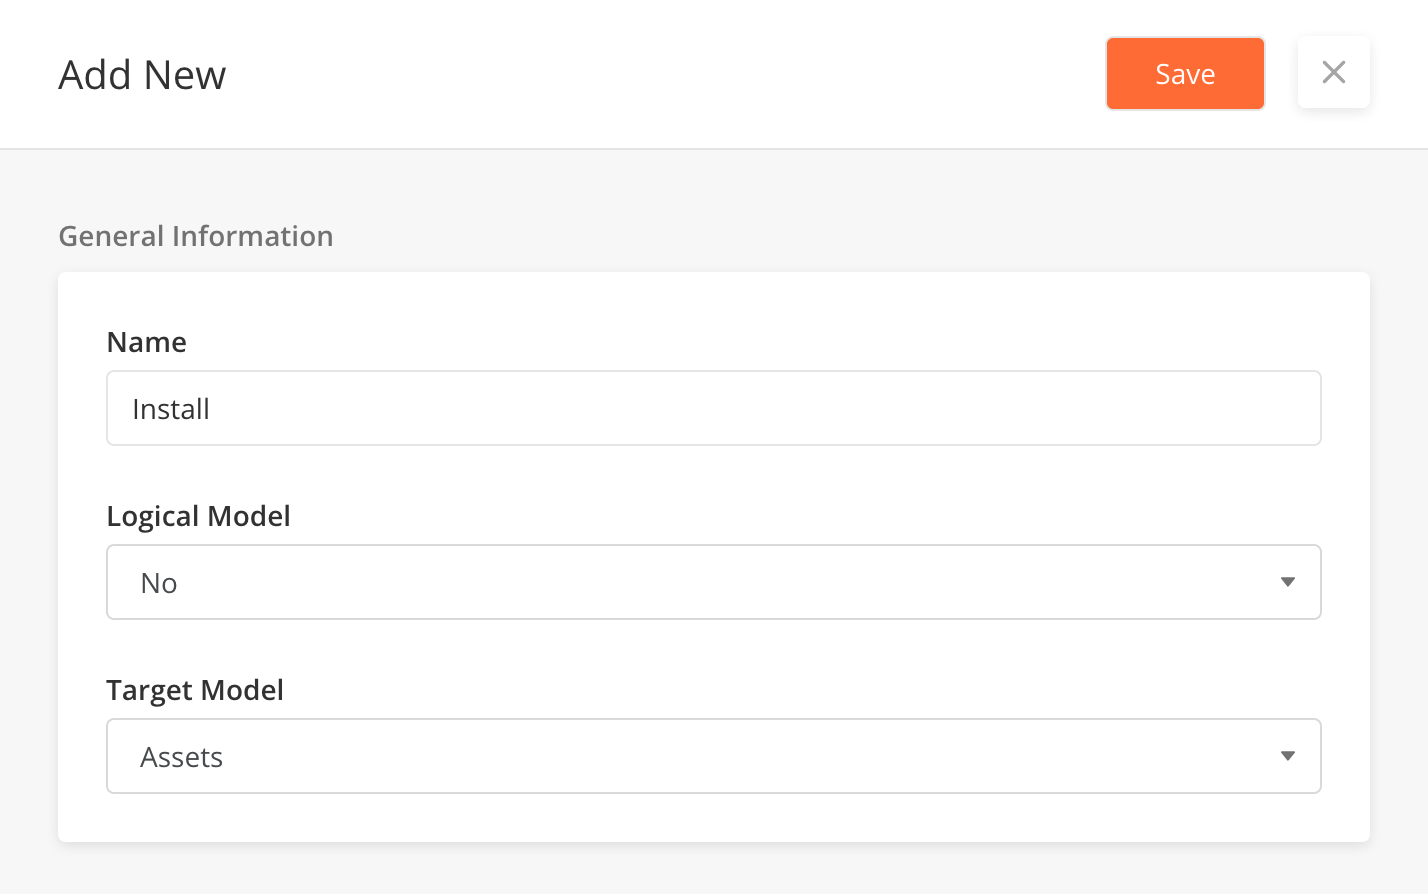
Adding new/editing status action from the Side Panel:
-
From the side panel, you can define -
-
Name of the action
-
Whether the action is associated with a Logical Model or not. Logical Models are work orders or task workflows defined in the system. If selected yes, the action will be associated with the selected workflow. If selected no, the action will be associated with a model which indicates the selected Field Service Elements (FSE) product.
-
Select a model from the list of Logical Models/Target Models.
-
|
|
Field Name |
Description |
Example |
|---|---|---|
|
Name |
Name of the status action. |
Dispatch |
|
Logical Model |
To define whether the model used is a workflow model, or a target model for a FSE product. |
Yes |
|
Target Model |
The target model dictates the Field Service Elements product you want to associate to the status action. This field can be selected only when Logical Model is selected as "No". |
Assets |
|
Work Order Type/Task Type |
The work orders or task workflow model that you want to associate with the status action. |
Cable Pulling |
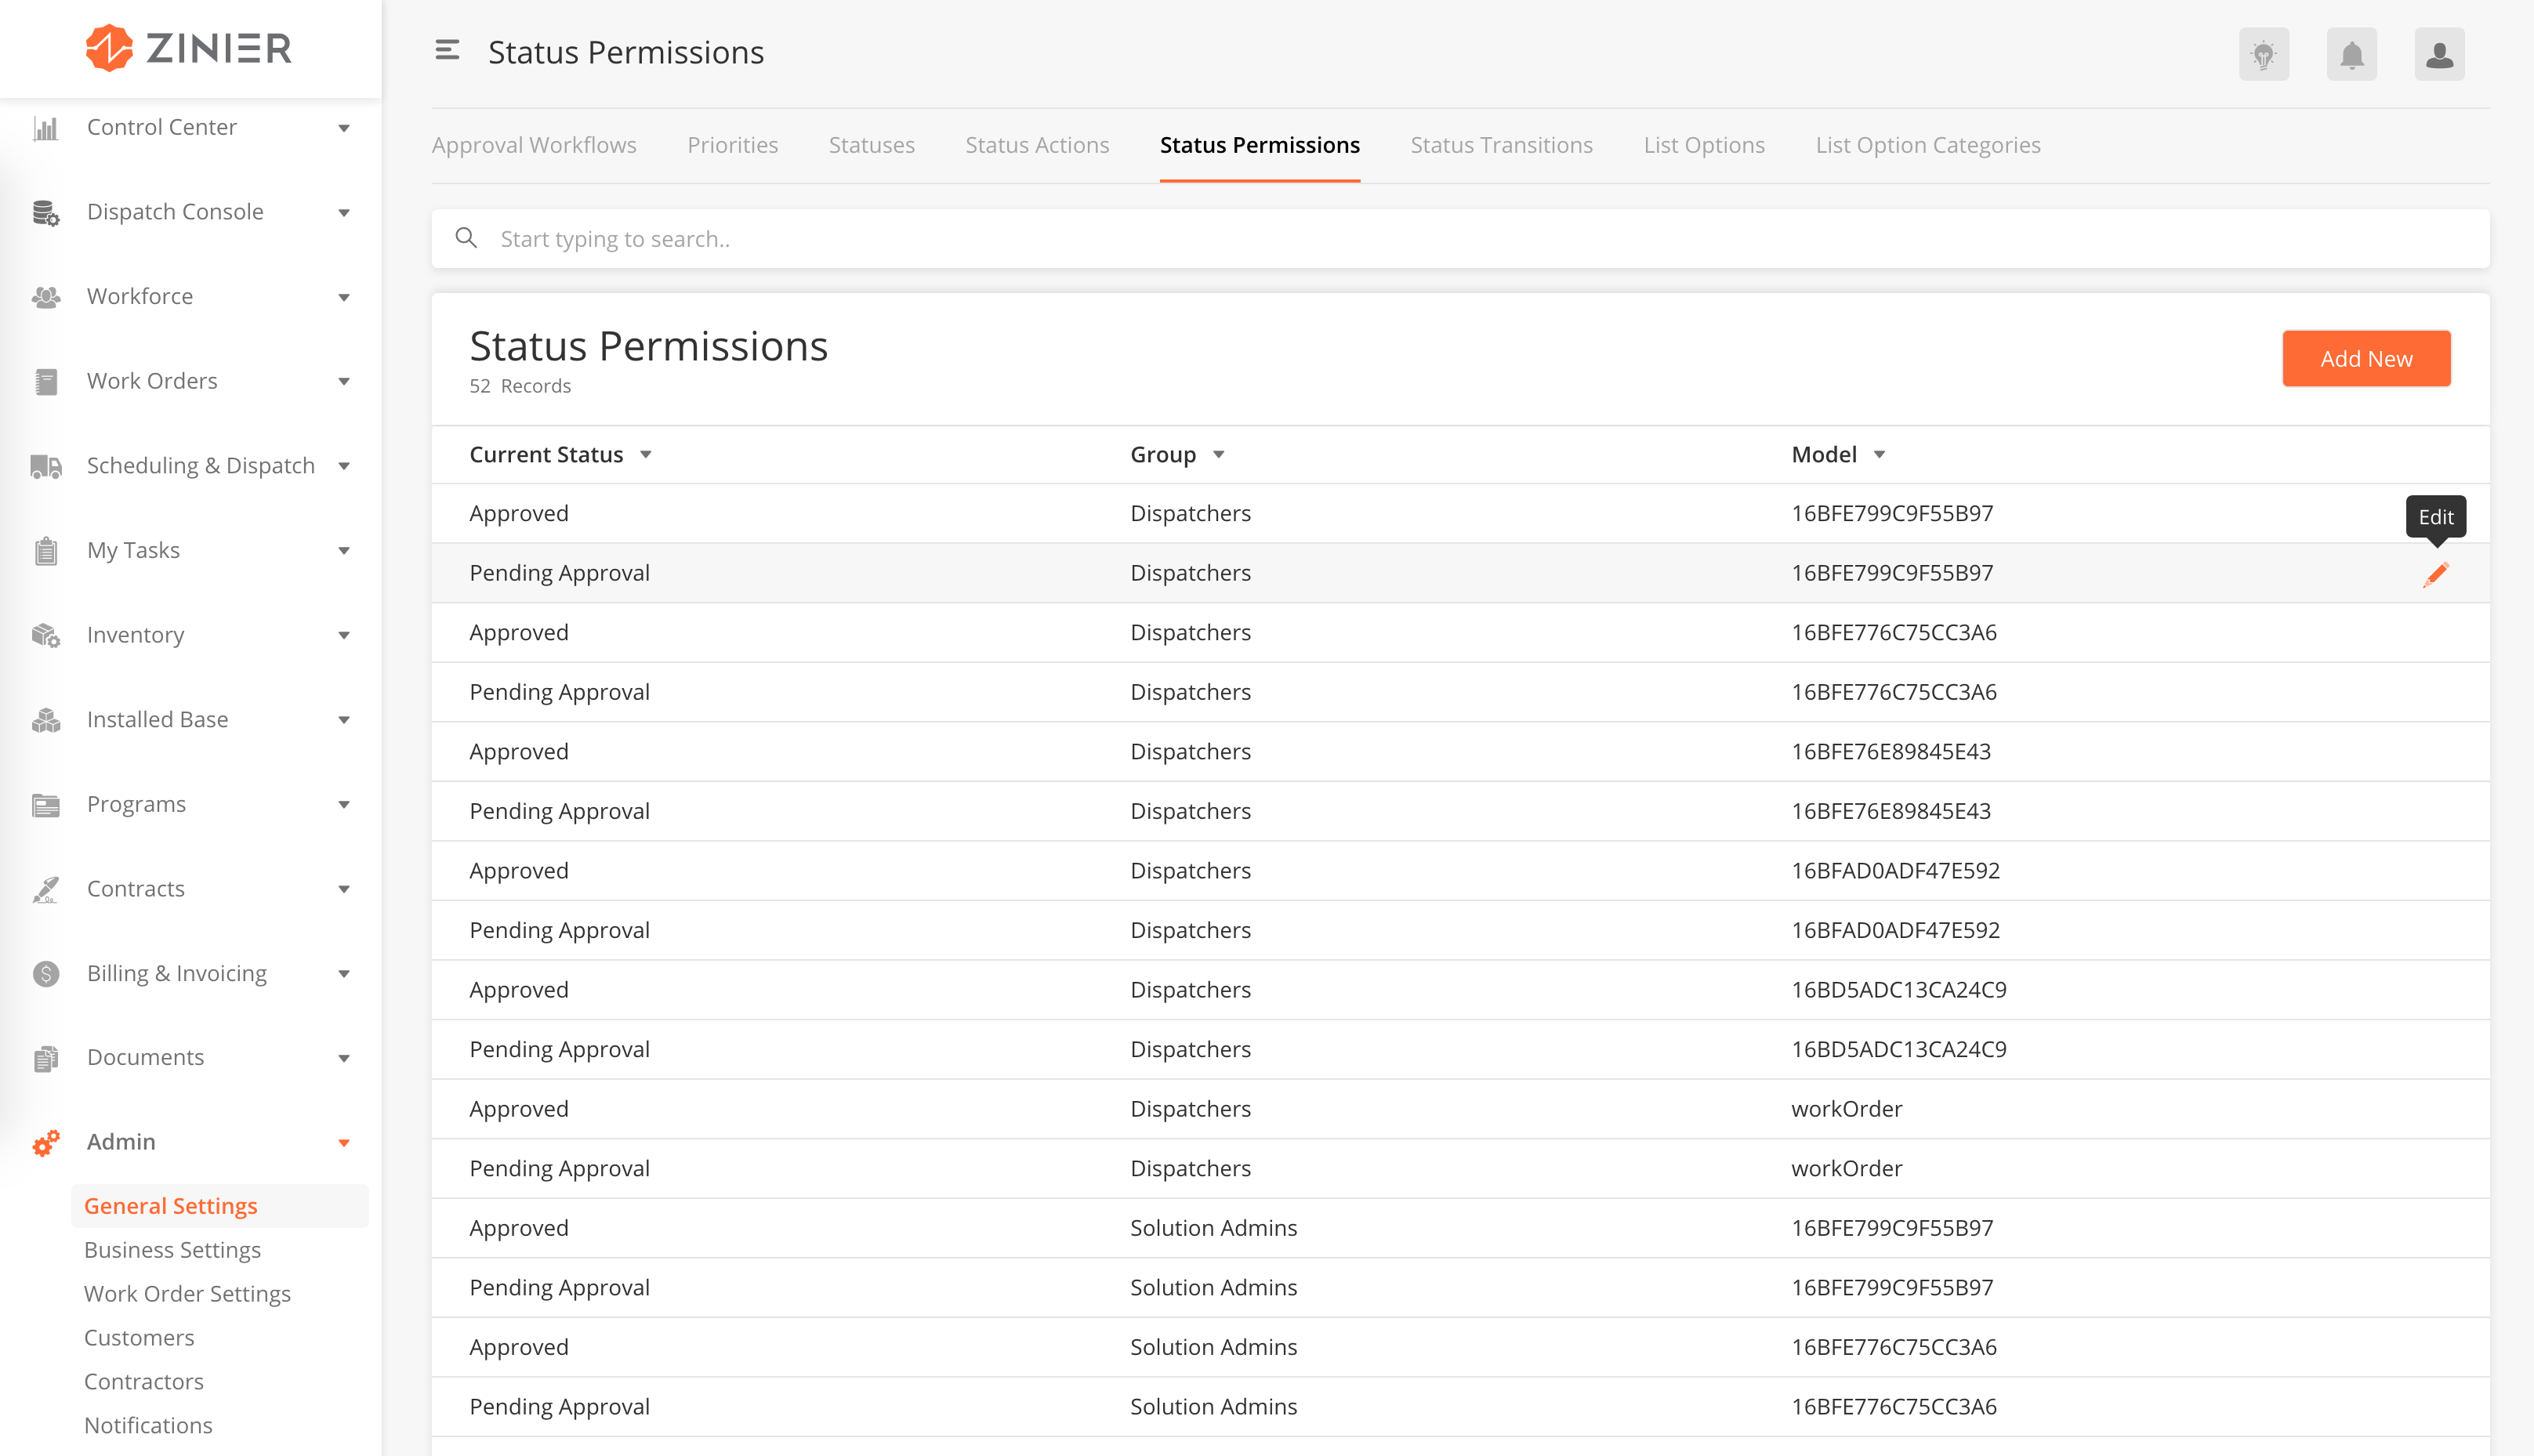
Status Permissions are used to define which workflow status are available to which user groups. If the status is associated with a group, that means that a user in that group can view the model when it is having that specific status. Multiple status permissions can be associated with a single model.
The status permissions can be defined for:
-
Logical Models (work orders and task type workflows), or
-
Target Models (other FSE products available, like contracts, assets, etc).
|
From the Main Table you can:
-
View the list of configurations of available Status, Associated Group, Associated Model.
-
Click on the edit row action button to open Side Panel to edit a configuration.
-
Click on Add New to add a new status permission configuration.
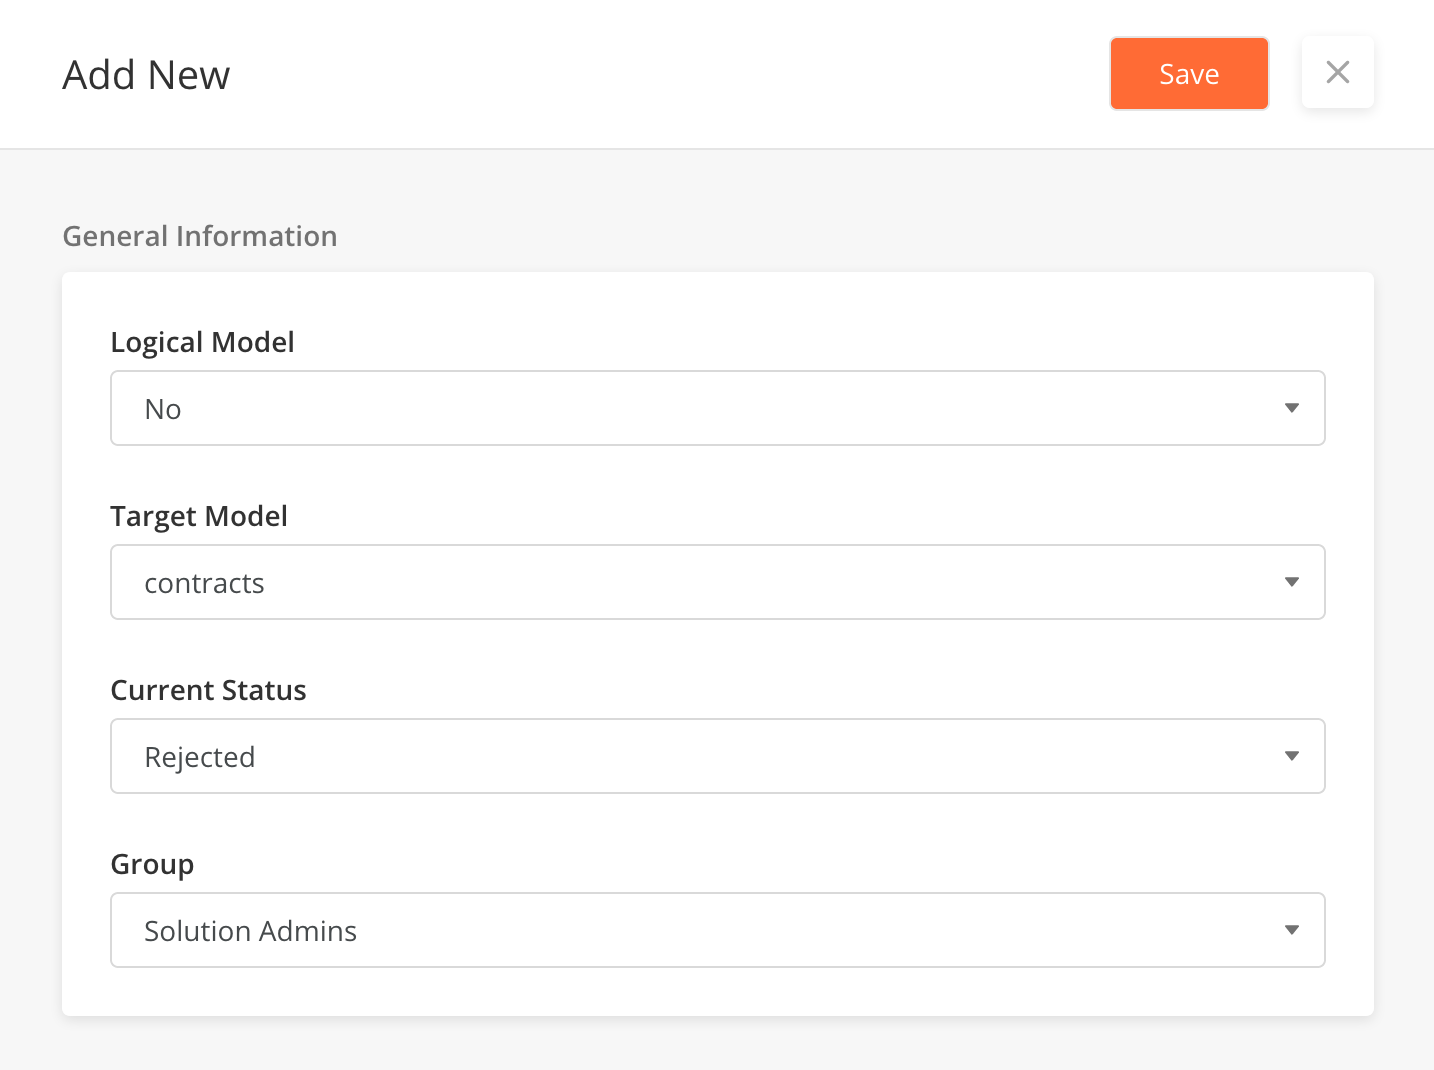
From the Add New/Edit Side Panel, you can:
-
Select whether the model is Logical Model or not.
-
Select the Work Order Type or Task Type if it's a logical model.
-
Select the FSE product model if it's a target model, or not a logical model.
-
Select the current status from the list of available status. Current status defines that the model will be available to the selected group if the model is having that specific status.
-
Select the group.
|
|
Field Name |
Description |
Example |
|---|---|---|
|
Logical Model |
To define whether the model used is a Logical Model (workflow), or a Target Model for a FSE product. If selected yes, it means that user is selecting a Logical Model to apply the status permission to. |
Yes |
|
Work Order Type/Task Type |
The work orders or task workflow model that you want to associate with the status permission. |
Field Audit |
|
Current Status |
Current status defines that the model will be available to the selected group if the model is having that specific status. |
Approved |
|
Group |
The group for which the model will be available to, when the model is having the above selected Current Status. |
Solution Admins |
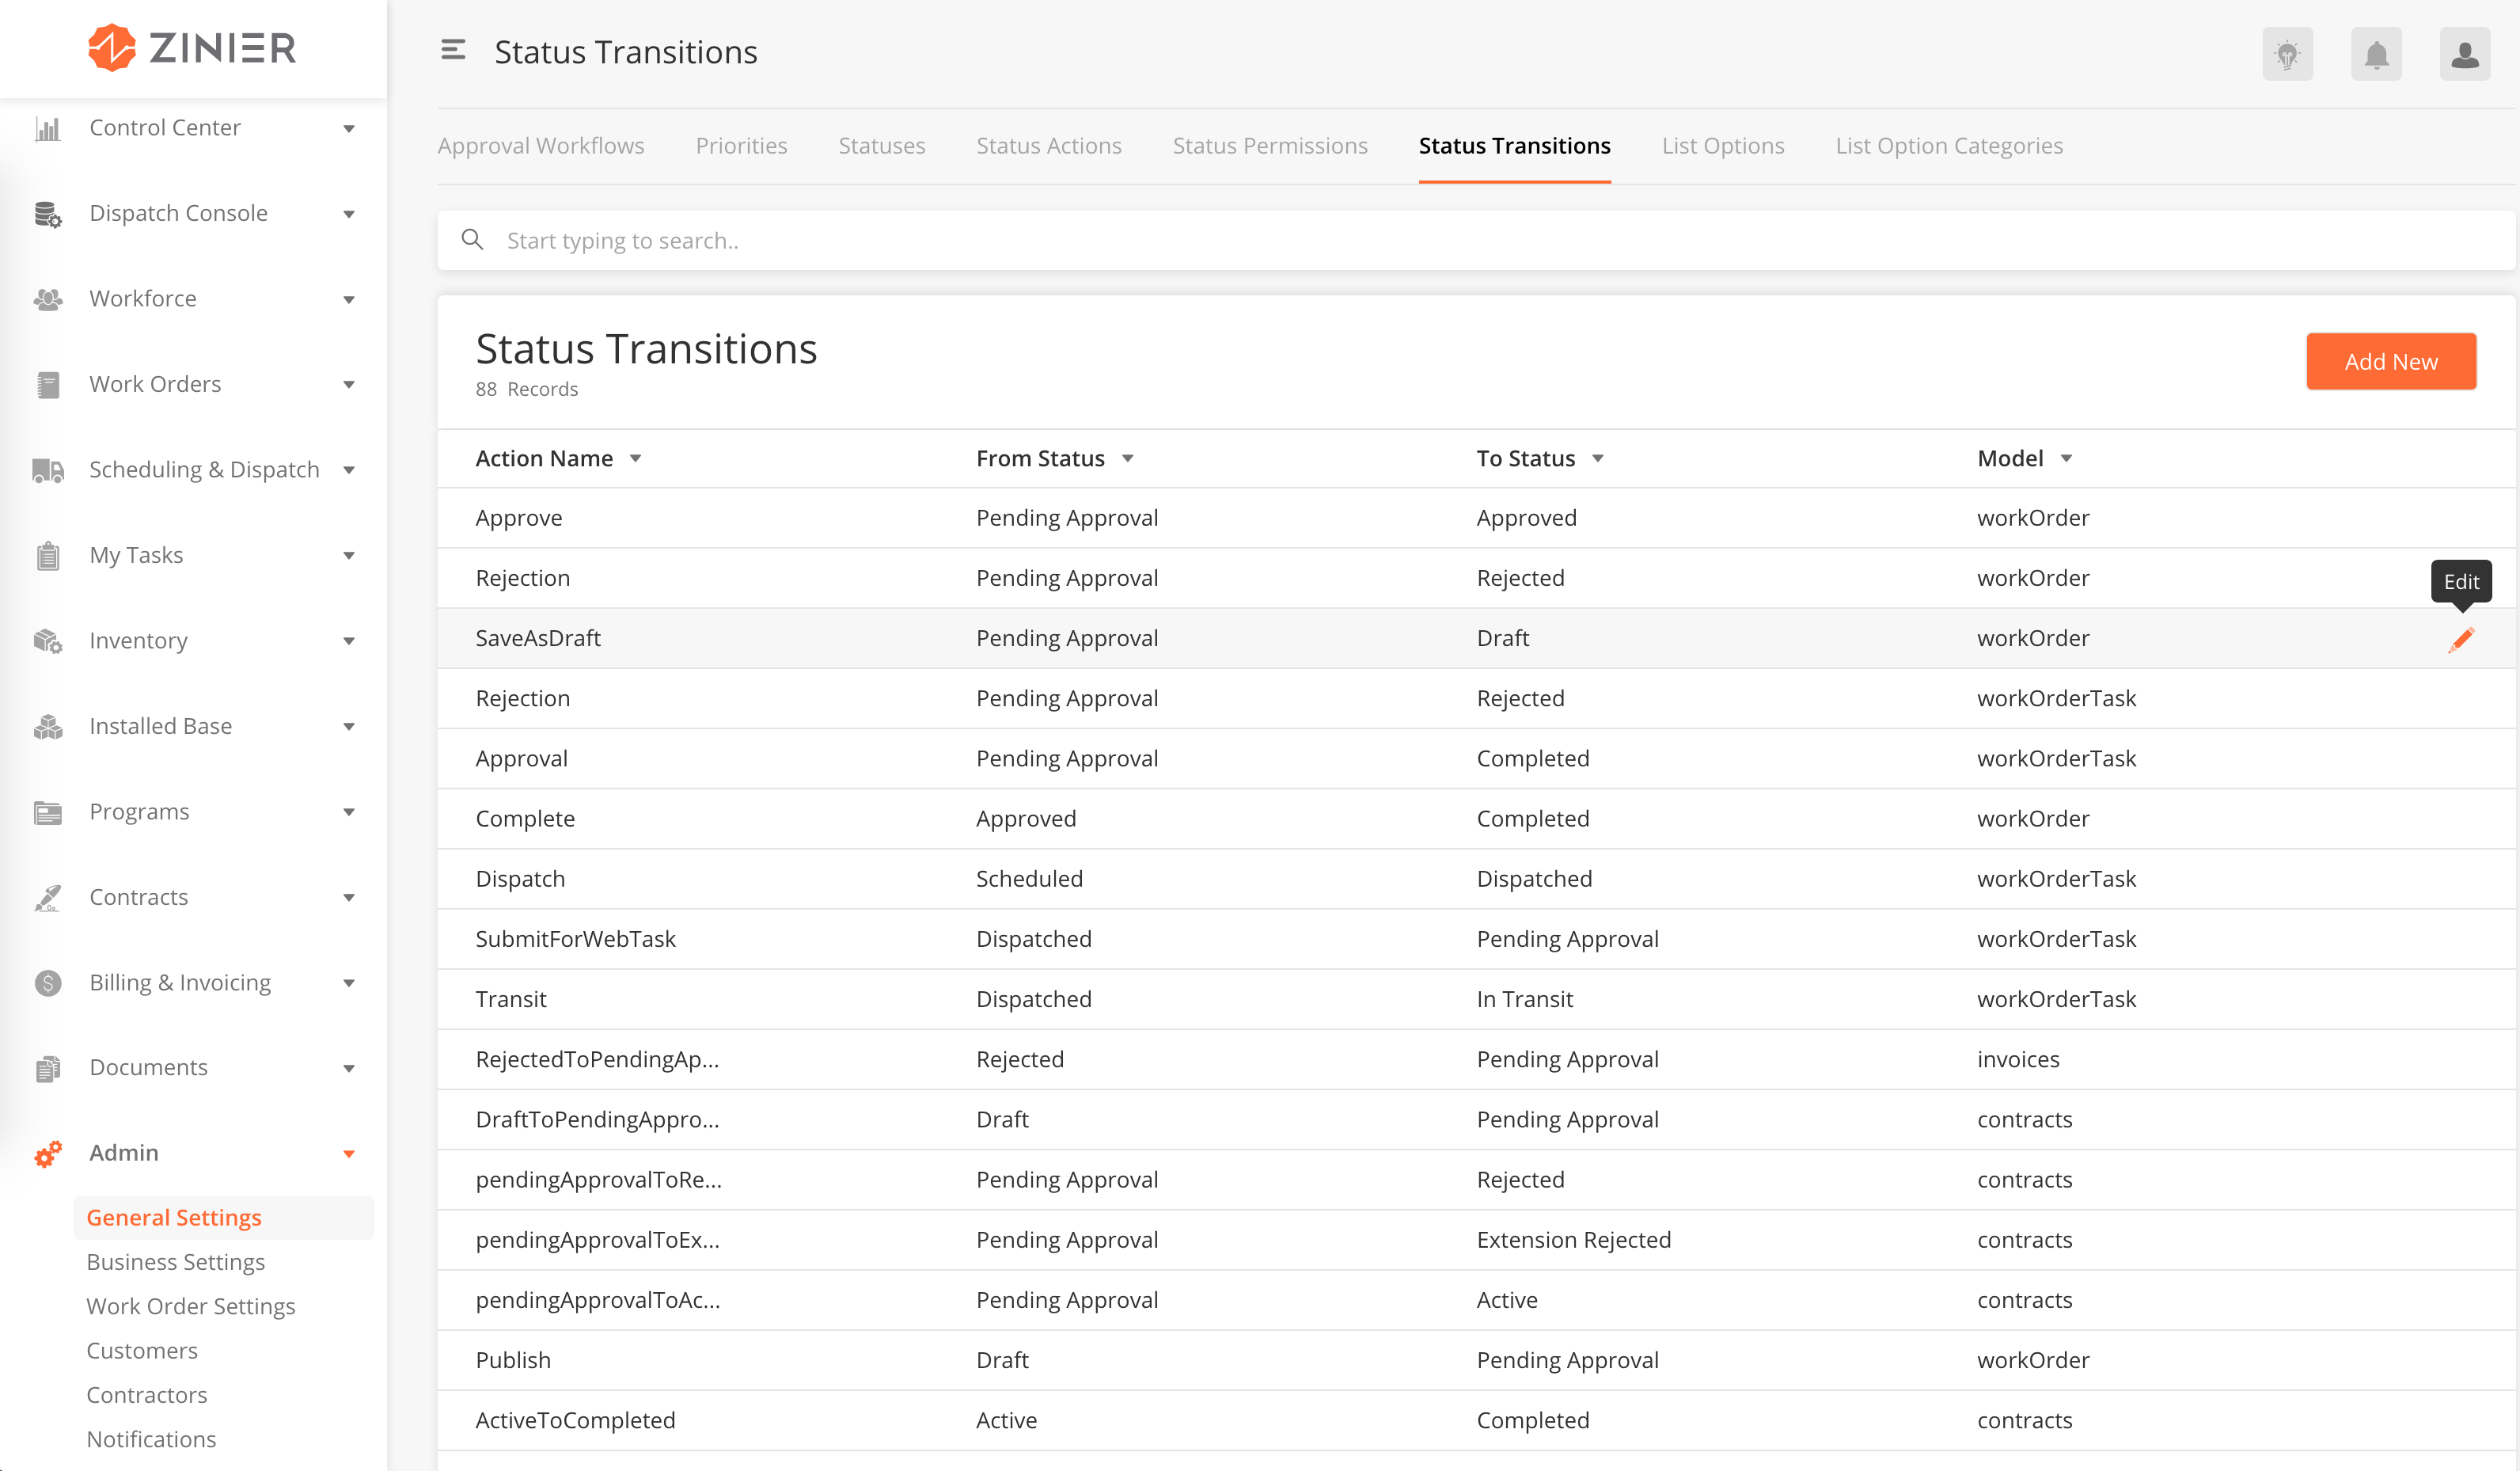
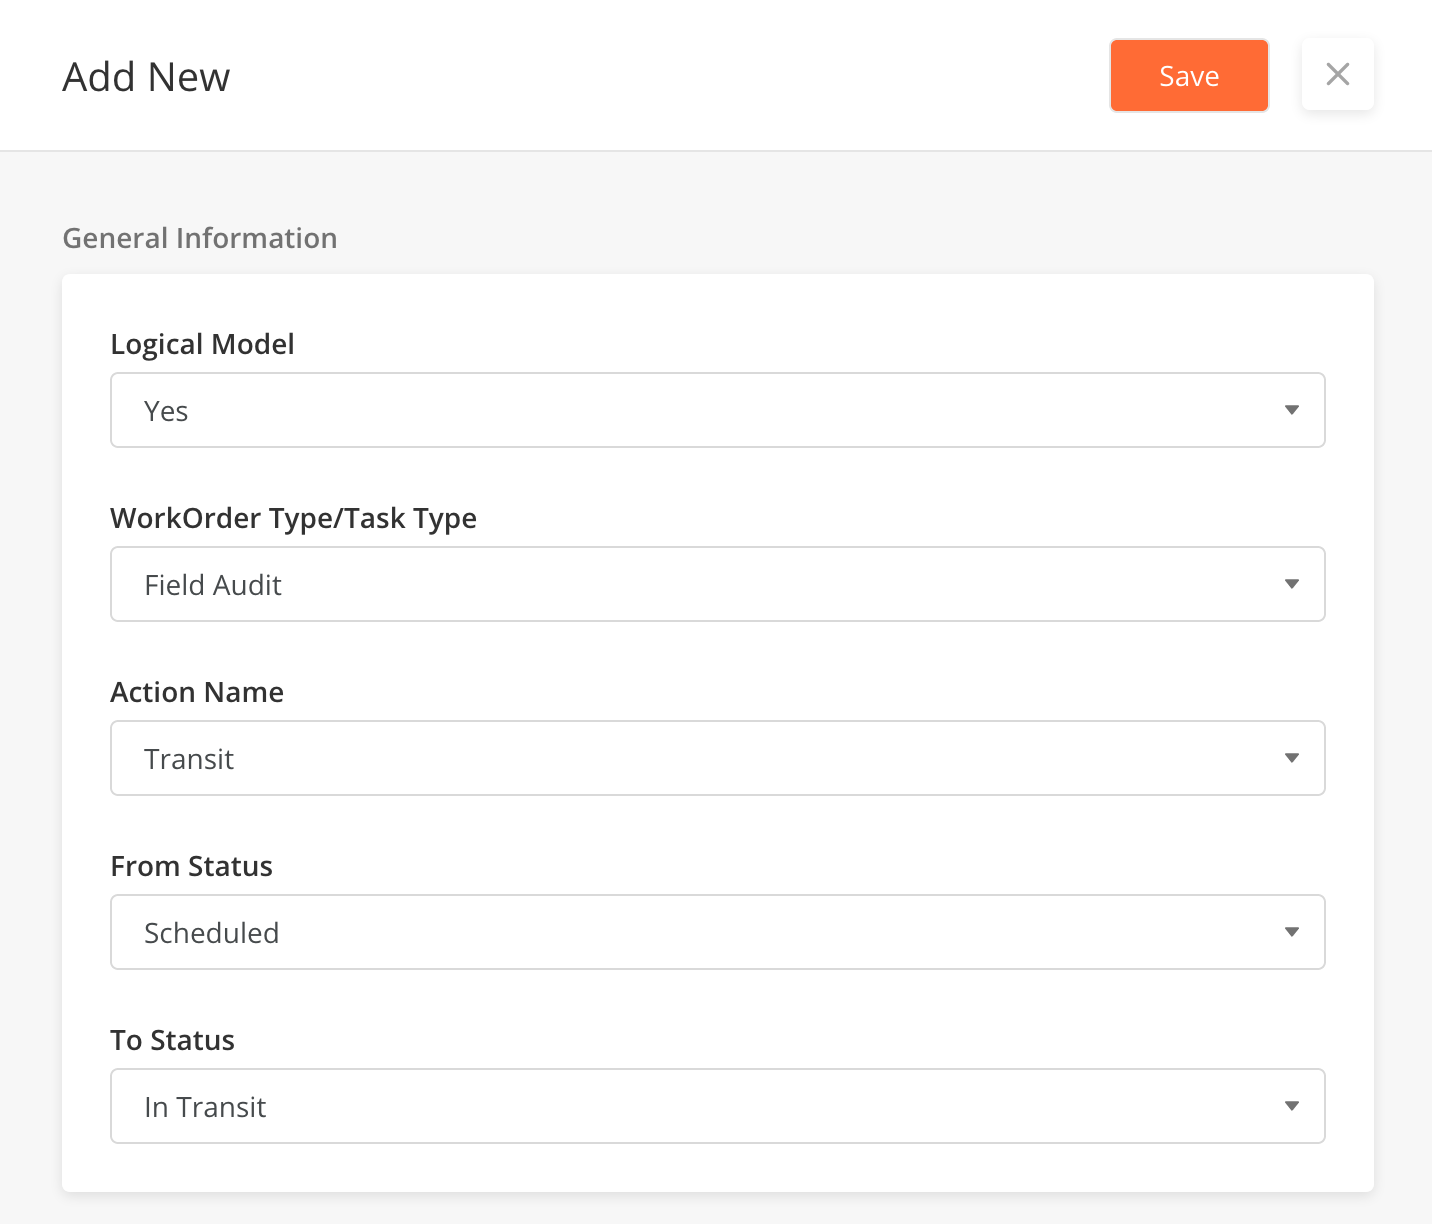
Status Transitions are used to define the change in Status of a model when an Action is completed. The configuration of Status Transitions include Action Name (fetched from Status Actions), From Status and To Status (both fetched from Statuses). An active configuration would trigger the model's status to change its value from 'From Status' to 'To Status' when the Action is completed by the user or the system.
For example, in the below configuration, the model workOrder would change the status from Pending Approval to Approved once the action Approve is performed.

|
From the main table you can:
-
View the list of available Status Transition configurations that are active, including the Action Name, From Status, To Status, Model associated with them.
-
View the details and edit any existing configuration by clicking on the corresponding row action Edit button.
-
Add new Status Transition configuration by clicking on Add New.
|
Adding new/editing status action from the Side Panel:
-
From the side panel, you can define -
-
Select whether the model is a Logical Model or not. If selected No, it means that the model is a Target Model.
-
Select the Logical/Target model from the dropdown.
-
Select Action Name from the dropdown list of associated actions with the model.
-
Select From Status and To Status from the dropdown list of associated status with the model.
-
|
|
Field Name |
Description |
Example |
|---|---|---|
|
Logical Model |
To define whether the model used is a workflow model, or a target model for a FSE product. |
Yes |
|
Work Order Type/Task Type |
The work orders or task workflow model that you want to associate with the status action. |
Cable Pulling |
|
Target Model |
The target model dictates the Field Service Elements product you want to associate to the status action. This field can be selected only when Logical Model is selected as "No". |
workOrder |
|
Action Name |
The list of actions associated with the model. Here you will select the action on which you want to trigger the status change on the selected model. |
Approve |
|
From Status |
The list of status associated with the model. Here you will select the previous status that you want to change to the new status based on the action. |
Pending Approval |
|
To Status |
The list of status associated with the model. Here you will select the new status that you want to change from the previous status based on the action. |
Approved |