Add, edit, invite and deactivate users in this module. You will be able to manage the user personal details, select the platform access and the user group.
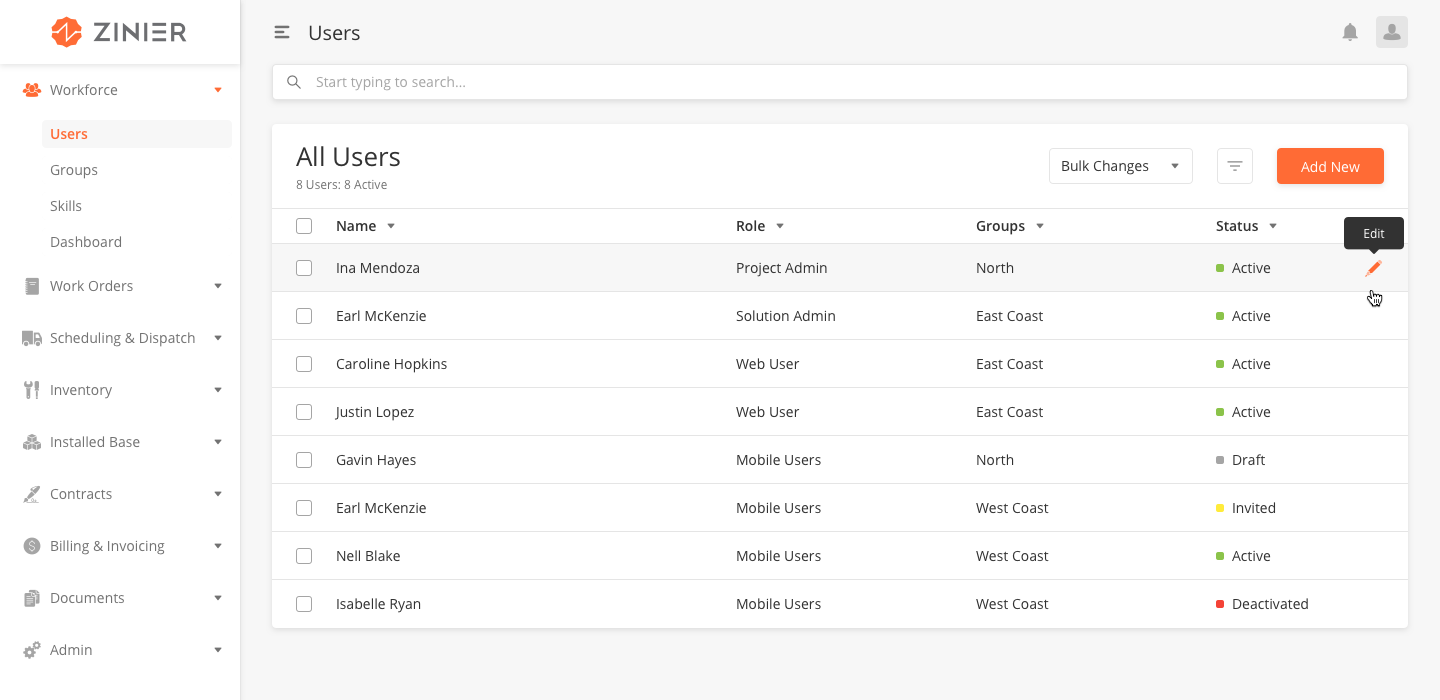
Statuses are used to indicate at what state the user has in the platform.
|
Status |
Description |
|---|---|
|
Draft |
When you create a new user and click save the status turns to Draft. You can then invite the user to the platform. |
|
Invited |
The user has been Invited, an email has been sent to the registered email address. |
|
Active |
The user has accepted the invite and is Active on the web platform or app. |
|
Deactivated |
A Deactivated user no longer has access to the platform, but the associated records are still available in the platform. |
Access
User access is determined by the Role and Group of the user. Roles give general access to the Mobile App and Web platform. Access to specific Web and Mobile Projects are determined by the Group that is associated with the user and the project. Users can have access to multiple projects on both the Zinier App and Web Platform.
|
Role |
Mobile OR Web Access Mobile User can log into Zinier Mobile App Web user can log into Zinier web platform If User has Both (Mobile AND Web) he can log into Mobile app and Web Platform *Important Note - what the user ultimately sees on the mobile app and web platform depends on Mobile Project or Web App access given to the Group(s) he is in. |
Users and Groups Access User can add new, delete, invite, re-invite users User can add new groups, add members and remove members from groups |
Solution Builder Access User can Assign Mobile Project(s) and Web App(s) to Groups |
Org Config Access User can add or edit entity config, see logs, |
App Stores Access User can view, install and upgrade solution bundles |
Role Persona Example |
|---|---|---|---|---|---|---|
|
Mobile User |
Mobile ONLY |
No |
No |
No |
No |
Technicians who only need mobile access to do mobile tasks |
|
Project User |
Mobile AND Web |
No |
No |
No |
No |
Coordinators that dont need to do any user management AND also need to do mobile tasks |
|
Project Admin |
Mobile AND Web |
No |
No |
No |
No |
Same as above |
|
Web Admin |
Web ONLY |
Yes |
No |
No |
No |
Coordinators that need to do user management |
|
Org Admin |
Mobile AND Web |
Yes |
No |
No |
No |
Business users that need to do user management and mobile to see how a mobile task is seen. |
|
Solution Admin |
Mobile AND Web |
Yes |
Yes |
Yes |
Yes |
Someone from Zinier Solutions Team or partner devs that configure the solution |
|
Solution Developer |
Mobile AND Web |
Yes |
Yes |
Yes |
Yes |
Someone from Zinier Solutions Team or partner devs that configure the solution |
-
What is the difference between Web Admin and Org Admin?
-
Org Admin has both Mobile and Web access. This means that Org Admin can log into the mobile App. Web Admins cannot login to mobile app EVEN if they are in a Group assigned to mobile project
-
Org Admin persona is someone that needs to oversee everything.
-
-
What is the difference between Project User and Project Admin?
-
There is no functional difference between Project User and Project Admin. They are the same for now.
-
-
What is the difference between Project User/Project Admin and Web Admin?
-
Project User/Project Admin does not have access to Users and Groups. They cannot add, invite, deactivate, delete any user or add new groups.
-
Users are essential for the platform. When adding new users for the first time, you should be particularly mindful of their relationships to the following modules:
|
Module |
Relationship |
|---|---|
|
Solutions Builder - Mobile Projects |
The access of a user to the Mobile App is defined by the role and the group of the user. When a group is assigned to a Mobile Project all mobile users associated with that group have access to that specific project. This all results in the user being able to access one or multiple Mobile projects in the Zinier App. |
|
Solutions Builder - Web Projects |
The access of a user to the Web Platform is defined by the role and the group of the user. When a group is assigned in a Web Project to a specific module all mobile users associated with that group have access to that specific module. This results in the user being able to access one or multiple modules in the web platform. |
|
Users - Groups |
Users can be assigned to a group. |
-
From the main page, click Add New to open the side panel.
-
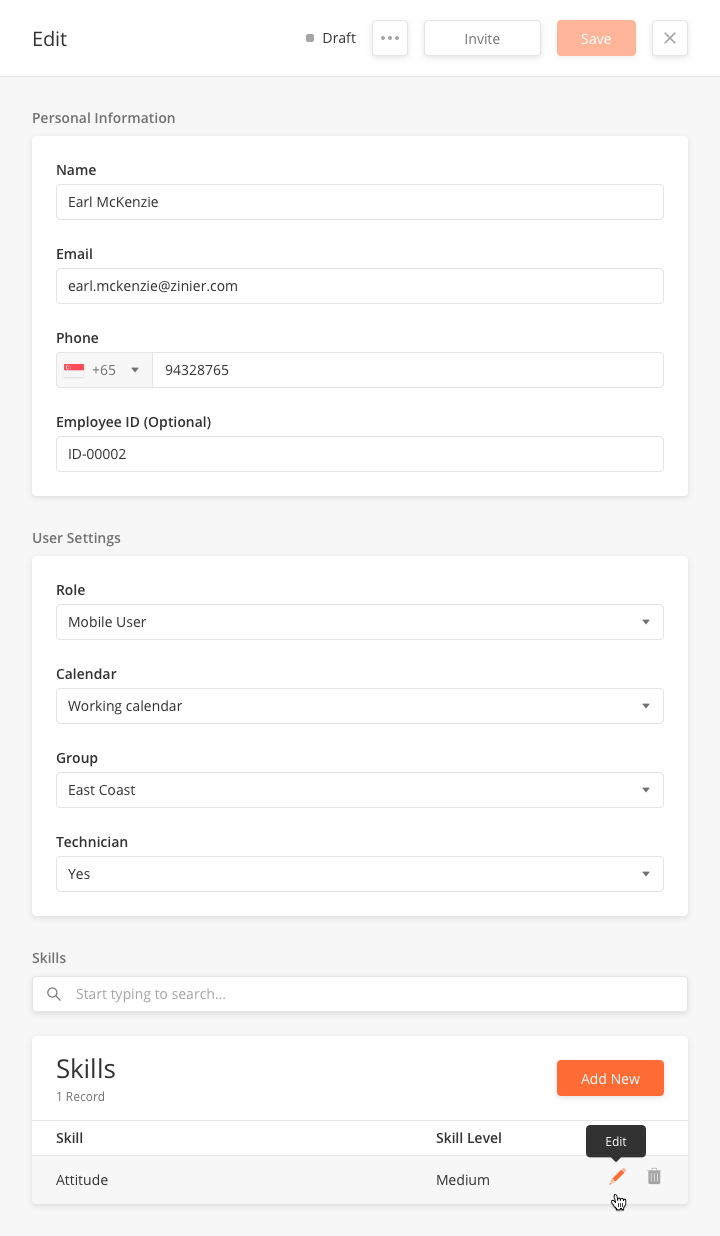
Enter the Name, Email, Phone number and optional Employee ID.
-
Select the platform Role for the user. This defines the level of access.
-
Select the Group, groups are used for specific Mobile or Web project access, approval workflows, notifications.
-
Click Save & Continue which will save the record and make the Skills table visible. After adding the optional skills the user will have the status Draft and is ready to be invited to the platform.
After creating the user you can invite the user by clicking Invite in the side panel. The status of the user will change to Invited. The user will receive an email with the instructions on how to create an account. After the user completes this process the status will change to Active.
You can edit or deactivate a user by hovering over the row of the desired User from the main page table and clicking the Edit icon. If you click Edit, the side panel will appear. Edit the information and click Save, or click the trash bin icon on the top navigation to deactivate the user. The users status will change to Deactivated.
User
|
Name |
Name of the user |
John Doe |
Source (Module) |
|---|---|---|---|
|
|
Email of the user |
||
|
Phone |
Phone of the user, select the country code first. |
88309458 |
|
|
Employee ID |
Employee ID of the user, this field is optional. |
USER-ID103492 |
|
|
Role |
This defines the level of access the user has to the platform:
|
Mobile User |
|
|
Group |
Select the group for this user, groups can be set up in Workforce - Groups. |
East Coast |
Users - Groups |
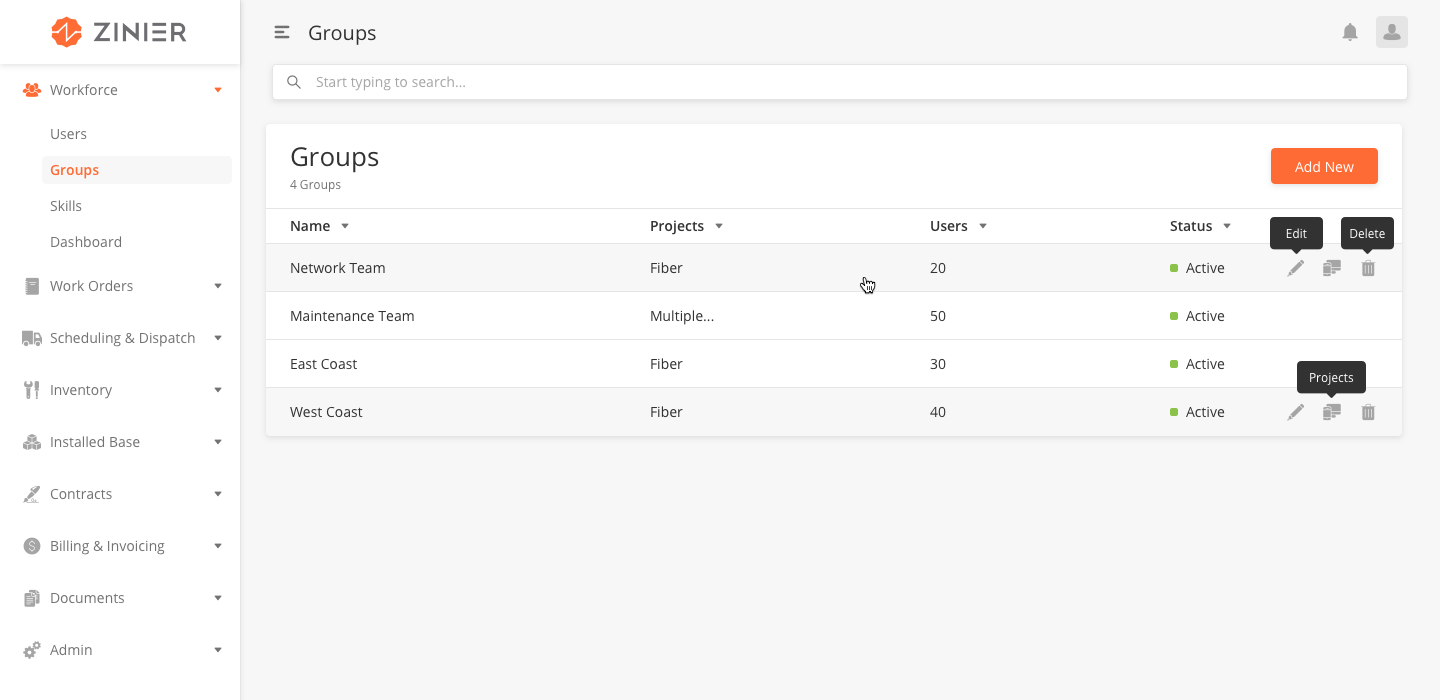
Workforce lets you organize your users in multiples groups. In this module, you will be able to add, edit, duplicate or delete groups and select the users that belong to a group.
Groups are used in a number of places across the platform. When creating Groups, you should be particularly mindful of their relationship to the following modules:
|
Module |
Relationship |
|
|---|---|---|
|
The access of a user to the Mobile App is defined by the role and the group of the user. When a group is assigned to a Mobile Project all mobile users associated with that group have access to that specific project. This all results in the user being able to access one or multiple Mobile projects in the Zinier App. |
||
|
The access of a user to the Web Platform is defined by the role and the group of the user. When a group is assigned in a Web Project to a specific module all mobile users associated with that group have access to that specific module. This results in the user being able to access one or multiple modules in the web platform. |
||
|
Workforce - Users |
Users can be added to groups in order to get platform and project access, receive notifications or be added as an approver in the approval process. |
|
|
Admin - Notifications |
When adding a new notification the Recipient Group needs to be selected. |
|
|
Admin - Business Settings - Escalation Hierarchies |
You need to select the User Group who will receive the Notification when setting up Escalation Levels in Escalation Hierarchies. Note that by default, this comes from the Notification Group you used when creating the Notification. |
|
|
Admin - Business Settings - Approval Workflows |
Create a Group (Action Group, Approval Group, and Rejection Group) for each set of users in each Transition added to an Approval Workflow. |
-
From the main page, click Add New to open the side panel.
-
Enter the Group Name.
-
Click Next and the users table will appear. You can now start adding Group Members.
-
Add the group members by selecting the users from the users table.
-
Click Save & Continue, the Group Members table will now appear.
-
From the Groups sidepanel, click Add Users above the Group Members table. A sidepanel will appear where you can select one or multiple users.
-
After you have added Group Members, return to this sidepanel and click the Save button in the top right of the side panel.
You can Edit, Delete a group by hovering over the row of the desired Group e from the main page table and clicking the Edit icon. When you click edit, the side panel will appear. Edit the information and click Save, or click the trash bin icon on the top navigation to delete the record. Hover over the desired group from the main table and click the Duplicate icon in order to duplicate the group.
-
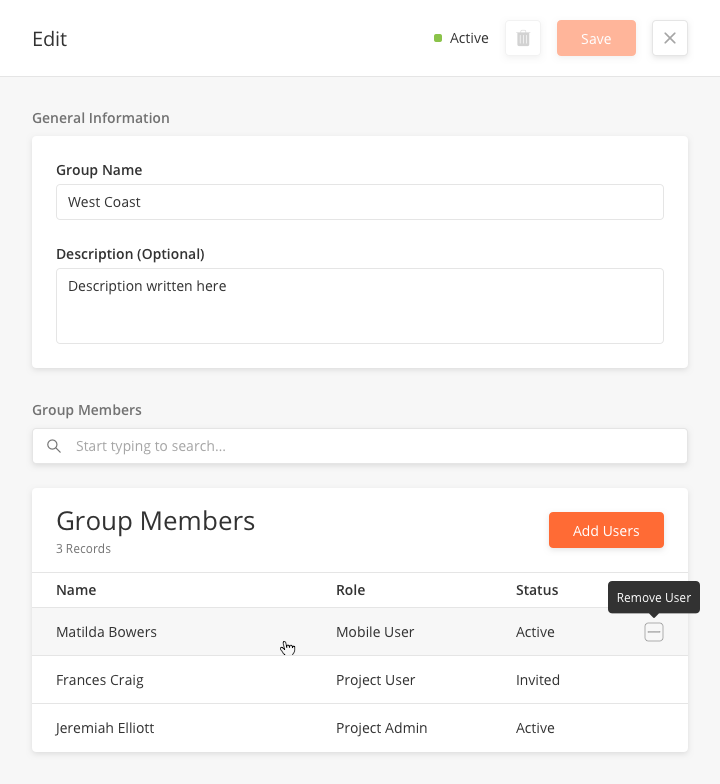
From the Groups sidepanel, click Add Users above the Group Members table.
-
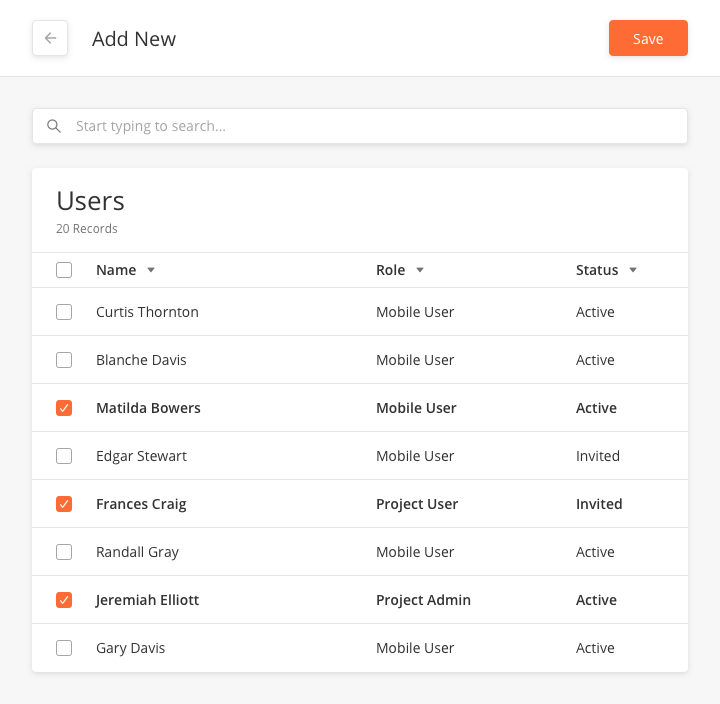
To add new users to the group, in the group section, click Add Users, a sidepanel will appear where you can select one or multiple users.
-
Make your selection and click Save.
-
Click the Minus icon to remove a user.
-
-
Click the Save button in the side panel header to save the changes successfully.
You can or Remove group members by hovering over the row in the Group Members table in the Groups sidepanel and clicking the Minus row action icon. If you want to remove or add multiple Team Members you can click Add New and the sidepanel with a table of all the users will appear. You can select and deselect the users.
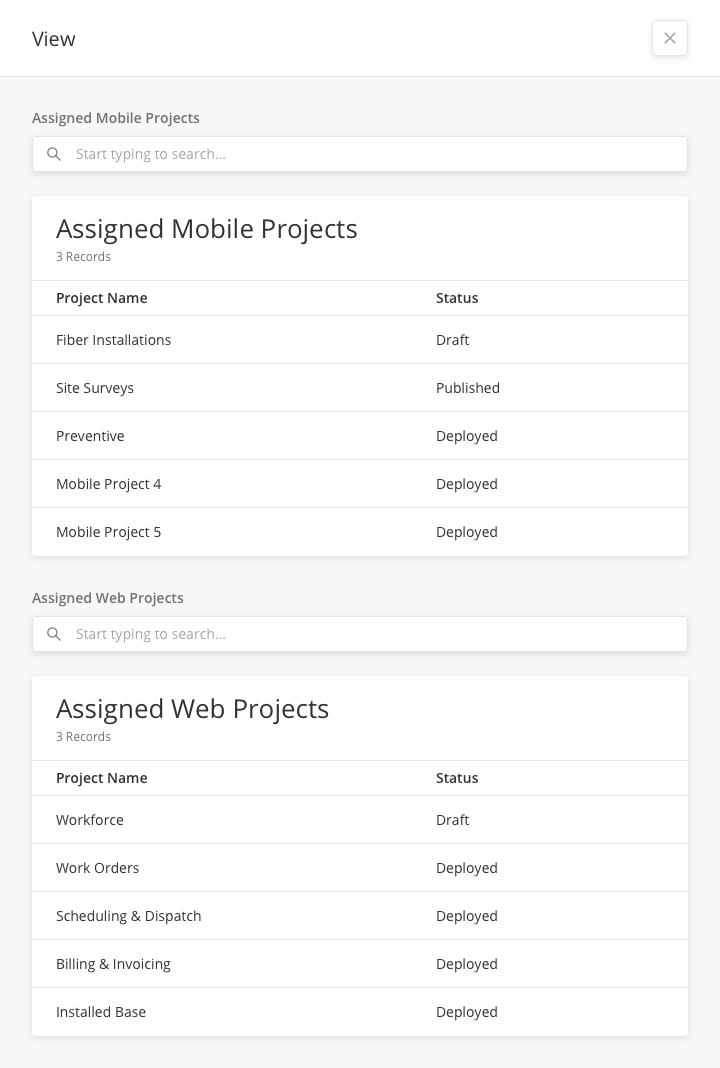
When you create a new group, by default there are no projects assigned to this group. Once a new group has been created you can assign Mobile projects and Web Projects in order to give the users that belong to that group access. This can be done from the Solutions Builder using the Mobile Projects and Web Projects modules.
