Solution Builder is a tool for Solutions Admin to create, test and deploy customized Zinier Solutions for clients. This includes configuring all mobile projects and web projects for the client and its respective workflows as well as other items needed for a Zinier solution to function properly including setting up Events, integrating Objects and associating different Models to the Solution. Solutions Admin can also configure AI/ML applications to be used in the organisation’s solution.
Solution Builder is sometimes referred to as ZStudio and is a core differentiator in Zinier. It allows for high amount of solution flexibility and customization according to the client’s needs without long implementation man-hours and lengthy change-request process.
This page contains an overview of the environments and organisations on the Zinier Platform.
Environments are servers where orgs (organisations) are housed. Environments are governed by an underlying ISAC (platform version). Environments host multiple orgs. End-users interact with environments through URL they use to log into the web platform (ie, hawking.zinier.com)
|
Environment Servers |
URL |
Type |
Purpose |
|---|---|---|---|
|
Raman |
raman.zinier.com |
Development |
Used by ISAC/Studio Z teams to develop platform features |
|
Edison |
edison.zinier.com |
Development |
Used by FSE/PCB teams to develop FSE bundles |
|
Hawking |
hawking.zinier.com |
Beta |
Used by Engineering QA for Regression testing and Solutions/SE for preview testing after every ISAC or FSE release |
|
Einstein |
einstein.zinier.com |
Production |
Used by demo team to build and show demos. |
|
Newton |
newton.zinier.com |
Production |
Used by training teams to conduct training |
|
Curie |
curie.zinier.com |
Production |
Used by Solutions team to build solutions for clients |
|
Platform |
platform.zinier.com |
Production |
All the bundles for the production environment are created from here and distributed to respective orgs in production. |
|
Client Production |
'client-name'. zinier.com |
Production |
Used to house UAT and production orgs per customer |
Orgs are organisations and what end-users actually log into. Orgs have an org id which users enter before logging in.
Orgs house a set of solution objects (web apps, workflows, mobile projects) that is unique for that org. Orgs can also have different Org Configs that are unique to that org (date format, currency, time format (24 hour or 12 hours)).
Production
Environment URL: platform.zinier.com
|
Organization Name |
Purpose |
Description |
Owner |
|---|---|---|---|
|
z2store (1.1.0) |
Product |
All the bundles for the production environment are created from here and distributed to respective orgs in production. |
Training/QA - Customer/Partner
Environment URL: newton.zinier.com
|
Organization Name |
Purpose |
Active |
Description |
Owner |
|---|---|---|---|---|
|
mmd |
Se |
No |
Used fo first version of mmd. SKO Jan,2020. Currently retired. |
varun.bhoomireddy@zinier.com |
Preview 2.0
Environment URL: einstein.zinier.com
|
Organization Name |
Purpose |
Active |
Description |
Owner |
|---|---|---|---|---|
|
gamechanger |
Demo |
Yes |
Environment for all SE members, standard customer demos |
|
|
SMB |
Demo |
Yes |
Parent Demo org for Mid Market and related products |
varun.bhoomireddy@zinier.com |
|
pgdev |
Demo |
Yes |
Parent Demo org for Utilities. Currently focused on PG&E |
|
|
gtdev |
Demo |
Yes |
Demo org for Groupo Techno POC. |
Asya.brevdo@zinier.com |
|
sbtest |
Demo |
Yes |
Clean org created for testing sandbox functionality |
|
|
gc2 |
Demo |
Yes |
Another demo org for Groupo Techno POC. |
|
|
gamechangerstaging |
Demo |
Yes |
For testing gamechanger changes on einstein |
|
|
Ei_Gamechanger_004 |
Demo |
NO |
Created in anticipation of rebuilding gamechanger |
Preview
Environment URL: hawking.zinier.com
|
Organization Name |
Purpose |
Active |
Description |
Owner |
|---|---|---|---|---|
|
gamechangerhawking |
Demo |
Yes |
FSE gamechanger demo on hawking. Usually newer versions of platform/fse are here. |
|
|
ha_fse_005 |
Demo |
No |
Dev environment of what will be the gamechager demo. Expected delivery date: 19th Feb |
|
|
gamechangerregres |
DEMO-creation |
Yes |
regression testing for gamechanger additions and platform upgrades - linked from gamechanger einstein |
hector in PM |
|
gamechanger [dev org ] |
DEMO-creation |
Yes |
development world for project management additions to gamechanger demo org |
hector in PM |
Staging
Environment URL: edison.zinier.com
|
Organization Name |
Purpose |
Description |
Owner |
|---|---|---|---|
|
ed_qa_002 |
Mobile / Platform / Tools QA |
Product Team QA for new Mobile features Development QA for new Mobile features |
|
|
ed_mobileteam_004 |
Mobile / Platform / Tools QA |
QA for new Mobile features |
|
|
productqa983 (1.2.0) |
Product QA |
The staging version of FSE. Bundle version from here moves to hawking every two sprints or as and when the release is announced. |
|
|
z2store (1.2.0) |
Product App Store |
|
|
|
ed_designqa_021 |
Mobile / Platform / Tools QA |
Design Team QA for both mobile and web features |
Development
Environment URL: raman.zinier.com
|
Organization Name |
Purpose |
Description |
Owner |
|---|---|---|---|
|
mobileautomation |
Mobile QA / Platform QA |
QA for new mobile features |
|
|
jkraman |
Mobile QA / Platform QA |
QA for new mobile features |
|
|
zdemo |
Mobile QA / Platform QA |
QA for new mobile features |
|
|
ra_mobileteam_018 |
Mobile Development |
Development for new mobile feature |
|
|
z2store (1.2.1) |
Product / Platform Development |
|
|
|
libra |
Platform / Tools Development |
Development for new features |
Version Control is a feature that enables solution teams in Zinier to work efficiently in a controlled setting. All solution teams working on Solution Buildermustuse Version Control during Solution Development. Without utilizing Version Control properly, all solution objects in Master will be locked by default - meaning any changes you make without being in a branch are not saved.
With Version Control, solution developers can make changes to Solution Objects like workflows, pages, queries, rules in a controlled environment within their branch. Solution Admins review any changes in a branch and approve/reject the changes before committing them to the master branch.

|
There are two main roles in Version Control: Solution Admin and Solution Developer. These role types can be set for individual users in Users and User Roles.
|
Role Name |
Description |
|---|---|
|
Solution Admin |
Solely responsible for reviewing requests to merge/discard. A Solution Admin can also create and work on branches and be a Branch Owner. Special for Solution Bundle Only a Solution Admin can create, edit, and publish/deploy solution bundle(s). |
|
Solution Developer |
A Solution Developer can only work in one branch at a time. A Solution Developer can also be a Branch Owner. |
|
Description |
||
|
Branchable |
Any solution object in these models is only added or edited if a solution admin/developer is in a branch. If the user is not in a branch (meaning the user is in Master), the user can only view these objects. Making a change triggers an error message with no saved changes. |
ModelEvent, WebApp, WebAppDesign, WebAppModule, WebAppModuleDesign, WebAppModuleUser, WebAppPage, WebAppPageWidget, WebPage, WebPageDesign, WebWidget, ZApp, ZAppDesign, ZPage, ZPageDesign, ZProcess, ZProcessDesign, ZProject, ZProjectPage, ZProjectProcess, ZProjectRule, ZQuery, ZRule, ZRuleDesign, ZStatus, ZStatusAction, ZStatusPermission, ZStatusTransition |
|---|---|---|
|
Non-Branchable |
These models are NOT branchable. Any change made by Solution Developer OR Solution Admin is direct to the master. Changes wont be reviewed by Solution Admin. |
State Events Timer Events Process Events Network APIs Templates ZNode Sandbox Models |
|
Only Solution Admin |
Special for Solution Bundle Only a Solution Admin can create, edit, and publish/deploy solution bundle(s). |
Solution Bundle |
Both Solution Admins and Solution Developers can create branches. There is no limit to the number of branches you can create, but all users can only be in one branch at a time.
-
From Solution Builder > Version Control, go to Active Branches page and click Add New.
-
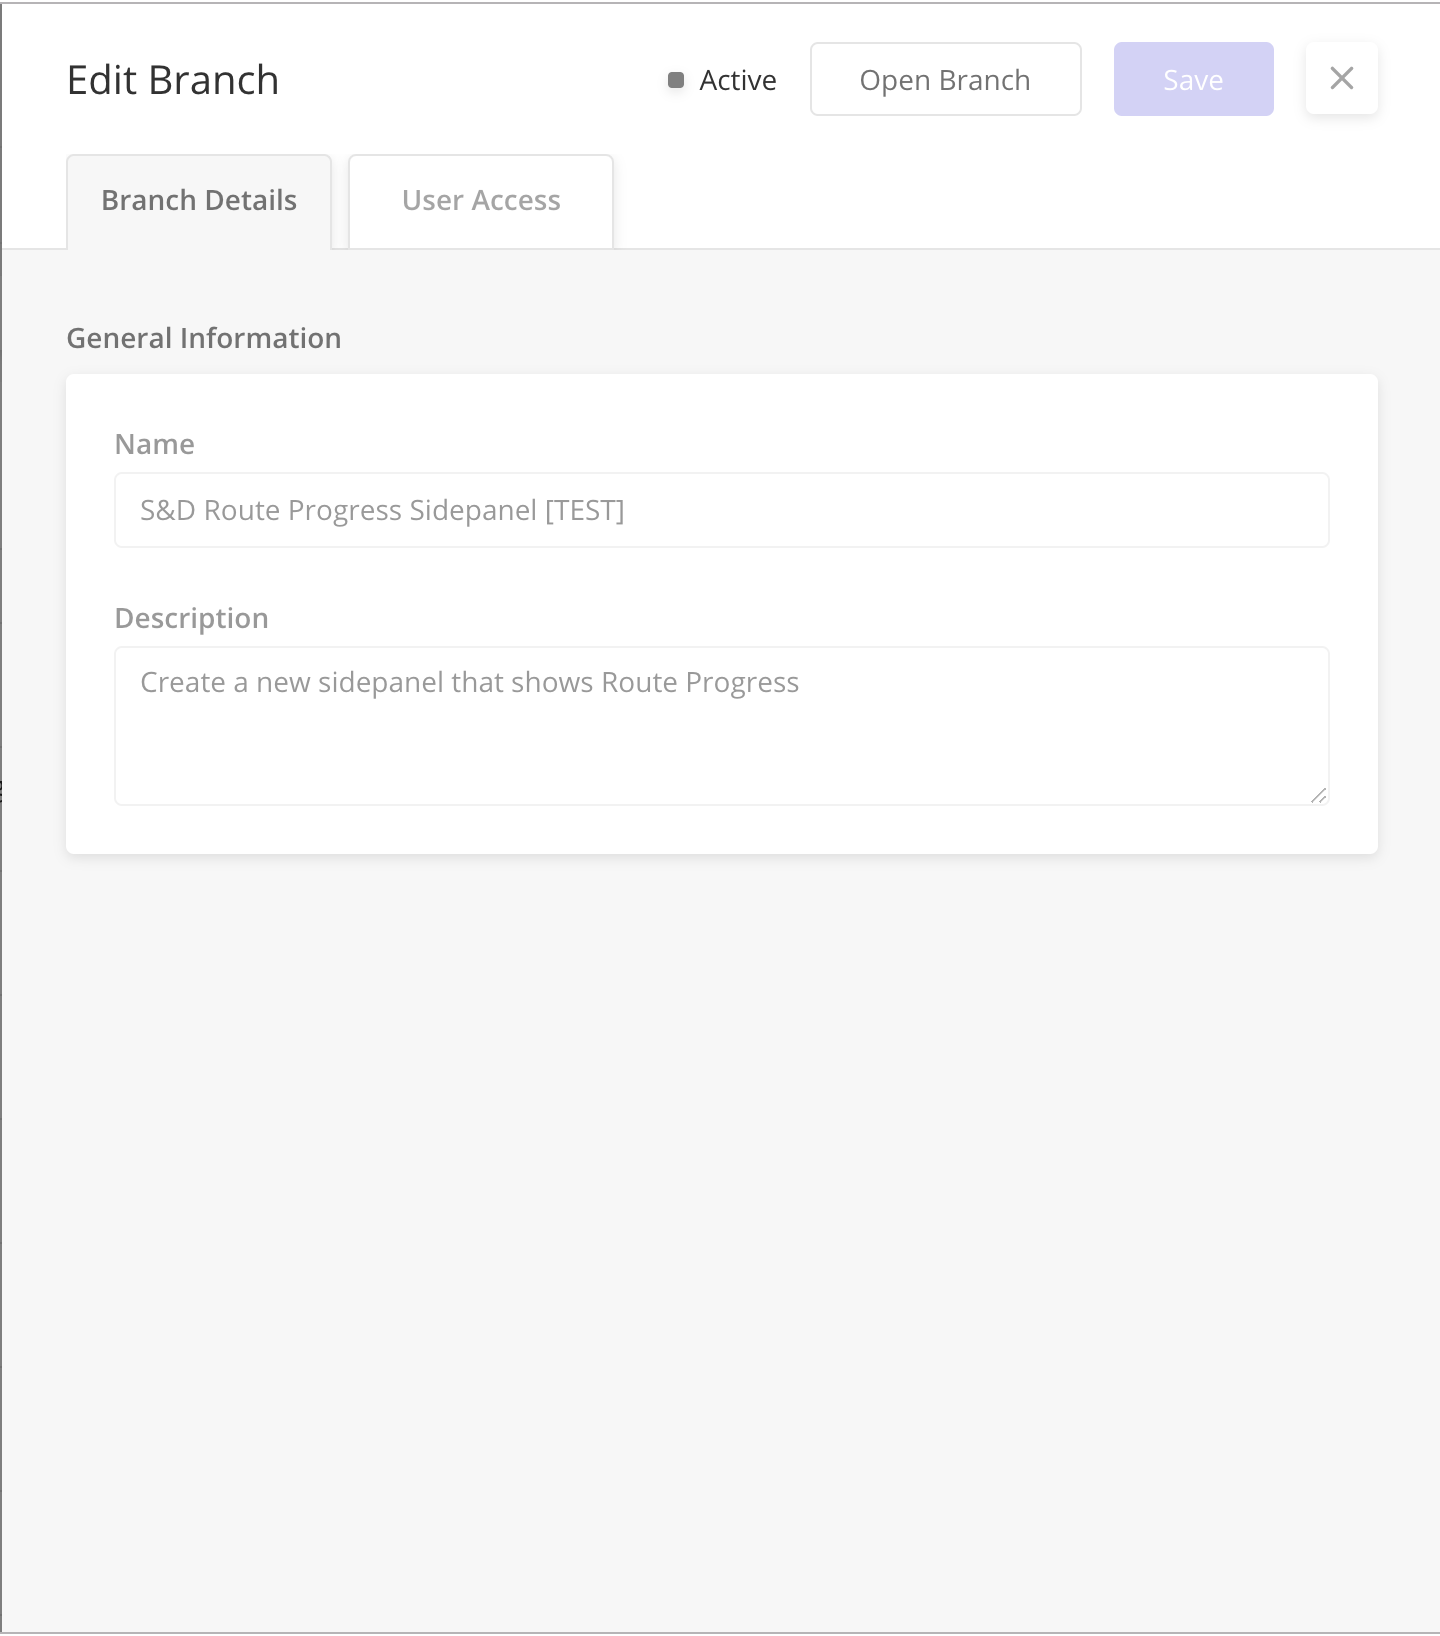
In the side panel, enter the name of the branch and description and click Save.

It is good practice to set the name of a branch as something that describes the task that you are doing. For example, “Task side panel”.
-
Open the side panel and click Open Branch. If you were previously in that branch, click Switch Branch on the side panel to enter the branch.
-
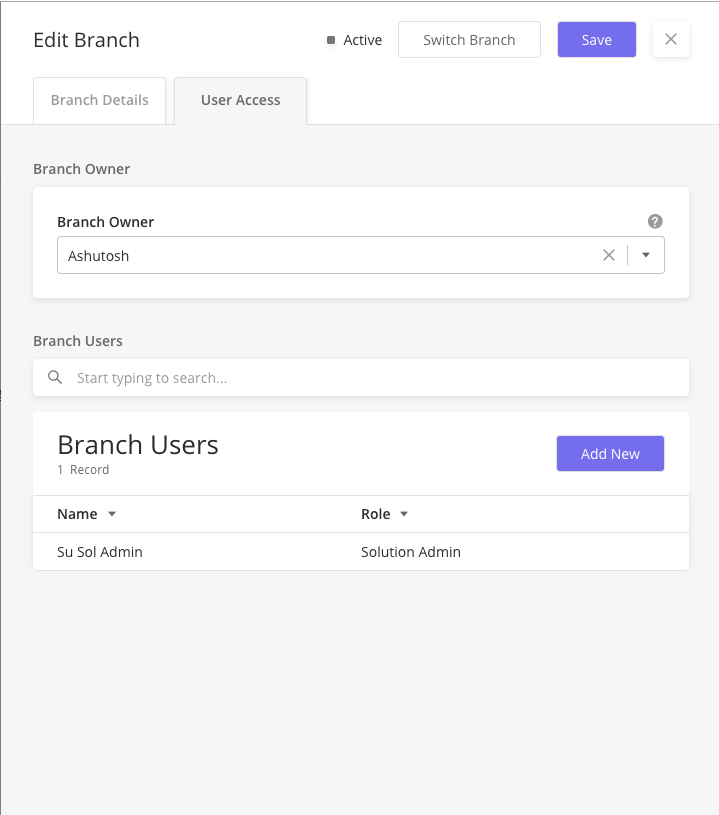
From the main page, click on Edit row action to see details of the newly created branch. In the User Access tab, users can verify who is in their branch and the Branch Owner. Whoever creates the Branch is the Branch Owner by default.
-
Once you are in a branch, the status of your current branch in the Main grid of Active Branches is Active (Current).
-
A user can make any changes to branchable models now that the user is in a branch.
![[Tip]](../css/image/tip.png)
Branch Size It is good practice to make each branch a small or manageable size of work (i.e., one page or one workflow). Do not create one branch and make an entire solution implementation in that branch.
|
Two user types can be set up in branches.
|
User Access |
Description |
|---|---|
|
Branch Owner |
A Branch Owner is either a Solution Developer or Solution Admin. Only a Branch Owners can request to merge or discard a branch. Each Branch must have one Branch Owner. |
|
Branch User |
A Branch User is either a Solution Developer or Solution Admin that are normal users in a branch. A Branch User can work on solution objects but cannot request a merge or discard. |
Only a Solution Admin can add more users to a Branch. A Solution Admin can also change the Branch Owner for a branch.
-
From Solution Builder > Version Control, go to Active Branches page and click on the edit row action of a branch.
-
Depending on your role, you can:
-
Solution Developer: Only view the User Access side panel tab. You cannot add users to a branch or change its branch owner.
-
Solution Admin: Select a Branch Owner from a list and add new team members as part of the branch.
![[Note]](../css/image/note.png)
Branch Members When you add a user to a branch, you will be notified in the web. You will now be allowed to switch into that branch when you want.
-
-
When a user is assigned to a branch, the user receives a notification via email and web.
-
The minimum number of users in a branch is 1. Only the Branch Owner is mandatory for a branch to exist.

|
Both Solution Admins and Solution Developers can switch branches.
-
From Solution Builder > Version Control, go to Active Branches page.
-
Select a branch that you want to enter and click on the edit row action.
-
From the side panel, select Switch Branch.
Once the switch is successful, you will see that in the main grid of Active Branches. The status of your current branch will be Active (Current).
|
-
From Solution Builder > Version Control, go to Active Branches page.
-
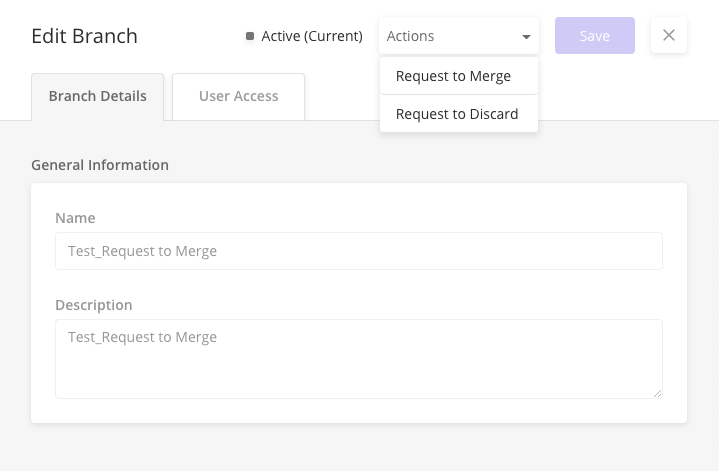
Select your current active branch, which you want to request a merge/discard. You must be a branch owner to see the Actions list.
-
In the side panel, select either from the Actions list:
-
Request to Merge: Commit the changes in a branch to Master (make things official!)
-
Request to Discard: Delete the branch
-
-
When a Branch Owner requests to merge/discard, a branch user:
-
Receives notification on the web.
-
Is removed from the branch.
-
Enters another branch by creating or switching to a branch to continue working.
-
|
After a Request to Merge/Discard is sent, the system identifies if there is a version difference between the Master and Branch. If Master has a more recent version than the branch, the Branch User is prompted to Upgrade from Master (Pull from Master).
-
From Solution Builder > Version Control, go to Active Branches page.
-
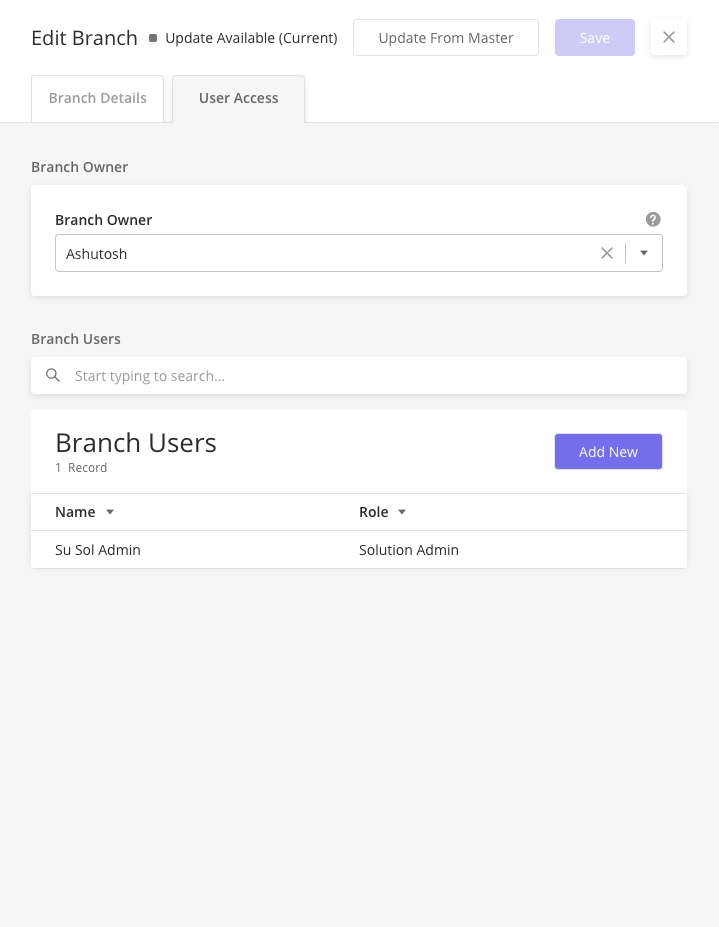
On the main grid, check your current branch status. If it is Update Available, there is an update available from Master that you need to pull from.
-
In the edit side panel, click Upgrade From Master.
-
Conflicts identified: Likely caused by changes to the same objects in master and in your branch. You will be prompted to resolve these conflicts by opening Merge Assistant.
-
No conflicts: Your branch is updated with the latest Master version and status of the branch is now Updated.
-
-
Once conflicts are resolved (if any) and a branch is updated, the Branch Owner can now proceed with the Merge or Discard request.
|
-
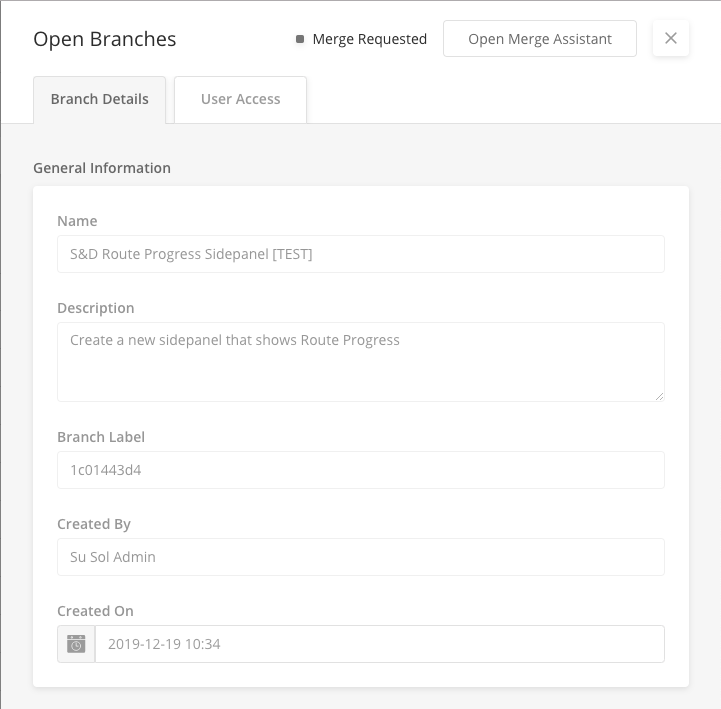
From Solution Builder > Version Control, go to Open Branches page. This page has all the branches that have been requested to merge/discard.
-
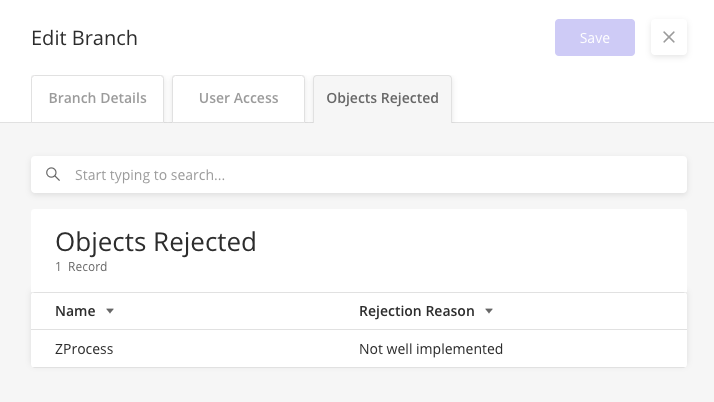
Open the edit side panel of a branch that you want to review and click Open Merge Assistant. The Merge Assistant identifies all the solution objects in that branch that were newly created, changed, deleted, or have conflicts.
-
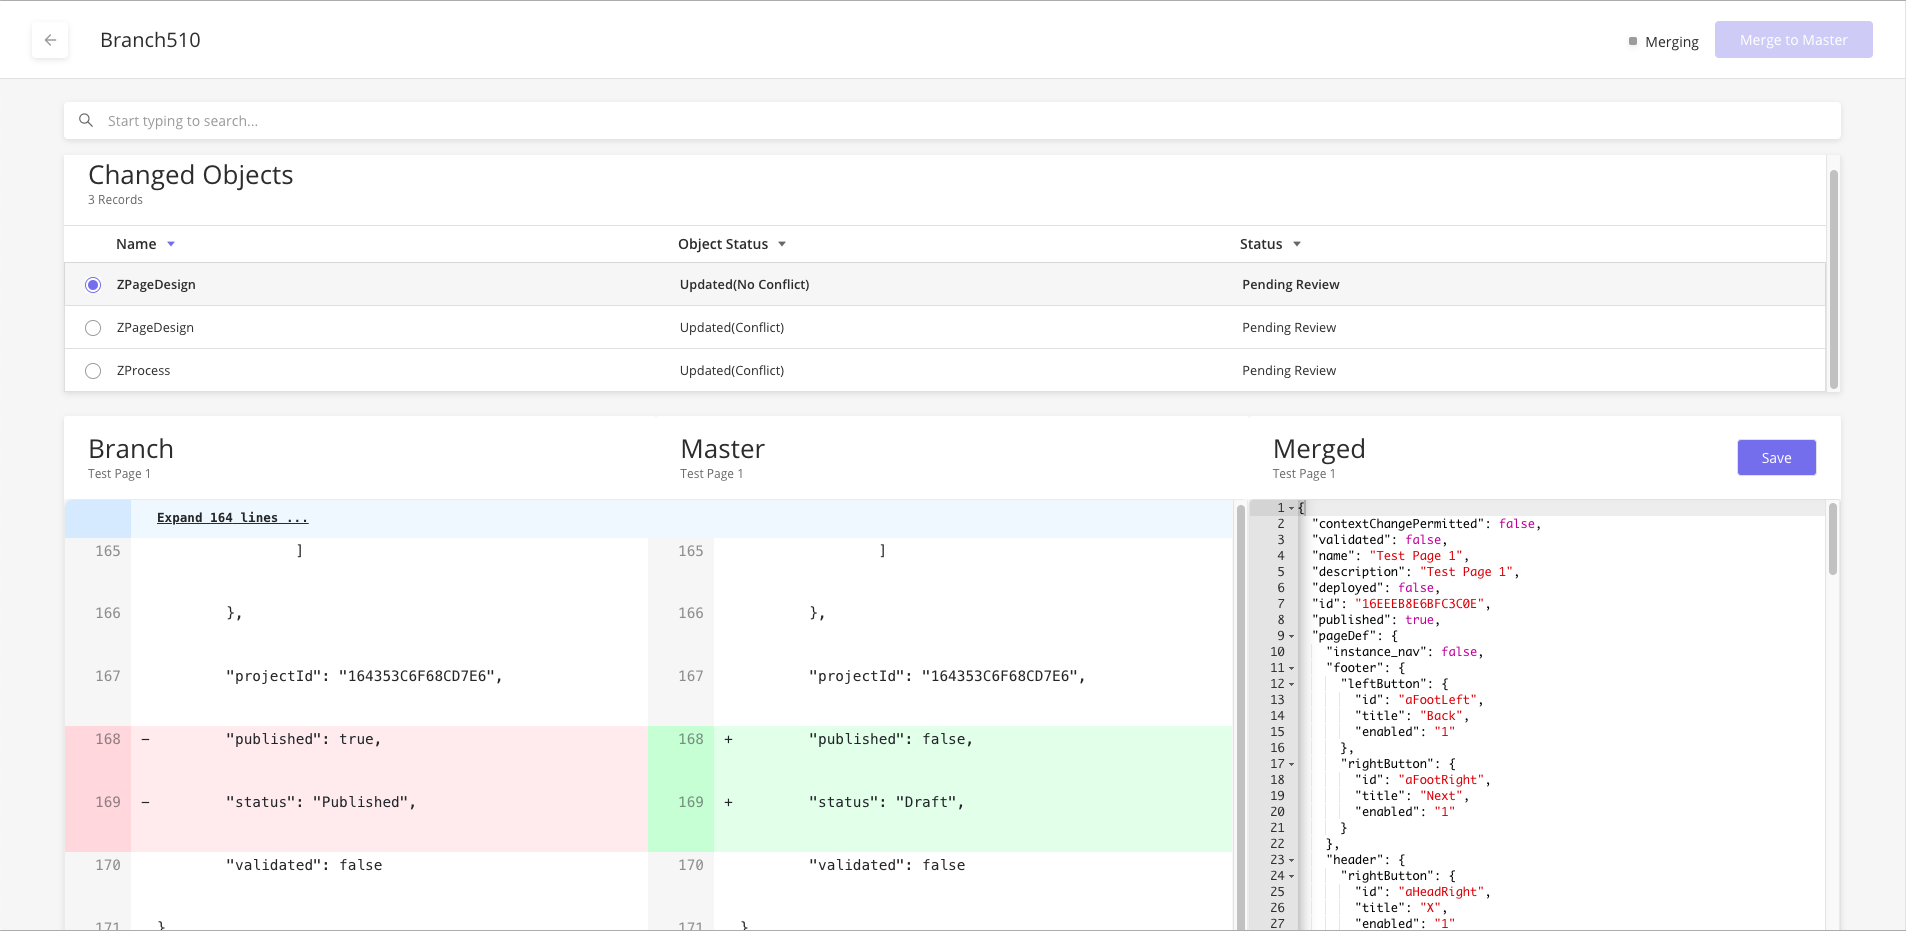
In the Merge Assistant page, Solution Admin can:
-
Review each solution object before approving or rejecting it.
-
Merge all the solution objects individually.
-
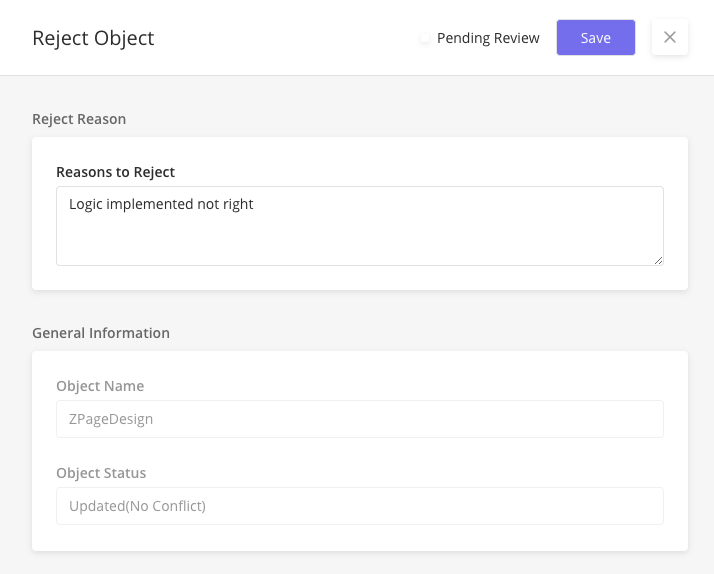
Reject a particular solution object and input a reason for rejection.
-
-
If one object is rejected, Solution Admin must decline the whole branch. A declined branch is sent back to the Active Branches' data grid.
-
Only if all objects are approved, Solution Admin can proceed with merging the branch.
|
|
|
-
From Solution Builder > Version Control, go to Open Branches page. This page has all the branches that have been requested to merge/discard.
-
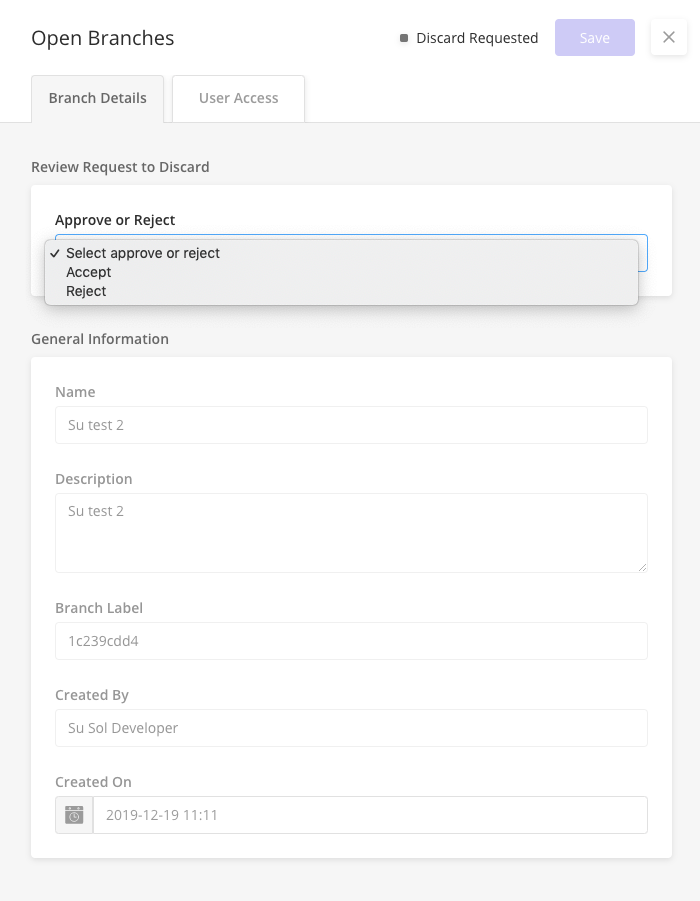
Open the edit side panel of a branch that you want to review.
-
On the side panel, from the Approve or Reject list, select either:
-
Approve: Discards the branch.
-
Reject: Enter a reason for the rejection and click Save. Sends the declined branch back to the Active Branches data grid.
-
|
A Branch User can view reasons for declined branches with status Merge Declined and Discard Declined.
-
From Solution Builder > Version Control, go to Active Branches page.
-
View branches with status Merge Declined or Discard declined.
-
Open the edit side panel to view the rejection reasons.
-
To start working on the branch again, a branch user can either:
-
Switch into the branch
-
Enter the branch
-
|

|
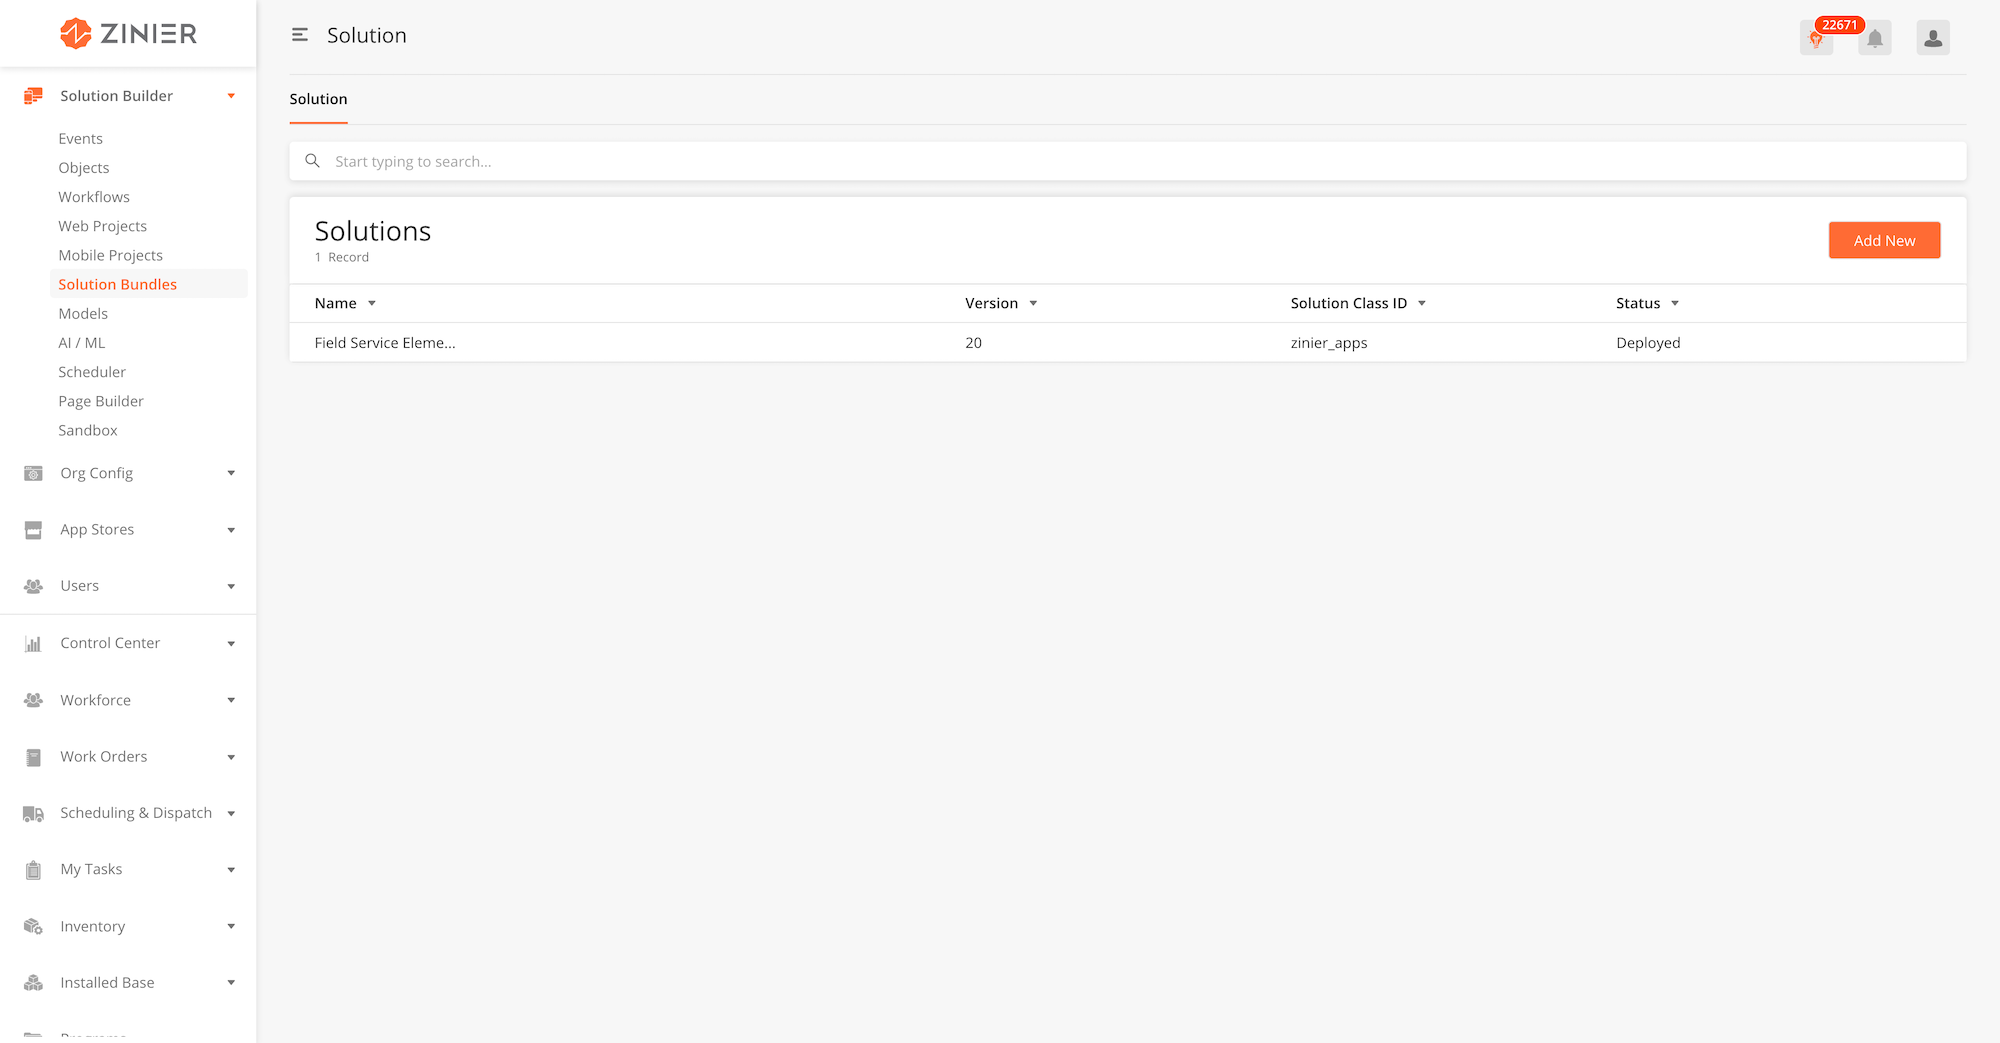
A solution bundle consists of all Solution Objects that is needed for a complete solution. Solutions Admin can configure a bundle, and install it into another organization. Solution Bundling saves on implementation time as it enables solutions admin to quickly build, bundle and install new org solutions. It also reduces manual work of upgrading the organization as all parts of a solution bundle can be upgraded at the same time. After installing the solution bundle into an organization, the solutions admin can continue to add or edit web projects, mobile projects or solution objects within the organization according to its growing needs.
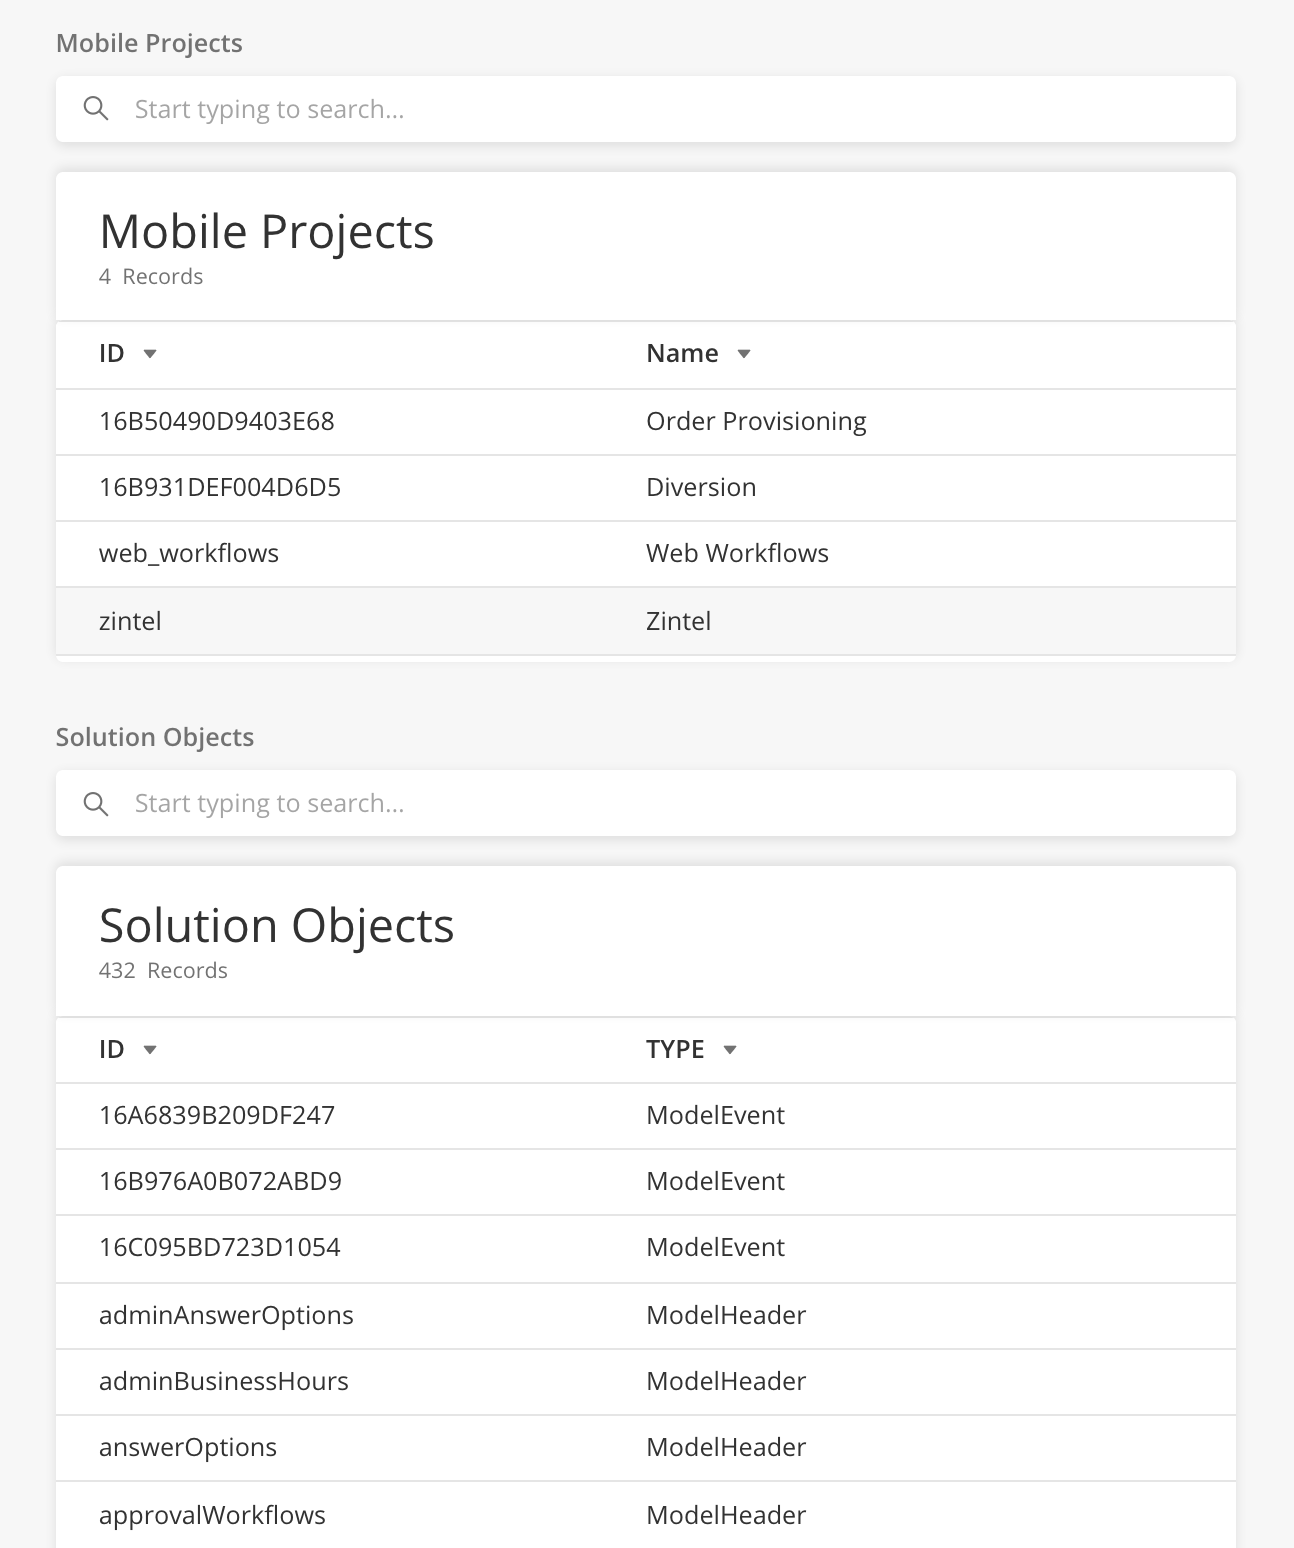
Solution objects can include
-
Web Projects - Web applications needed in the solution
-
Widgets - Configured Widgets used in dashboards in the solution
-
Mobile Projects - Mobile Projects used in the solution (Important note - you do not have to add Mobile Pages and Mobile Workflows separately)
-
Events - Events that are used to trigger workflows within the solution
-
Queries - Queries that are used within Workflows and Pages in the solution
-
Rules - Javascript rules that are used within Workflows and Pages in the solution
-
Znode - Custom user-defined nodes that are used within Workflows and Pages in the solution
-
Templates - PDF or Email templates used within the solution
-
Network API - APIs (including authentication details) used within the solution
-
Workflows - Workflows needed in the solution
-
Models - Custom models and selected system models like Status and Priorities
-
Seed Data - Records within the source organization
-
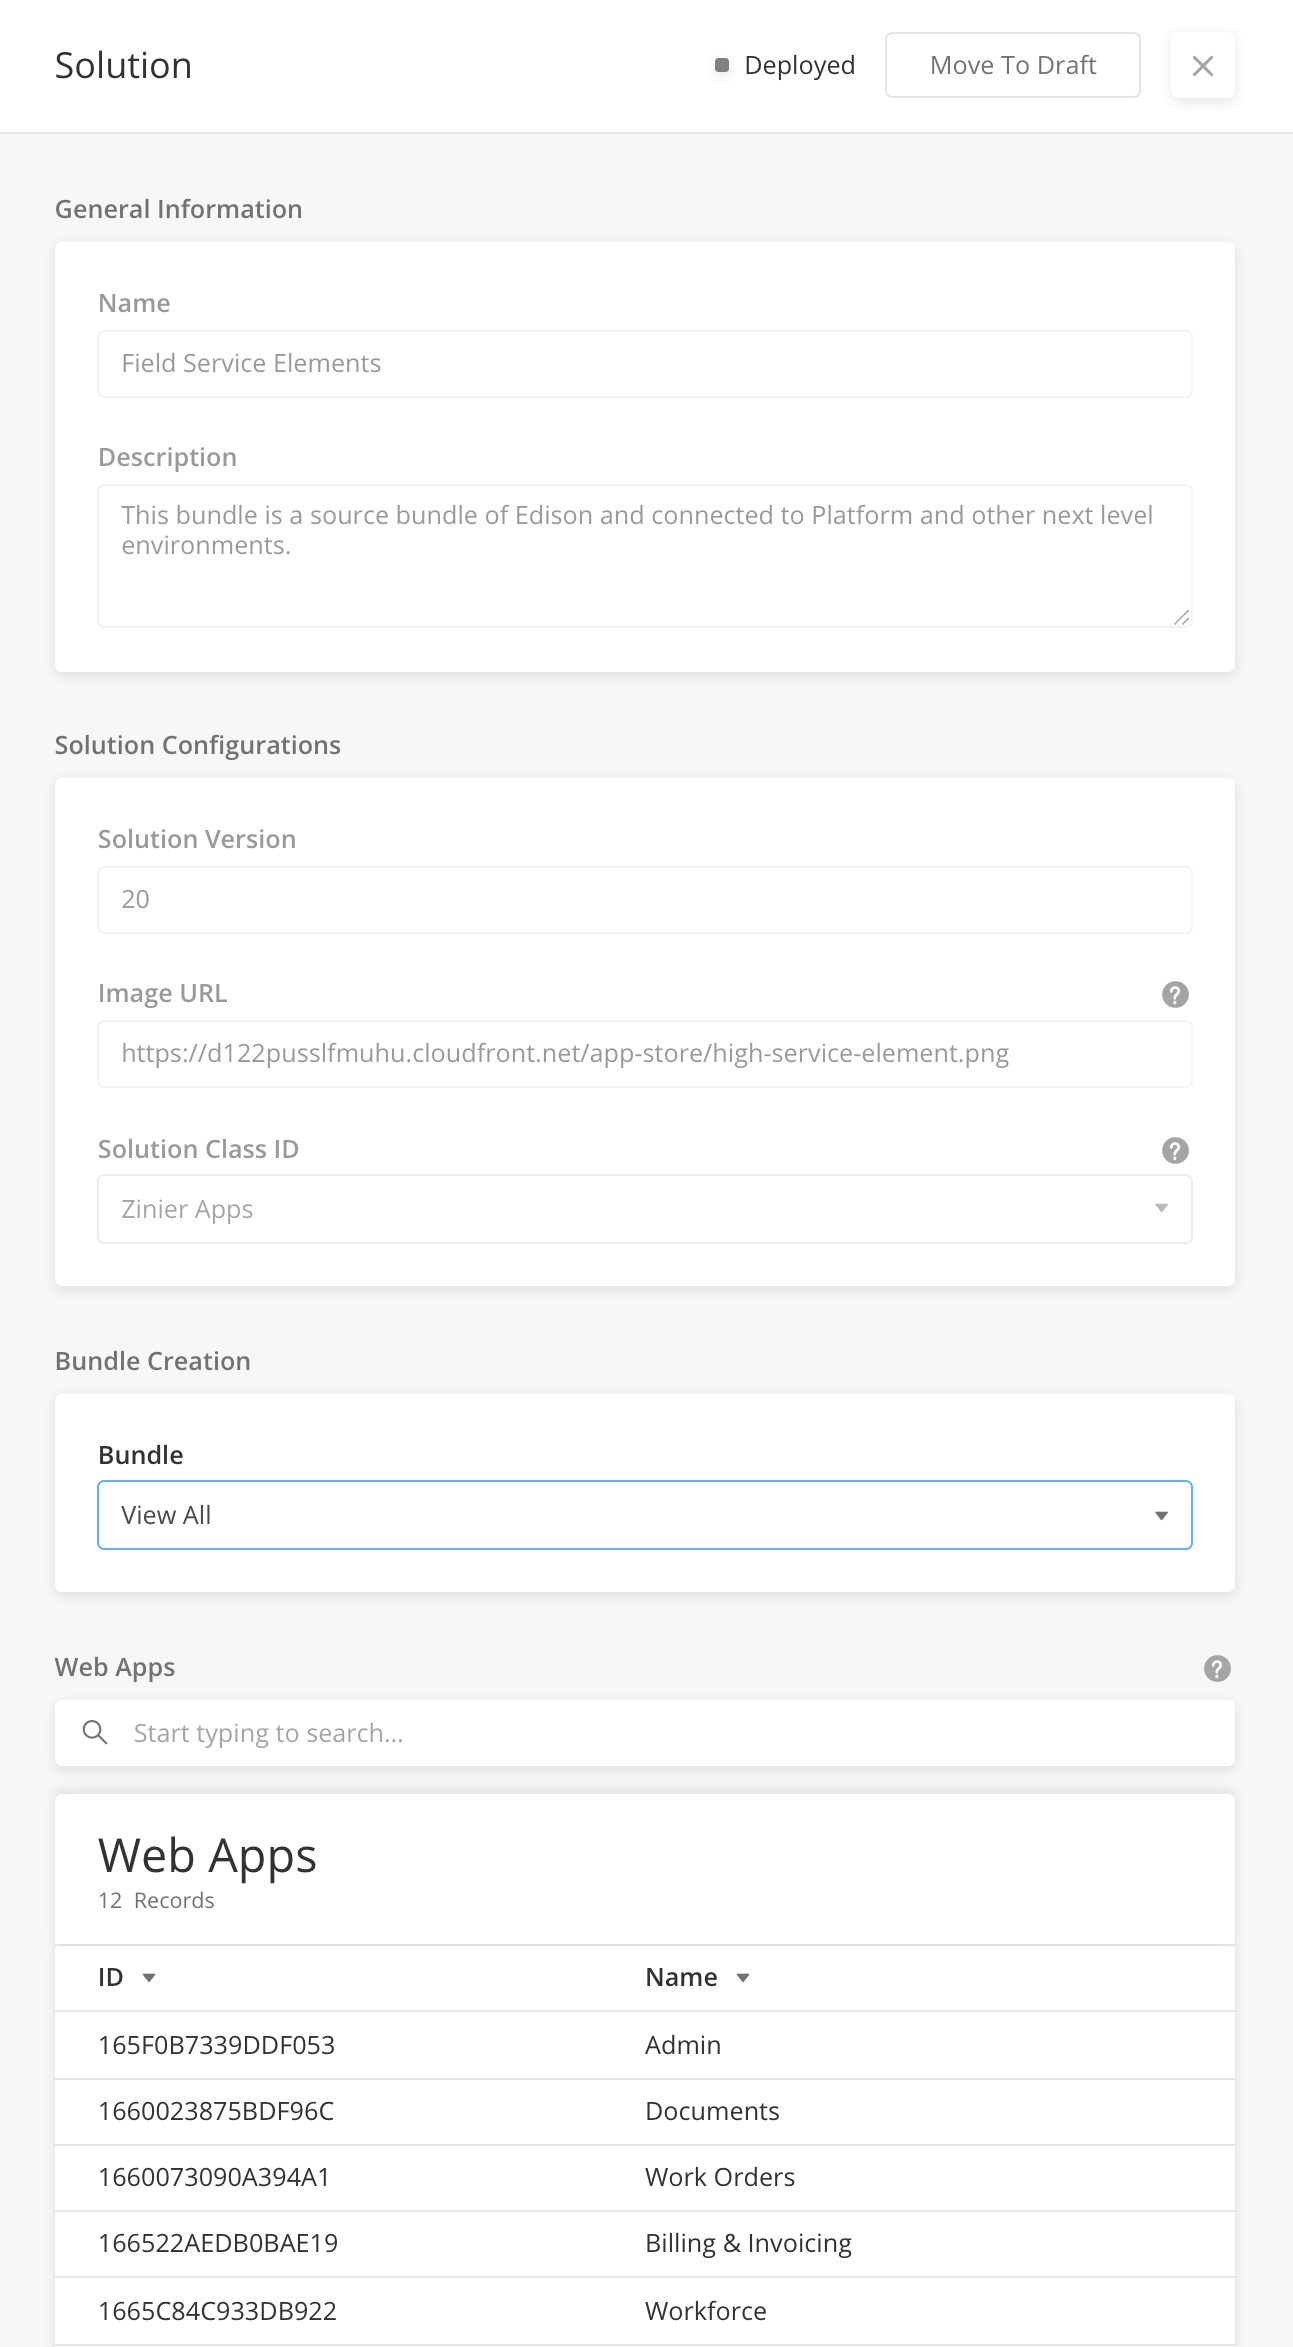
From the main page, click Add New.
-
Fill in General Information and Solution Configurations of the Bundle and click Save. The Bundle will be in "Draft" status.
-
Add solution objects to the Solution Bundle by selecting from the drop-down and adding objects to the table.
-
To view all the added objects, select View All.
-
To Delete Solution Objects, select from drop-down, hover over the record and click delete.
-
Once all objects needed for the bundle is added, "Publish" the bundle
-
Once the bundle is ready to be Deployed, Save and Deploy the bundle.
-
To make your bundle available on your target organization's app store, enter the source org and corresponding credentials within Org Config > External Systems.
-
For example, FSE is made available in the Z2store source org. Include the following as a row in External Systems > z2store record
-
"appStoreServer": "https://ramanlab.zinier.com",
"orgId": "sourceorgname",
"loginId": "useridhere",
"password": "passwordhere"
-
-
In your target organization, go to App Stores.
-
Select the Solution Bundle you created and open the side panel.
-
Click Install to close the side panel.
-
Status of the bundle in the app store will change from "Available" to "Installed".
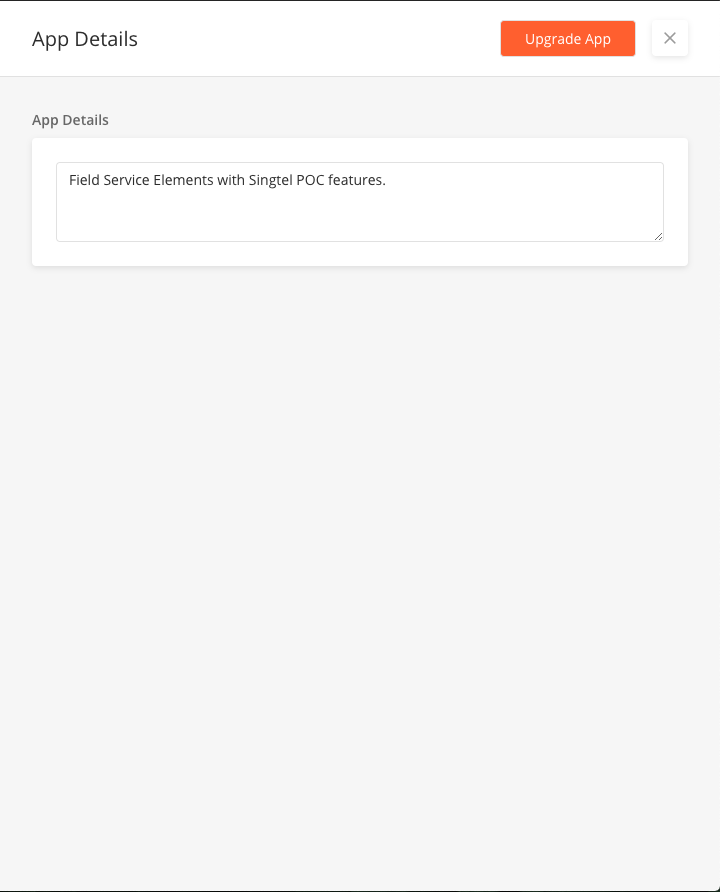
In cases where there is a new Solution Version of a solution bundle available, Solution Admin can upgrade the installed solution bundle in the app store. For example, when there is a new FSE version released (with new web apps or functionality), a new solution bundle will be published.
-
In your target organization, go to App Stores
-
Select the Solution Bundle with status "Upgrade Available" and open the side panel
-
Click on "Upgrade App"
-
If there are conflicts between the current solution in the target organization and the bundle to be installed, you will be prompted to go to the "Upgrade Assistant". For more information about conflicts and conflict resolution when installing or upgrading solution bundles, go to Solution Bundle FAQ
-
In Upgrade Assistant, Solution Admin can view the JSON code of each solution object in which a conflict is identified, make changes and merge the updated code.
-
Solution Admin can choose to override the conflicts in the target org with source org code, retain target org code OR make changes to merge the two.
-
Once all the conflicts have been resolved, solution admin can click on Upgrade to install the now modified bundle into the target organization.
|
|
Field Name |
Description |
Example |
|---|---|---|
|
Name |
Name of the Solution |
|
|
Description |
Short Description |
|
|
Solution Version |
The field gets auto-populated as the Solution Record is updated |
|
|
Image URL |
Determines the Publicised Image of the Solution on the App Store. |
|
|
Solution Class ID |
Type of Solutions |
Zinier Apps |
|
Bundle Creation |
The dropdown of all solution objects that can be added to a solution Bundle. View All shows the user all added solution objects. The solution objects that can be added include; Only Deployed solution objects can be added to a bundle
|
What is a source org/ target org?
Source Organisation - Org which you created the bundle
Target Org - Org which you want to install your bundle
What is the logic between source org/target org?
Bundle Upgrade will override Target Org with Source Org changes IF there has not been any updates/changes to Target Org object.
To summarize, following are the general logic between source and target.
|
|
Note |
|---|---|
|
Source overrides Target if object has not been changed at Target but changed at Source. No conflict will be identified. Target overrides Source if object has been changed at Target but not changed at Source. No conflict will be identified. Conflict if both Target and Source has changed the object. |
What are Conflicts and how are they identified by the system?
Conflicts are differences in JSON code within a solution object added to a Solution Bundle.
|
Conflicts use cases |
Expected Behaviour |
|---|---|
|
Source Org has Workflow A.Target Org has the same Workflow A (same ID). Target Org makes changes to Workflow A. Source Org makes changes to Workflow A. When upgrading Source Org bundle in Target Org, what will happen? |
Conflict will be identified. User will be prompted to use the Upgrade Assistant. |
|
Source Org has Workflow A. Target Org has the same Workflow A (same ID). Target Org makes changes to Workflow A. When upgrading Source Org bundle in Target Org, what will happen? |
No conflict will be identified. Workflow changes will remain same in the Target ORG without any conflicts. |
|
Source Org had Mobile Page B. Target Org has Mobile Page B. Source Org deletes Mobile Page B and re-bundles When upgrading Source Org bundle in Target Org, what will happen? |
No conflict will be identified. Target Org will still have Mobile Page B. We only do the upsert calls in the entire Solution Bundle. Deletion in Source Org will not affect any data in the Target Org. |
|
Source Org and Target Org have installed the same 4 Workflows (A,B,C,D). Source Org makes changes to Workflow A and B and re-bundles. Target Org makes changes to Workflow C and D. When upgrading Source Org bundle in Target Org, what will happen? ZIN2-6048 - JIRA issue doesn't exist or you don't have permission to view it. |
No conflict will be identified. The modified workflow definition for A & B from Source will get updated in the Target & modifications done at Target for C & D will remain same in the Target Org. |
|
Source Org and Target Org had Stateless Workflow A. Source Org updates Stateless Workflow A and re-bundles. When upgrading Source Org bundle in Target Org, what will happen? |
No conflict will be identified. It is a Direct Update. So, workflow A changes will appear in the Target Org after the upgrade. |
|
Target Org has Stateless Workflow A. Source Org does not have Stateless Workflow A. When installing/upgrading Source Org bundle in Target Org, what will happen? |
No conflict will be identified. Workflow A will persist in the Target Org. |
|
Source Org and Target Org has Template A and Workflow A. Target Org makes changes to Template A. When installing/upgrading Source Org bundle in Target Org, what will happen? |
No conflict will be identified. Modifications related to the Template A will get updated in the Target Org. |
|
Target Org has External Systems (set up in Org Config) which is used in its solution (workflows, network API calls). Source Org does not have the same external systems. When installing/upgrading Source Org bundle in Target Org, what will happen? ZIN2-5913 - JIRA issue doesn't exist or you don't have permission to view it. |
No conflict will be identified. For External System, we get the ExternalSystem record without SecurityCredential details. So, the user has to just enter the SecurityCredentials for the above record in the Target Org to make it work. |
|
Target does not make changes to Object A. Source makes changes to Object A and re-bundles. When installing/upgrading Source Org bundle in Target Org, what will happen? |
No conflict will be identified. Source Overrides Target org without a conflict page. |
|
Target Org has installed Bundle A from Source Org A. He now wants to install FSE bundle from Z2store. Both Bundle A and FSE Bundle have common Workflow C. Workflow C is different in Bundle A and FSE Bundle. When installing FSE bundle into Target Org, what happens to Workflow C? |
No conflict will be identified. Workflow C will get overridden by FSE workflow. We are not checking for conflicts across two installed apps currently. |
Overview
App Stores is a marketplace for Zinier applications. Custom solutions can also be published as applications in the app store for solution delivery. Solutions Admin can install applications or solution bundles into an organisation. It It allows for a quick and easy way to install multiple out of the box products like Field Service Elements (FSE) and other future Zinier products into a client's organisation.
After installing an app into an organisation, user should refresh the platform to see the web applications installed as part of the app/bundle.
Note : Users should ensure that User Groups have been configured before installing the app so that respective users see all the new web apps upon refresh.
Types of App Stores
|
App Store Name |
Description |
|---|---|
|
Zinier Apps |
Default Zinier Apps or Bundles including out of the box Field Service Elements (FSE) and in the future Project Management, Vendor Management etc |
|
Telco Solutions |
Apps or Bundles specific to the telecommunication industry such as Fibre Installation bundle which will contain all the web apps and mobile projects for Fibre Installation tasks. |
|
Integrations |
Apps or Bundles that enable users to install connectors to other external systems like CRM or ITSM systems such as Hubspot, Service Now, Zendesk etc. This makes it easy for clients to enable integrations needed with their existing systems. |
|
AIML Apps |
Apps or Bundles that enable users to install configurable AIML recommendations such as Technician recommendation, Parts recommendation, Tools recommendation |
|
Upgrade Assistant |
Upgrade Assistant allows users to upgrade their existing installed apps. This Upgrade Assistant will analyze all web apps within the currently installed FSE and identify which web apps need to be upgraded. |
Actions that can be done
-
View the app description
-
See status of app or bundle - Available, Queued, Installed
-
Install the app or bundle into organisation
Sandbox allows Solution Admins to create a sandbox org from a production org. Sandbox APIs clone an existing organization on a production server to the sandbox server. With sandbox, you can ensure development and testing are done in a separate org and not in production. This reduces any risk of instability in Production orgs as development is done in a different, controlled environment.
Solution Admins should create and maintain Sandboxes from the production org. There is currently no limit to the number of Sandbox orgs that you can create.
Data that are NOT cloned in a sandbox include;
-
User and Groups data. The Super Admin will need to add users manually in the sandbox org.
-
Transactional data (seed data) from the Prod org that are not added as Sandbox Objects
|
|
Module |
Relationship |
|---|---|
|
Solution Builder |
All Solution Objects in Solution Builder (Events, Objects, Workflows, Mobile Projects, Web Projects, Schedulers, Models, Solution Bundles) in the production org . are cloned in the Sandbox org |
|
Org Config > Entity Config |
All entity Configs from Production org are cloned in the Sandbox org. |
-
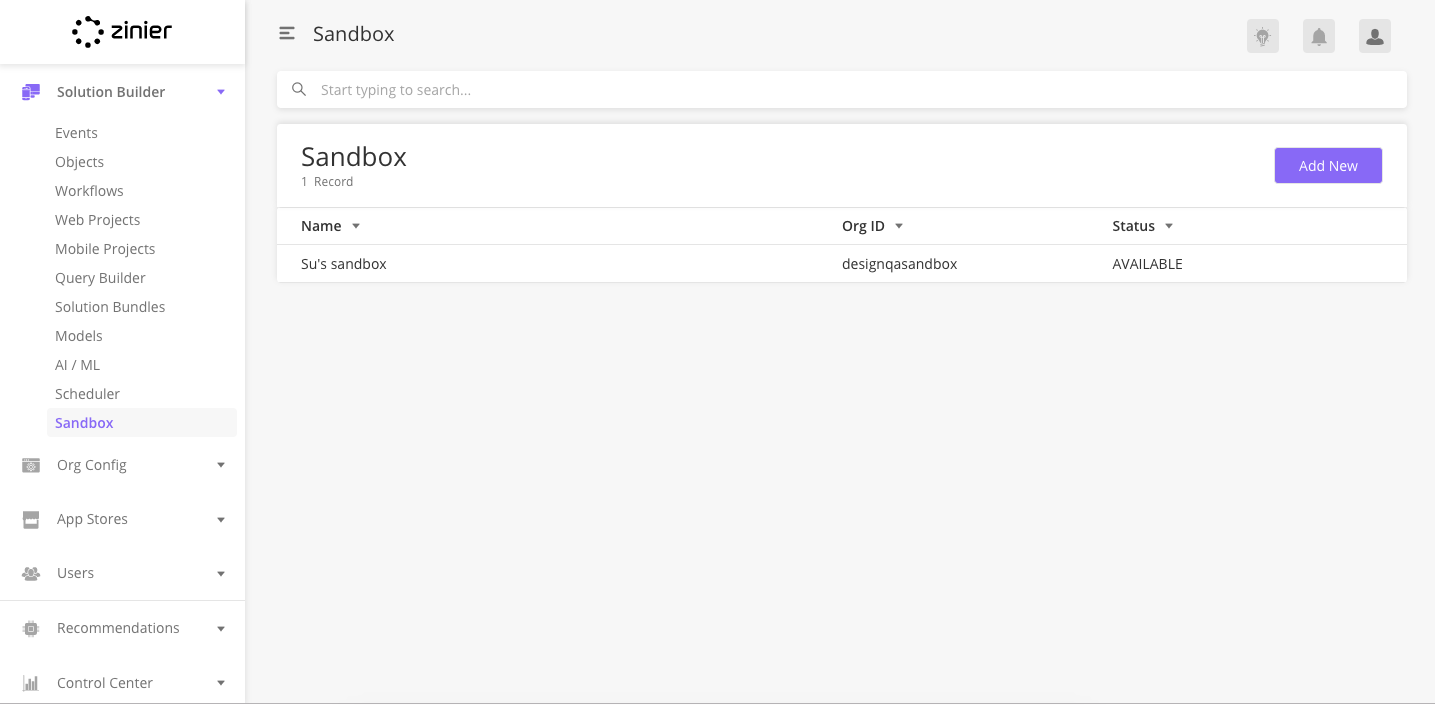
In Zinier, go to Solution Builder > Sandbox and click Add New.
-
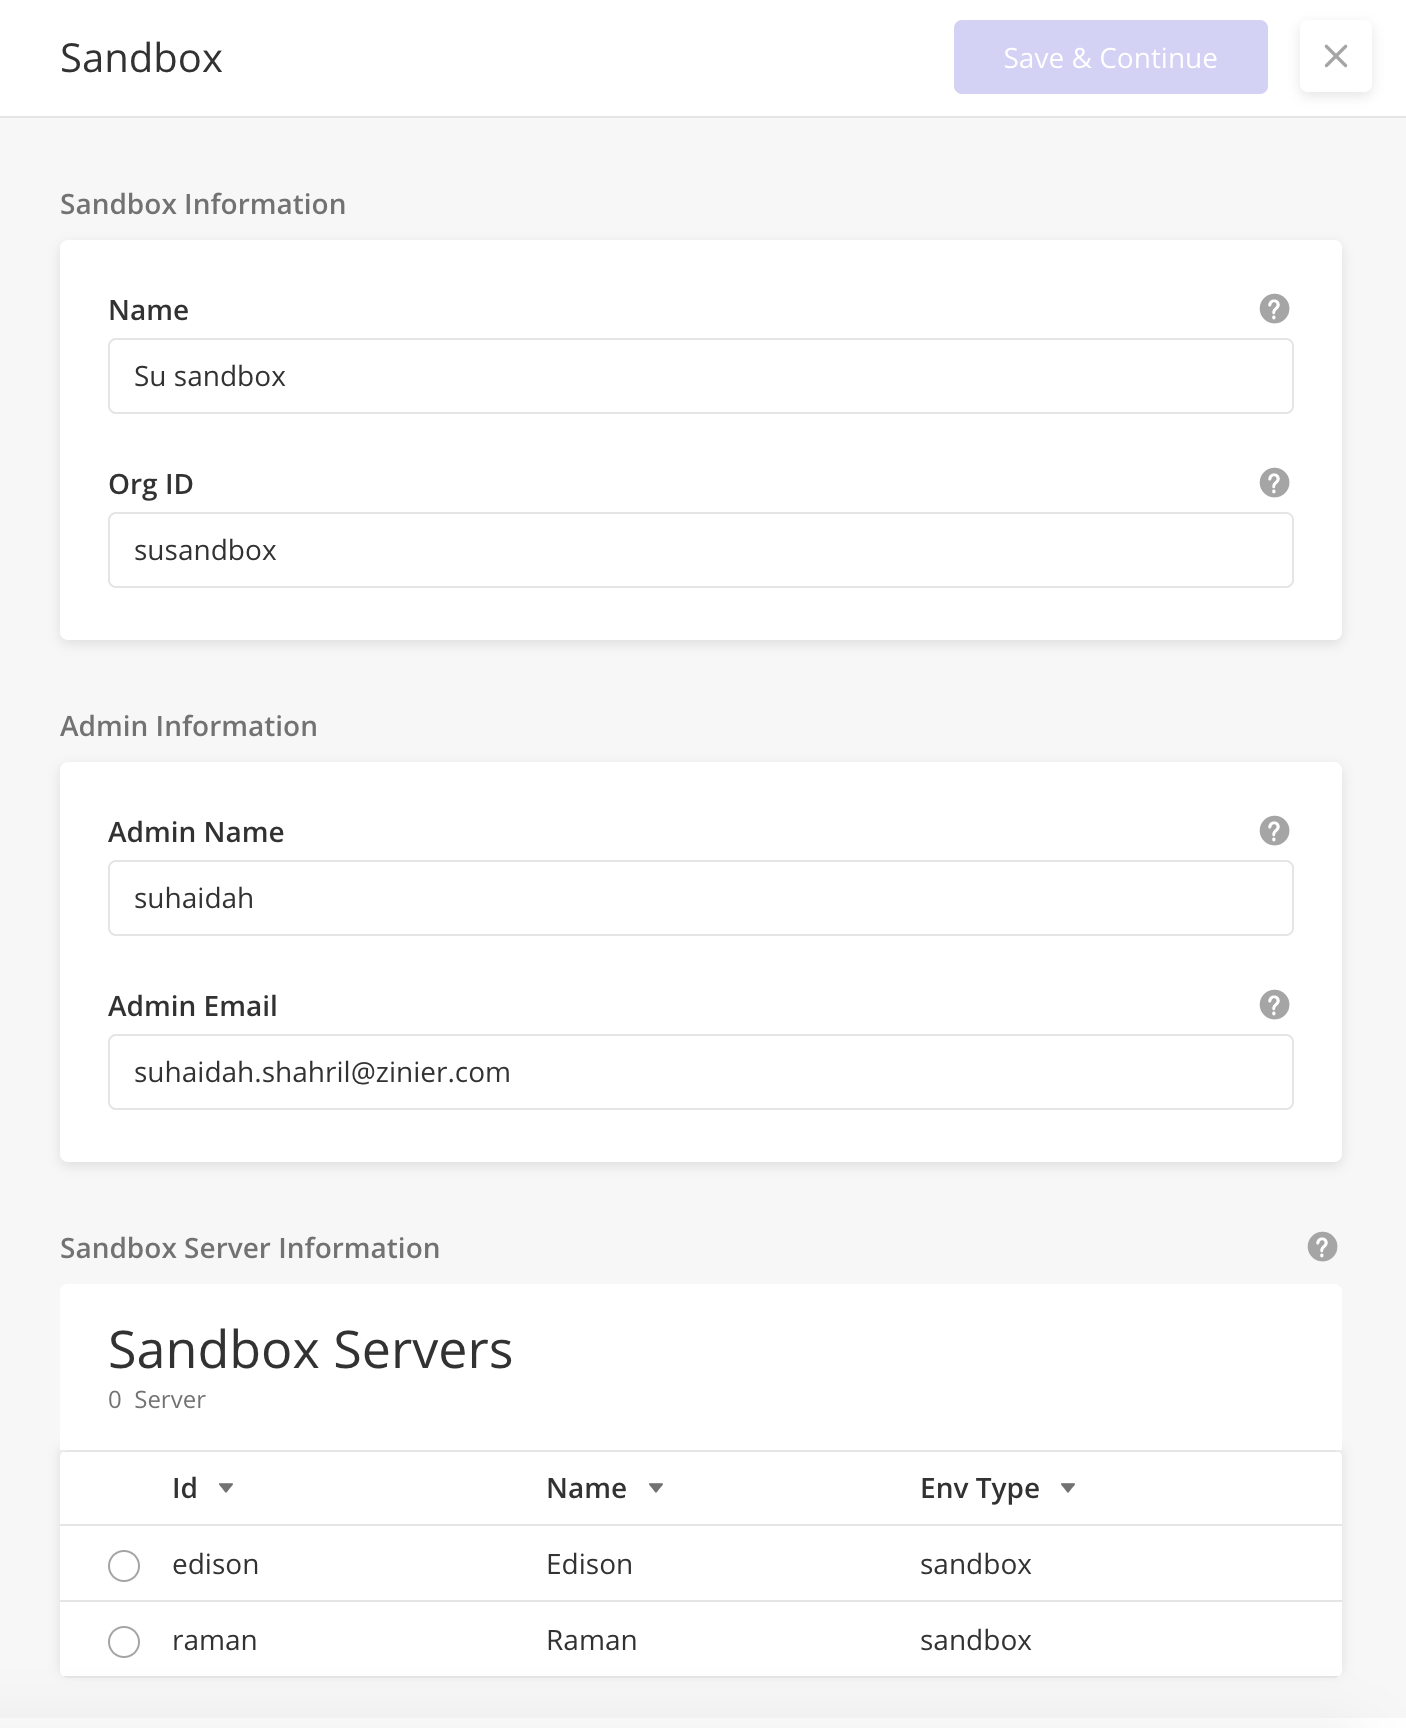
On the Sandbox page, enter the sandbox information which includes the Name and Org ID.
-
Enter the Super Admin information which includes the Name and Email. A Super Admin is the user who receives the invitation for the Sandbox org.
-
Select the Sandbox server. This will be the server the sandbox will be created in.
-
Click Save and Continue.
-
In the Sandbox Objects section, click Add New. Sandbox Objects are transactional data or seed data from the production org which can be migrated in the sandbox org.
-
From the Model list, search or select a dynamic model.
-
In the Records section, search or select related records.
-
Click Save.
-
-
Click Save.
-
The status of the newly created sandbox is Queued. Once the sandbox creation is successful, the status changes to Installed.
The Super Admin:
-
Receives an invitation email to the Sandbox org (both web and mobile invitations are sent).
-
Logs into the sandbox environment and invite solution admins or solution developers into the sandbox org.
Solution Admin can choose which server to host his sandbox org. This gives users the flexibility to create sandboxes in a server that is appropriate. For example, if the sandbox is created for troubleshooting, users should choose to create the sandbox org in the same production. server to ensure reproducibility. If the sandbox is created for building new features, user can choose to create the sandbox org in a beta server like Curie or Hawking.
What server's can I create a sandbox in?
|
Type of Server |
Sandbox can be created in |
|---|---|
|
Customer Production Org (ie, BV) |
Customer Production, Curie, Hawking |
|
Newton |
Newton, Hawking |
|
Einstein |
Einstein, Hawking |
|
Curie |
Curie, Hawking |
|
Hawking |
Edison |
|
Edison |
Raman, Edison |
|
Raman |
Edison, Raman |
-
From the Solution Builder > Sandbox page, click the edit row action of the sandbox org that you want to import. The sandbox that you want to import must have the status Ready for Import.
-
From the Actions list, select Prepare for Import. This action preps your sandbox for import into Production. The status of the sandbox will change to "In Progress." In this status, the user cannot do any action on the sandbox.
-
Once "Prepare for Import" is successful, the status will change to "Ready for import"
-
As the status changes, user can open the edit row action, click the Actions list and select Import. This will import your sandbox into the production org. It is important to ensure that proper testing has been done before importing the changes in production.
-
The sandbox status will change to "In Progress" Once the Import is successful, the sandbox status will change to "Installed" This process may take a few minutes.
-
Once Installed, changes from Sandbox will be deployed in Production.
Solutions Admin can Refresh a sandbox when there is a versioning conflict between the Sandbox and the Production environment. The Refresh action updates the sandbox server with the changes on the production server. This Refresh action appends the changes in the product organization without affecting local changes present on the sandbox organization. While refreshing the sandbox, there might be local updates to the same records which will create conflicts. These conflicts need to be resolved by the user through the Conflict Manager on the web.
-
When there is a versioning conflict between the Sandbox and the Production environment, the user will be prompted to Refresh the sandbox before he can Import the Sandbox into Production. From the main page, open the edit row action, click on the Action dropdown and select "Refresh"
-
On Refresh, the system will check if there are any conflicts between Sandbox org and Production org. Conflicts arise when there are updates to the same record (same ID) in both the Sandbox org and the Production org.
-
If conflicts are found, the status of the sandbox will change to "Conflict".
-
The user must open the edit row action and click on "Resolve Conflicts". This will open the Conflict Manager where he can resolve and merge conflicts on each individual object.
-
Once the conflicts are resolved, the user can Import Sandbox into Production using the steps outlined in the previous section
-
-
If conflicts are not found, the status of the sandbox will change to "Available" after refreshing. The user is free to Import Sandbox into Production using the steps outlined in the previous section.
Solutions Admin can Reset a sandbox to clear all existing data in a Sandbox organization and replace with fresh data from the production organization. Reset will clear all existing solution objects in the Sandbox organization.
-
Reset is available for all statuses except for In Progress.
-
From the main page, click on the edit row action. Click on the Actions Dropdown and click Reset. Warning : Reset will wipe out all existing Sandbox configurations. This may mean that ongoing development work in Sandbox org will be lost.
-
Once Reset is successful, the status of the sandbox will change to "Available" The sandbox org will be a fresh clone of Production Org.
Solutions Admin can Archive a sandbox when it is no longer used as a sandbox org.
-
Archive is available for all statuses except for "In Progress" and "Resolve Conflicts"
-
From the main page, click on the edit row action. Click on the Actions Dropdown and click Archive
-
Once Archive is successful, the status of the sandbox will change to "Archived" The super admin and any user of the sandbox org will not be able to log into the sandbox org anymore.
Solution Admin can get latest sandbox status by clicking on the 'Refresh' icon on the main data grid.
|
Status |
Description |
Actions Available |
|---|---|---|
|
Queued |
Sandbox is queued for an action like Import. |
No actions can be done in the side panel. |
|
In Progress |
Sandbox is in the middle of an action like importing, refreshing or resetting. |
No actions can be done in the side panel. |
|
Installed |
Sandbox has been successfully created or installed in the Production Org. If I need to import again, I have to Prepare for Import first. |
Reset, Refresh OR Prepare for Import*, Archive *Refresh will only be shown if there is a production change. If there are only Sandbox changes, Prepare for Import will be shown. |
|
Ready for Import |
Sandbox has finished Preparing for Import and can now be imported. |
Import, Archive, Reset, Refresh* *Refresh will be shown ONLY if there is production change. |
|
Conflict |
Conflicts with Production have been identified. User has to Refresh the sandbox and resolve conflicts before importing sandbox into production. |
Resolve conflicts , Reset. |
|
Failed |
Sandbox has failed in the middle of an action like Import, refresh or reset. This could be caused by a system error. |
Reset, Refresh, Archive, Prepare for Import. |
|
Archive (Not visible in main grid) |
Sandbox has been archived |
No actions can be done in the side panel. |
|
Field Name |
Description |
Example |
|---|---|---|
|
Name |
Name of the sandbox |
Sandbox for Mobile Project 1 |
|
Org ID |
Id of the org. This has to be one string without spaces |
productqa983 |
|
Super Admin Name |
Name of the solution admin who will administer the sandbox. He/She will be the first person invited to the Sandbox org after creation |
Jane Doe |
|
Super Admin Email |
Email of the super admin |
jane.doe@zinier.com |
|
Sandbox Objects |
Transactional or seed data that are to be migrated into the sandbox org. These data are from dynamic models that may be needed for configurations in the sandbox org. After you create the first sandbox in the production environment, you can add sandbox objects that are automatically inserted into any sandbox created after. |
|
Resource |
Link |
|---|---|
|
Postman collection for APIs used in Sandbox |
https://drive.google.com/file/d/1VQQY8EKU33zZWkjx38R-bb6-TSAFwRiM/view |
|
Video demo of a happy path in a sandbox |
https://drive.google.com/file/d/10hNo3jurJxghGKjCb5XCloSDD_ATpANj/view |