Workflows are fundamental building blocks used when making a customized Zinier Solution for a client. Constructed using usingNodesand written in JSON, they contain the inherent logic and steps that determine how Zinier’s applications function.
When building Applications, Solutions Admin can take advantage of a number of different types of Workflows to achieve almost any business outcome. Workflows for Web Applications are configured in the Solutions Builder > Workflows module. While these types of Workflows can also be utilized by Mobile Applications, it is important to point out that when building tasks for a Mobile Application, ISAC uses a specific type of workflow called a Mobile Workflow (located in the Solutions > Mobile Projects > Workflows module) to link the pages of a task together.
Workflows are written in JSON and executed on the server. Workflows can support external integrations. Workflows can be built using the Workflow Builder, a GUI builder to help Solutions Admin visualise and simulate workflows.
-
Stateless Workflows - A typical workflow that is not tagged to any particular mobile project. A stateless workflow cannot be paused for user inputs or events. Except Mobile Workflows, all other types of workflows are stateless workflows.
-
State Event Workflows - Workflows that are triggered when a State Event occurs.
-
Model Event Workflows - Workflows that are triggered when a Model Event occurs.
-
Procedure Workflows - A stateless workflow that can be used for processing APIs
Note - to create Mobile Workflows that the mobile user interacts with in the Zinier Mobile App, go to Solution Builder - Mobile Projects - Workflows
Different type of nodes used in workflows. Their description can be found below;
|
Node |
Description |
Sample JSON |
|
|---|---|---|---|
|
Start Node |
Entry Point of a workflow Available attributes: - name*(String) - description (String) - nodeType*(String) - connectors*(JSONArray) |
"start": {
"connectors": [],
"name": "start",
"description": "Create a new ticket", "nodeType": "START"
}
|
|
|
Page Node |
Used to collect data with multiple inputs fields Available attributes: - name*(String) - description (String) - nodeType*(String) - connectors*(JSONArray) - processPage (String) pageId - inputVarMap (Inputs for the page) - outputVarMap*(JSONObject) |
"pageName": {
"connectors": [],
"name": "pageName",
"description": "pageDescription", "inputVarMap": {},
"outputVarMap": {},
"nodeType": "PAGE",
"processPage": "MyPAGE1"
"appendPageIds": [ "compInfo2", "contactInfo" ]
}
|
|
|
Network Node |
Use it to do GET/POST request to external servers. Available attributes: - name*(String) - description (String) - nodeType*(String) - networkId*(String) - connectors*(JSONArray) - inputVarMap (String) - outputVarMap (String) |
"networkNode": {
"connectors": [],
"name": "networkNode", "description": "networkNode", "networkId": "sera4", "inputVarMap": {}, "outputVarMap": {}, "nodeType": "NETWORK"
}
|
|
|
Query Node |
When you need some data from Database Available attributes: - name*(String) - description (String) - nodeType*(String) - connectors*(JSONArray) - inputVarMap ( inputs for query filter) - outputVarMap*(JSONArray) - queryId or query components* |
"fetchTicket": { "models": [
"tickets" ],
"connectors": [], "columns": {},
"name": "fetchTicket", "description": "getTickets", "inputVarMap": {}, "outputVarMap": {}, "nodeType": "QUERY"
}
|
|
|
Process Node |
Used to initialise the variables and JS validation. |
"getLatLong": {
"connectors": [],
"contextChangePermitted": true,
"name": "getLatLong",
"description": "getLatLong",
"processRule": "{contextVar.lat = 100; contextVar.long=200}", "nodeType": "PROCESS"
}
|
|
|
Model Node |
Used when we want to collect data Available attributes: - name*(String) - description (String) - nodeType*(String) - connectors*(JSONArray) - modelName*(String) - inputVarMap*(Inputs for the page) - outputVarMap (JSONObject) - operation*(Integer) |
"persist": {
"modelName": "workOrderTask", "connectors": [],
"name": "persist",
"description": "persist", "inputVarMap": {},
"nodeType": "MODEL" "operation": 0
},
Operations:
READ_OPERATION = 0 CREATE_OPERATION = 1 UPDATE_OPERATION = 2 DELETE_OPERATION = 3
|
|
|
Decision Node |
Condition validation for True/False. |
"name": "pageDecision",
"description": "pageDecision",
"processRule": "(contextVar.token === false)",
"nodeType": "DECISION" },
"pageDecision": { "connectors": [{
"exitPortType": "TrueStep",
"nodeId": "end"}, {
"exitPortType": "FalseStep",
"nodeId": "page2" }],
|
|
|
PDF Node |
Use it when you want to generate a PDF file. Available attributes: - name*(String) - description (String) - nodeType*(String) - connectors*(JSONArray) - templateId*(String), - outputVarMap (String) |
"pdfGen": {
"connectors": [],
"name": "pdfGen", "description": "Generate PDF", "nodeType": "PDF", "templateId": "pdfTemplate"
}
|
|
|
Workflow Node |
Use it to trigger another workflow. Available attributes: - name*(String) - description (String) - nodeType*(String) - processId*(String) - connectors*(JSONArray) - inputVarMap (String) - outputVarMap (String) |
"RunRecommend": {
"connectors": [],
"processId": "SMRecommend",
"name": "RunRecommend",
"description": "Run Recommend Process", "inputVarMap": {},
"outputVarMap": {},
"nodeType": "WORKFLOW"
},
|
|
|
Multi Decision Node |
Use it for Nested Condition validation similar to CASE Available attributes: -"DefaultStep" (boolean) -"condition" -"exitPortType" -"nodeId" -"condition" |
"multiDecision": { "connectors": [{
"DefaultStep": true,
"condition": "contextVar.installationPlan === 'ADSL Upgrade to Broadband'",
"exitPortType": "NextStep",
"nodeId": "fieldSalesADSLupgradeToBroadbandPage"},
{"condition": "contextVar.installationPlan === 'Broadband'",
"exitPortType": "NextStep",
"nodeId": "fieldSalesBroadbandPage"},
{
"condition": "contextVar.installationPlan === '5G and Broadband'",
"exitPortType": "NextStep",
"nodeId": "fieldSales5GBroadbandPage" }
],
"name": "multiDecision", "description": "MultiDecision", "nodeType": "MULTIDECISION"}
|
|
|
Instance Node |
Used as a process_instance table and this node is used for READ/UDATE operation. |
"instance": {
"connectors": [],
"name": "instance", "description": "instance", "inputVarMap": {
"id": "1234" },
"nodeType": "INSTANCE"
"operation": 0 }
|
|
|
Logger Node |
Used for all Alert,Error,Warning and Debug information. |
"logger": {
"connectors": [], "name": "logger", "description": "logger", "inputVarMap": {
"logLevel": "3" },
"nodeType": "LOGGER" }
|
|
|
Notify Node |
Use it when you want to send a notification. Available attributes: - name*(String) - description (String) - nodeType*(String) - connectors*(JSONArray) - templateId*(String) - notificationType*(String) - outputVarMap (String) |
{
"nodeType": "NOTIFY",
"name": "notify",
"description": "Notify via email", "notificationType": "email", "templateId": "templateId", "inputVarMap": {}, "outputVarMap": {}, "connectors": []
}
|
|
|
End Node |
Exit Point of a workflow Available attributes: - name*(String) - description (String) - nodeType*(String) |
 },
  "end": {
    "name": "end",
    "description": "End",
    "processRule": "",
    "nodeType": "END"
|
|
|
Publish Node |
Use it to publish an event. This will trigger start call for all workflows which are monitoring this event This will start all paused instances which are waiting for this event. Available attributes: - name*(String) - description (String) - nodeType*(String) - eventId*(String) - connectors*(JSONArray) - inputVarMap (String) - outputVarMap (String) |
|
|
|
External Node |
Use it to publish an event. This will trigger start call for all workflows which are monitoring this event This will start all paused instances which are waiting for this event. Available attributes: - name*(String) - description (String) - nodeType*(String) - externalNodeId*(String) - connectors*(JSONArray) - inputVarMap (String) - outputVarMap (String) |
|
|
|
Multi Records Model Node |
Multi Records Model Node lets a solution admin user create many records on a model using 1 node so that he does not need to create complex iteration logic within a workflow. |
"updateTaskDeployable": {
  "modelName": "workOrderTask",
  "connectors": [
    {
      "exitPortType": "NextStep",
      "nodeId": "end"
    }
  ],
  "multirecord": true,
  "name": "updateTaskDeployable",
  "description": "update deployable value from workOrderApproval table.",
  "inputVarMap": {
    "data1": "data"
  },
  "nodeType": "MODEL",
  "displayPositionX": 225,
  "operation": 2,
  "displayPositionY": 34
},
|
|
|
forEach node |
A new node to allow an end user to iterate through a list of records. |
"nodeId": { "connectors": [ { "exitPortType":"TrueStep",//nextstepiniteration "nodeId":"processQueryResult" }, { "exitPortType":"FalseStep",//exitnode after processing all elements "nodeId":"end" } ], "data":"customersInfo",//key containing data listincontextVar "name":"forEachLoop", "nodeType":"FOREACHLOOP" } |
|
|
while node |
A new node to allow an end user to iterate through a list of records. |
"nodeId": { "connectors": [ { "exitPortType":"TrueStep", "nodeId":"processQueryResult" }, { "exitPortType":"FalseStep", "nodeId":"end" } ], "processRule":"(contextVar.nodeId_index < 3)",//conditionfortruestep "data":"customerList",//key containing data listincontextVar "name":"while loop sample", "nodeType":"WHILELOOP" } |
|
Connector Name |
Description |
Sample |
|---|---|---|
|
NextStep |
This type can be used with nodes where we have only one connector for the next node and multi-decision node. |
{ "exitPortType":"NextStep", "nodeId":"nextNodeId" } |
|
TrueStep |
This type can be used only with Decision, forEach and while node. |
{ "exitPortType":"TrueStep", "nodeId":"nextNodeId" } |
|
FalseStep |
This type can be used only with Decision, forEach and while node. |
{ "exitPortType":"FalseStep", "nodeId":"nextNodeId" } |
‣ Gather customer requirements
‣ Identify external integration points
‣ Choose the appropriate objects required in the workflow.
‣ Build the model and define the relationship
‣ Identify workflow types STATELESS, MOBILE, etc.
‣ Build workflow and assign to projects
‣ Test and deploy workflows.
Overview
A Stateless Workflow is one that is not tagged to any particular mobile project. A stateless workflow cannot be paused for user inputs or events. Except Mobile Workflows, all other types of workflows are stateless workflows.
Examples of stateless workflows:
-
Notify web users when SLA of a dispatched task is breached
-
Auto approve a task when a certain time has lapsed
-
Get AI recommendations
Relationship to other modules
|
Module |
Description |
|---|---|
|
Add Workflows into a solution bundle |
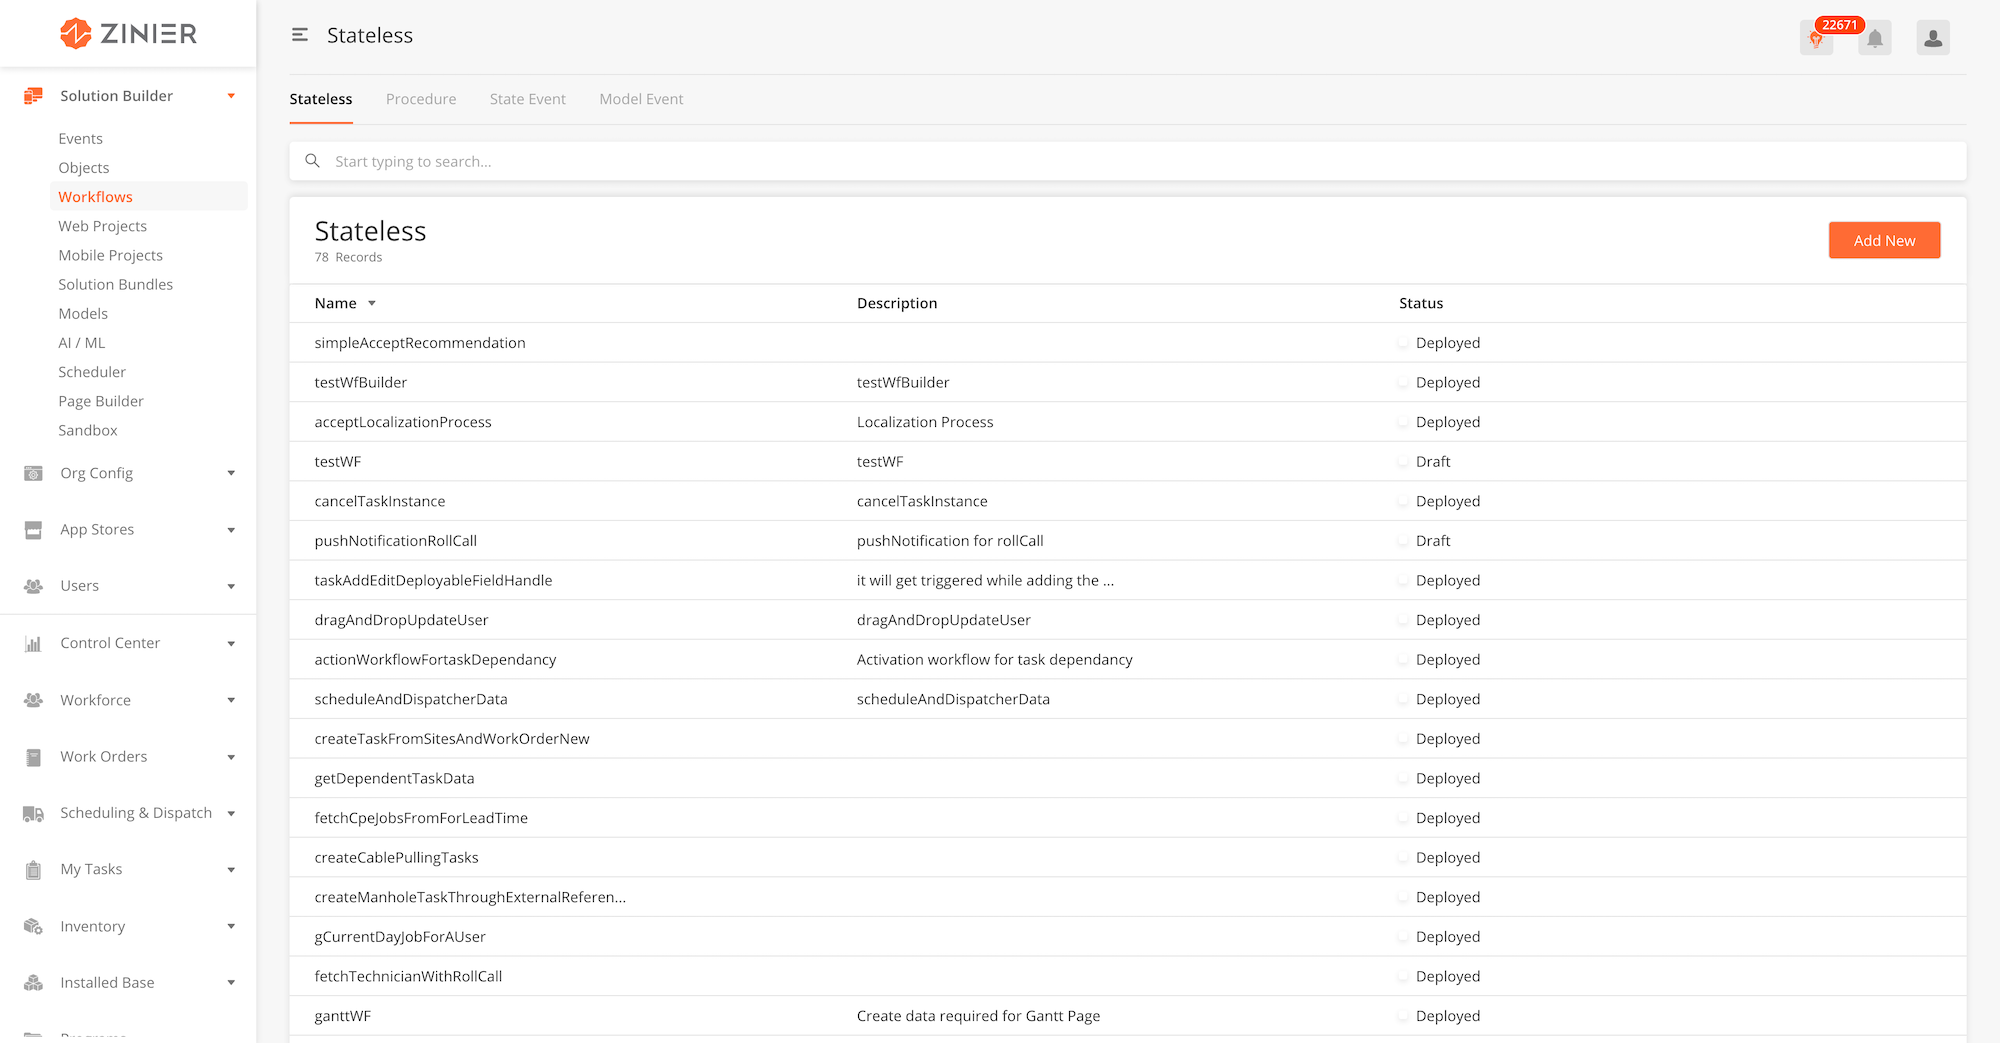
Adding Stateless Workflow
-
From the main page, click Add New to open the side panel.
-
Enter a Name and an optional Description for the stateless workflow.
-
Enter the Workflow Settings section, which includes the JSON object which contains the entire workflow
-
Include other Workflow settings including Start Event ID and Max Latency. Details of these fields are found below.
-
Click Save to save the workflow. Once a new workflow is saved, it will be in Draft state by default.
-
Click Publish to publish the workflow or close the sidepanel to remain in Draft status.
-
In Published state, click Deploy to deploy the workflow in the organisation. Once deployed, the workflow will be active.
Edit or Delete Stateless Workflows
-
You can edit a record by hovering over the row of the desired record from the main page table and clicking the Edit icon. When you click Edit, the side panel will appear. Editing any workflow in Published or Deployed state will revert the workflow to Draft status.
-
You cannot delete stateless workflows.
Use Workflow Builder
-
You can use Workflow Builder to build and simulate your workflows in a drag-and-drop GUI interface. You can enter Workflow Builder by hovering over the row of the desired record from the main page table and clicking the
Workflow Buildericon. -
For more details on how to use Workflow Builder, go to Solution Builder > Workflow Builder
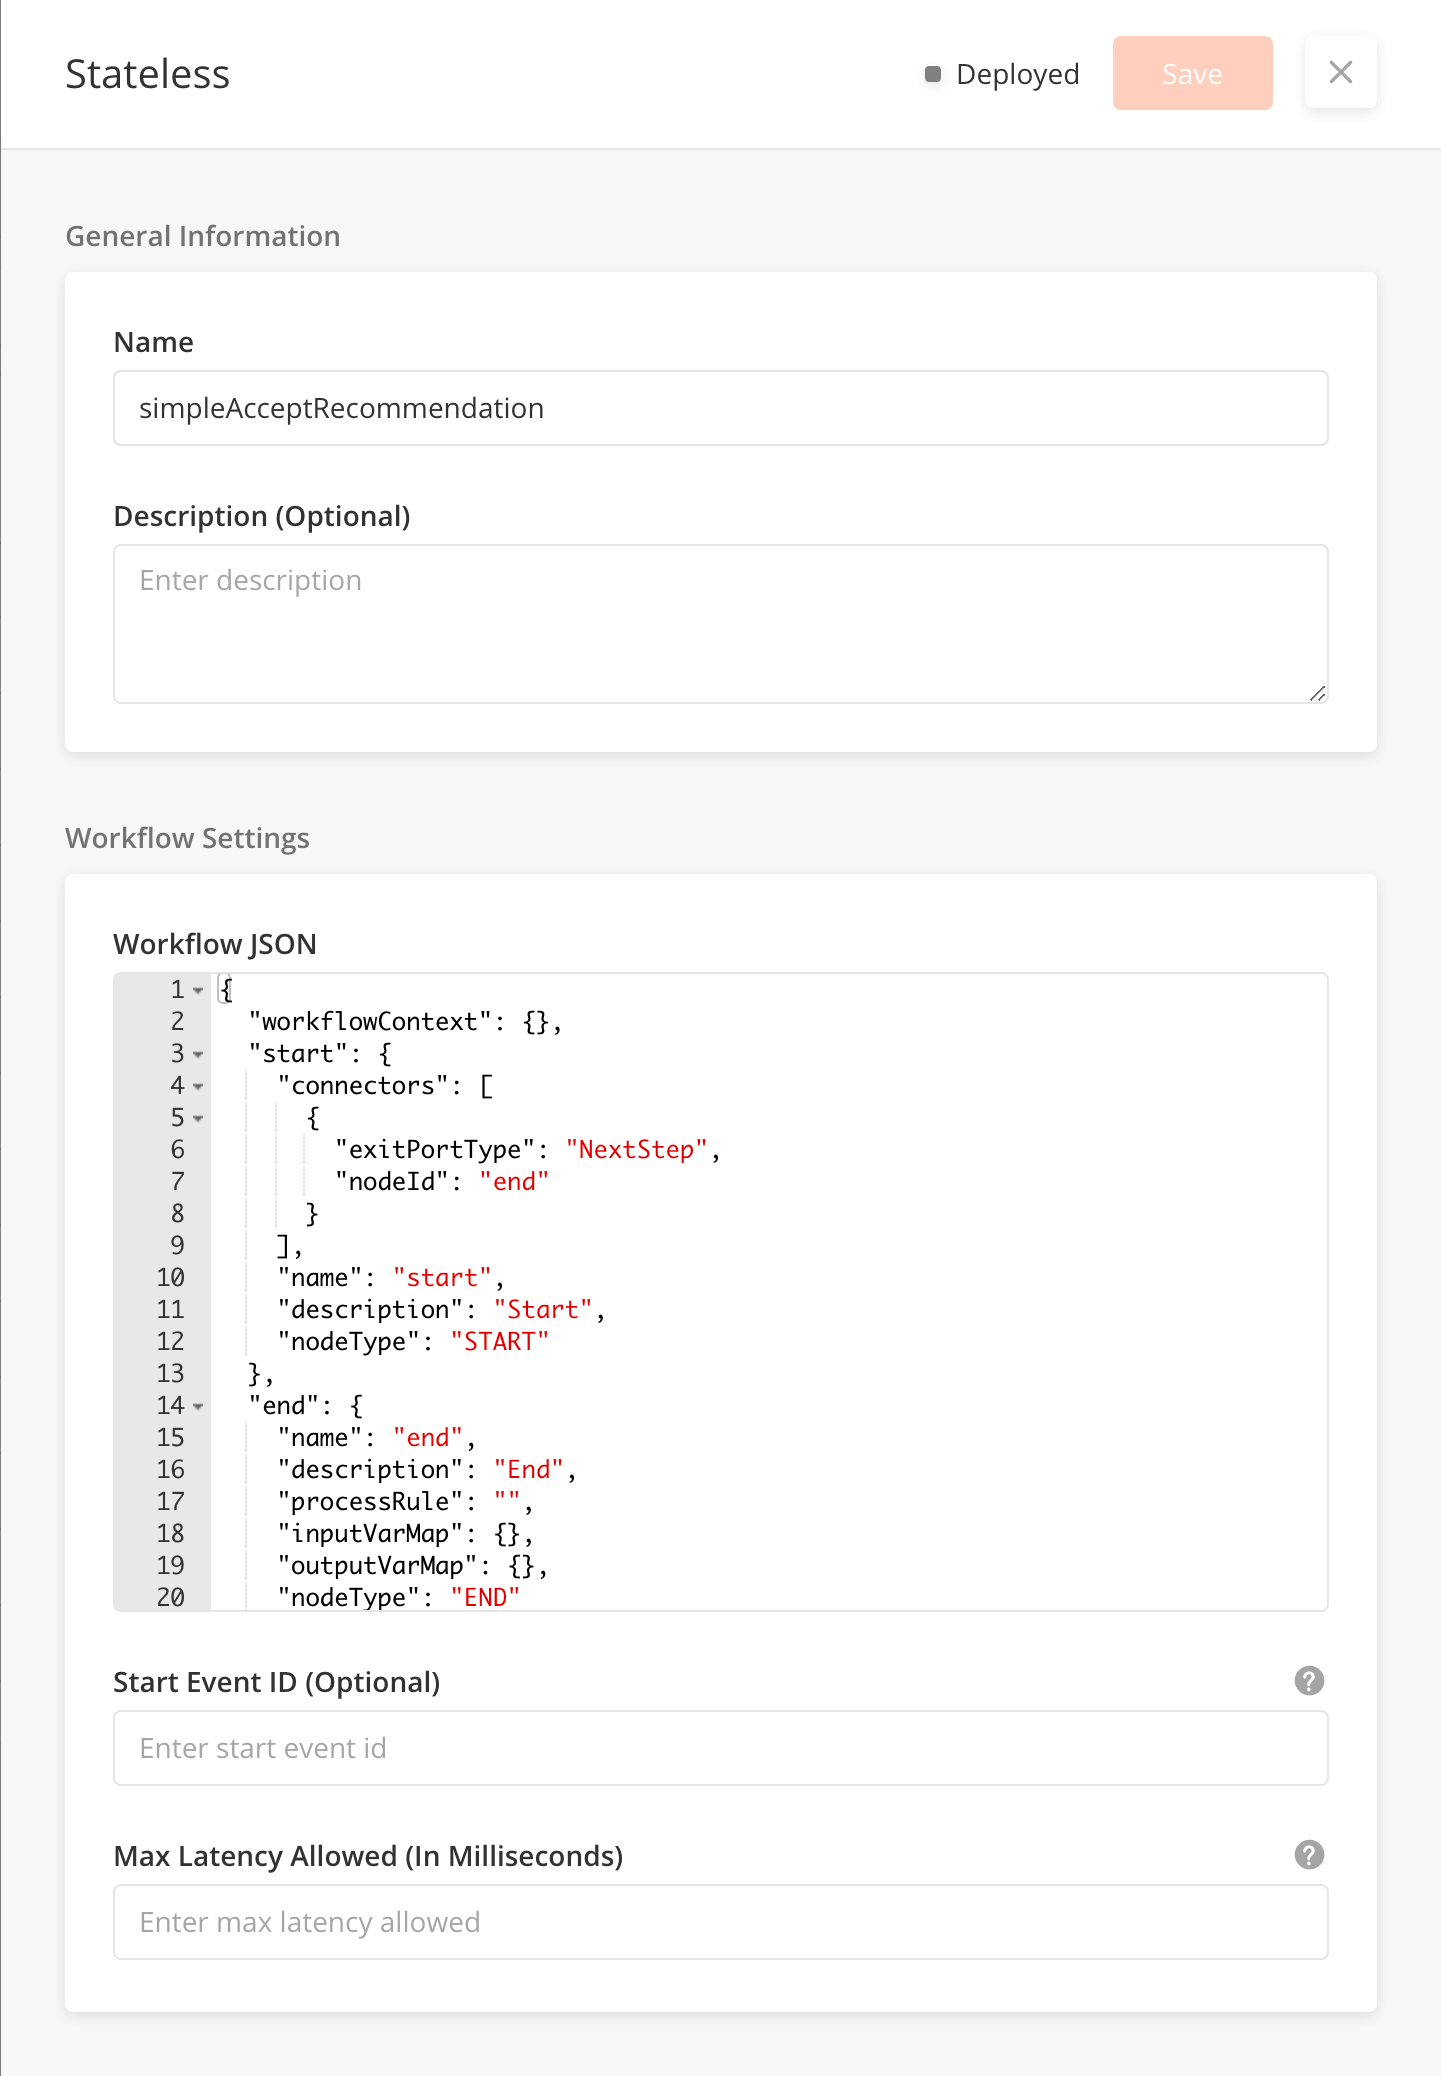
Fields in the Side Panel
|
Field Name |
Description |
Example |
|---|---|---|
|
Name |
||
|
Description |
Describe what the workflows does when executed |
|
|
Workflow JSON |
The JSON where you build a workflow |
{
  "getNotifications": {
    "filter": "{$id} = {@notifiyId}",
    "models": [
      "notifications"
    ],
    "connectors": [
      {
        "exitPortType": "NextStep",
        "nodeId": "getUserGroup"
      }
    ],
    "columns": {
      "id": "notifications.id",
      "docTemplateId": "notifications.docTemplateId",
      "emailSubject": "notifications.emailSubject"
    },
    "name": "getTechnicianTask",
    "description": "getTechnicianTask",
    "inputVarMap": {
      "notifiyId": "notifiyId"
    },
    "outputVarMap": {
      "data": "notifications"
    },
    "nodeType": "QUERY"
  },
  "start": {
    "connectors": [
      {
        "exitPortType": "NextStep",
        "nodeId": "initiateData"
      }
    ],
    "name": "start",
    "description": "Create a new",
    "nodeType": "START"
  },
  "getUserGroup": {
    "filter": "{$name} = {@emailGroup}",
    "models": [
      "Group"
    ],
    "connectors": [
      {
        "exitPortType": "NextStep",
        "nodeId": "processNotifications"
      }
    ],
    "columns": {
      "name": "Group.name",
      "id": "Group.id"
    },
    "name": "getUserGroup",
    "description": "getUserGroup",
    "inputVarMap": {
      "emailGroup": "emailGroup"
    },
    "outputVarMap": {
      "data": "groups"
    },
    "nodeType": "QUERY"
  },
  "processNotifications": {
    "connectors": [
      {
        "exitPortType": "NextStep",
        "nodeId": "sendNotification"
      }
    ],
    "contextChangePermitted": true,
    "name": "processNotifications",
    "description": "processNotifications",
    "processRule": "{if(contextVar.notifications !== undefined) {contextVar.templateId = 'testDoc'; contextVar.emailSub = contextVar.emailSubject;contextVar.groupId = 'solution_admin';}}",
    "nodeType": "PROCESS"
  },
  "sendNotification": {
    "connectors": [
      {
        "condition": "",
        "connectorDisplayType": "CurvedLine",
        "connectorLabel": "",
        "exitPortType": "NextStep",
        "nodeId": "updateTaskEscalationVal"
      }
    ],
    "name": "sendNotification",
    "description": "sendNotification",
    "inputVarMap": {
      "groupId": "groupId",
      "targetType": "targetType"
    },
    "notificationType": "email",
    "outputVarMap": {},
    "templateId": "testDoc",
    "nodeType": "NOTIFY",
    "displayPositionX": 150,
    "displayPositionY": 34
  },
  "workflowNodes": [
    "start",
    "initiateData",
    "getEscalationlevels",
    "taskDecision",
    "processEscalationList",
    "getNotifications",
    "getUserGroup",
    "processNotifications",
    "sendNotification",
    "updateTaskEscalationVal",
    "end"
  ],
  "getEscalationlevels": {
    "filter": "{$escalationHierarchyId}={@escalationHierarchyId}",
    "models": [
      "escalationLevels"
    ],
    "connectors": [
      {
        "exitPortType": "NextStep",
        "nodeId": "taskDecision"
      }
    ],
    "columns": {
      "escalationValue": "escalationLevels.escalationValue",
      "escalationTime": "escalationLevels.escalationTime",
      "level": "escalationLevels.level",
      "notificationId": "escalationLevels.notificationId",
      "escalationGroupId": "escalationLevels.escalationGroupId",
      "escalationUnit": "escalationLevels.escalationUnit"
    },
    "name": "getEscalationlevels",
    "description": "getEscalationlevels",
    "inputVarMap": {
      "escalationHierarchyId": "escalationHierarchyId"
    },
    "outputVarMap": {
      "data": "escalationLevelList"
    },
    "nodeType": "QUERY"
  },
  "taskDecision": {
    "connectors": [
      {
        "exitPortType": "TrueStep",
        "nodeId": "processEscalationList"
      },
      {
        "exitPortType": "FalseStep",
        "nodeId": "end"
      }
    ],
    "name": "taskDecision",
    "description": "taskDecision",
    "processRule": "(contextVar.escalationLevelList !== undefined)",
    "nodeType": "DECISION"
  },
  "workflowContext": {
    "targetType": "GROUP"
  },
  "updateTaskEscalationVal": {
    "modelName": "workOrderTask",
    "connectors": [
      {
        "condition": "",
        "connectorDisplayType": "CurvedLine",
        "connectorLabel": "",
        "exitPortType": "NextStep",
        "nodeId": "end"
      }
    ],
    "name": "updateTaskEscalationVal",
    "description": "updateTaskEscalationVal",
    "inputVarMap": {
      "escalationValue": "currentEscalationTime",
      "workOrderTaskId": "id",
      "nextLevel": "currentEscalationLevel"
    },
    "nodeType": "MODEL",
    "displayPositionX": 225,
    "operation": 2,
    "displayPositionY": 34
  },
  "end": {
    "name": "end",
    "description": "End",
    "processRule": "",
    "nodeType": "END"
  },
  "processRecommendDecision": {
    "connectors": [
      {
        "exitPortType": "TrueStep",
        "nodeId": "publishEvent"
      },
      {
        "exitPortType": "FalseStep",
        "nodeId": "end"
      }
    ],
    "name": "processRecommendDecision",
    "description": "processRecommendDecision",
    "processRule": "(contextVar.taskList.length > 0)",
    "nodeType": "DECISION"
  },
  "processEscalationList": {
    "connectors": [
      {
        "exitPortType": "NextStep",
        "nodeId": "getNotifications"
      }
    ],
    "contextChangePermitted": true,
    "name": "processEscalationList",
    "description": "processEscalationList",
    "processRule": "{ var currentLevel = contextVar.pTask.currentEscalationLevel; contextVar.nextLevel = parseInt(contextVar.pTask.currentEscalationLevel) + 1; for(var i = 0; i < contextVar.escalationLevelList.length; i ++ ) {if(parseInt(currentLevel) === contextVar.escalationLevelList[i].level) {contextVar.emailGroup = contextVar.escalationLevelList[i].escalationGroupId; contextVar.notifiyId = contextVar.escalationLevelList[i].notificationId} else if(parseInt(contextVar.nextLevel) === contextVar.escalationLevelList[i].level) {contextVar.escTime = new Date(contextVar.pTask.currentEscalationTime).getTime(); contextVar.ev =new Date( ((parseInt(contextVar.escalationLevelList[i].escalationValue)) * 60 * 1000) + contextVar.escTime) ; contextVar.workOrderTaskId = contextVar.pTask.id; pageContext.currentEscalationTime =  pageContext.ev.getFullYear() + '-' + pageContext.ev.getMonth() + 1 + '-' + pageContext.ev.getDate() + ' '+ pageContext.ev.getHours() + ':' + pageContext.ev.getMinutes() + ':' + pageContext.ev.getSeconds(); }}}",
    "nodeType": "PROCESS"
  },
  "initiateData": {
    "connectors": [
      {
        "exitPortType": "NextStep",
        "nodeId": "getEscalationlevels"
      }
    ],
    "contextChangePermitted": true,
    "name": "initiateData",
    "description": "initiateData",
    "processRule": "{contextVar.escalationHierarchyId = contextVar.pTask.escalationHierarchyId}",
    "nodeType": "PROCESS"
  }
}
|
|
Start Event ID (Optional) |
Insert the workflow ID which should be triggered when |
|
|
Max Latency Allowed (In Milliseconds) |
Maximum time (in miliseconds) allowed for workflow execution. The workflow will be terminated after. Minimum value is 100. Do not insert less than 100. |
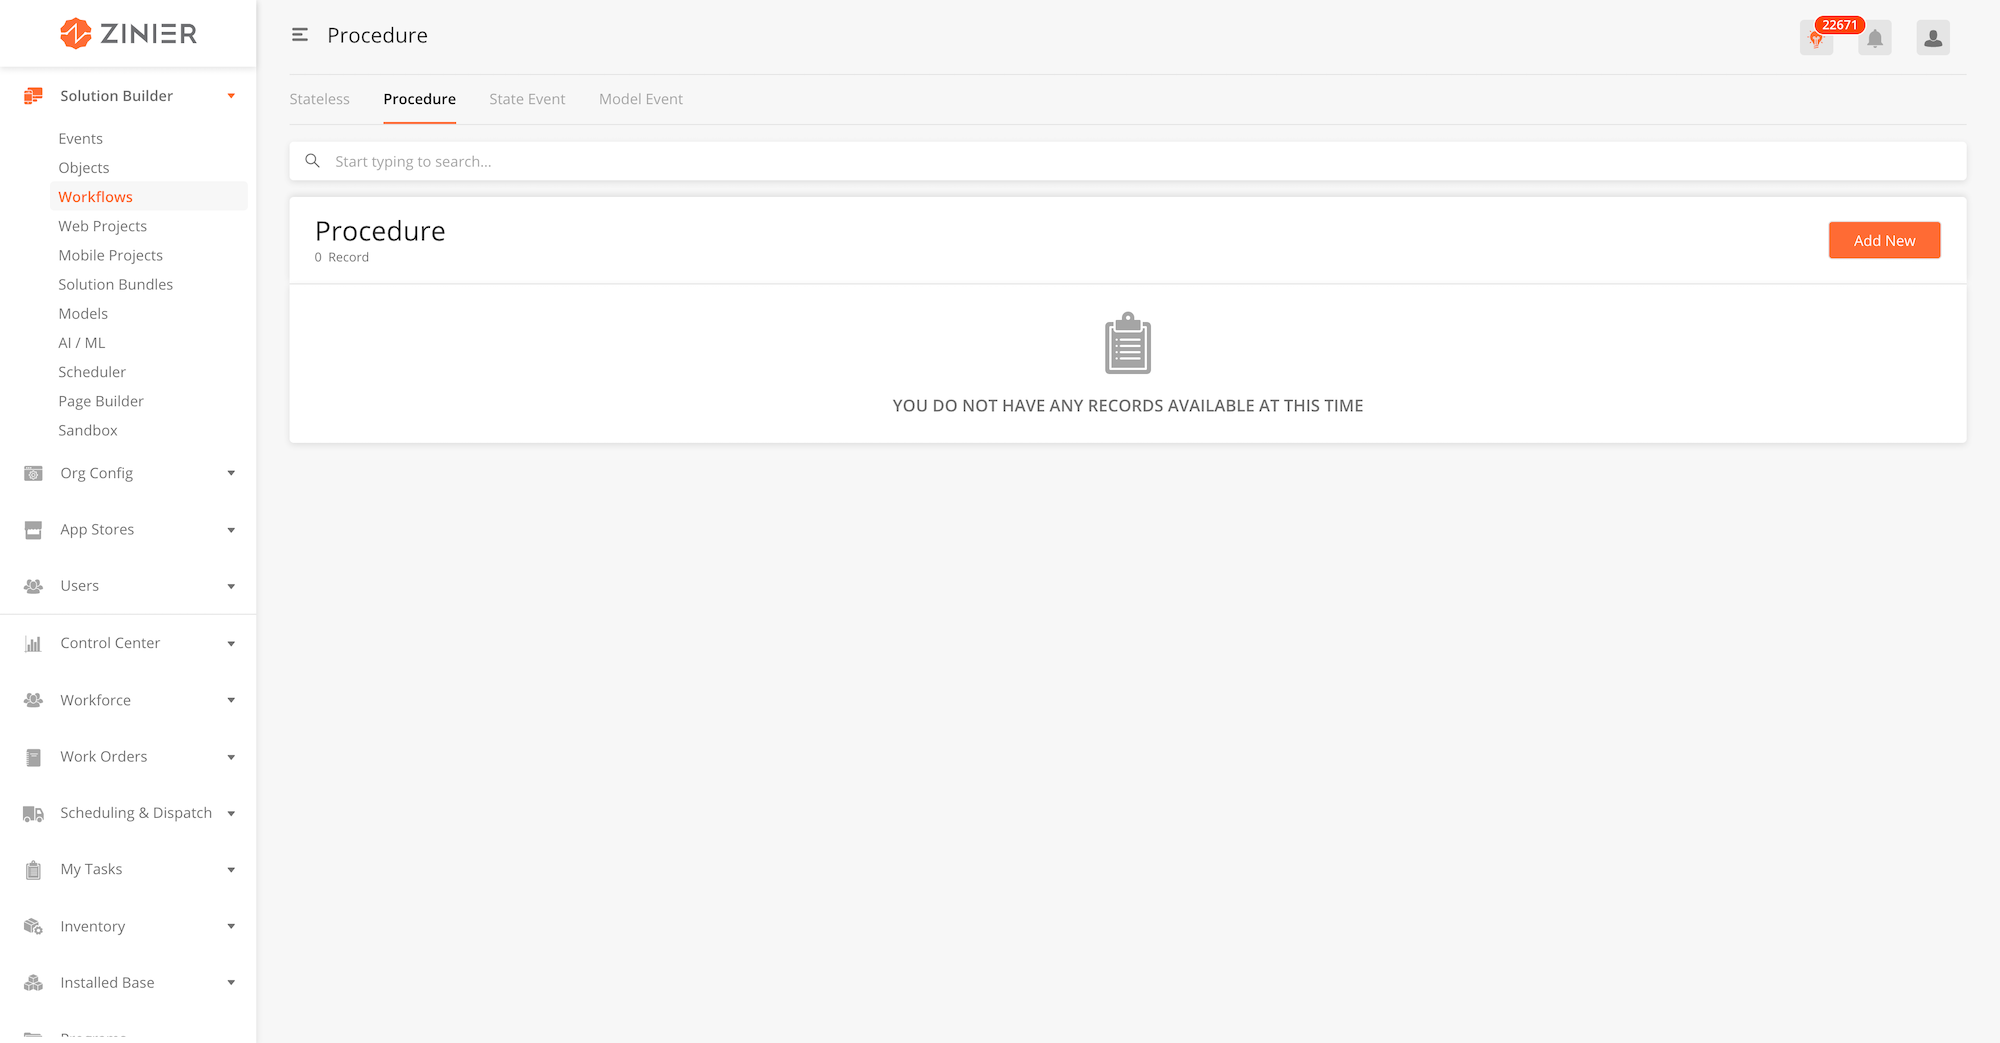
Overview
Procedure Workflows is stateless workflow that can be used to process APIs.
Relationship to other modules
|
Module |
Description |
|---|---|
|
Add Workflows into a solution bundle |
|
|
Create Model Events that will trigger corresponding State Event Workflow(s). |
Add New Process Event Workflow
-
From the main page, click Add New to open the side panel.
-
Enter a Name and an optional Description for the state event workflow.
-
Enter the Workflow Settings section, which includes the JSON object which contains the entire workflow
-
Include other Workflow settings including Start Event ID and Max Latency. Details of these fields are found below.
-
Click Save to save the workflow. Once a new workflow is saved, it will be in Draft state by default.
-
Click Publish to publish the workflow or close the sidepanel to remain in Draft status.
-
In Published state, click Deploy to deploy the workflow in the organisation. Once deployed, the workflow will be active.
Edit or Delete Process Event Workflows
-
You can edit a record by hovering over the row of the desired record from the main page table and clicking the Edit icon. When you click Edit, the side panel will appear. Editing any workflow in Published or Deployed state will revert the workflow to Draft status.
-
You cannot delete state event workflows.
Use Workflow Builder
-
You can use Workflow Builder to build and simulate your workflows in a drag-and-drop GUI interface. You can enter Workflow Builder by hovering over the row of the desired record from the main page table and clicking the
Workflow Buildericon. -
For more details on how to use Workflow Builder, go to Solution Builder > Workflow Builder
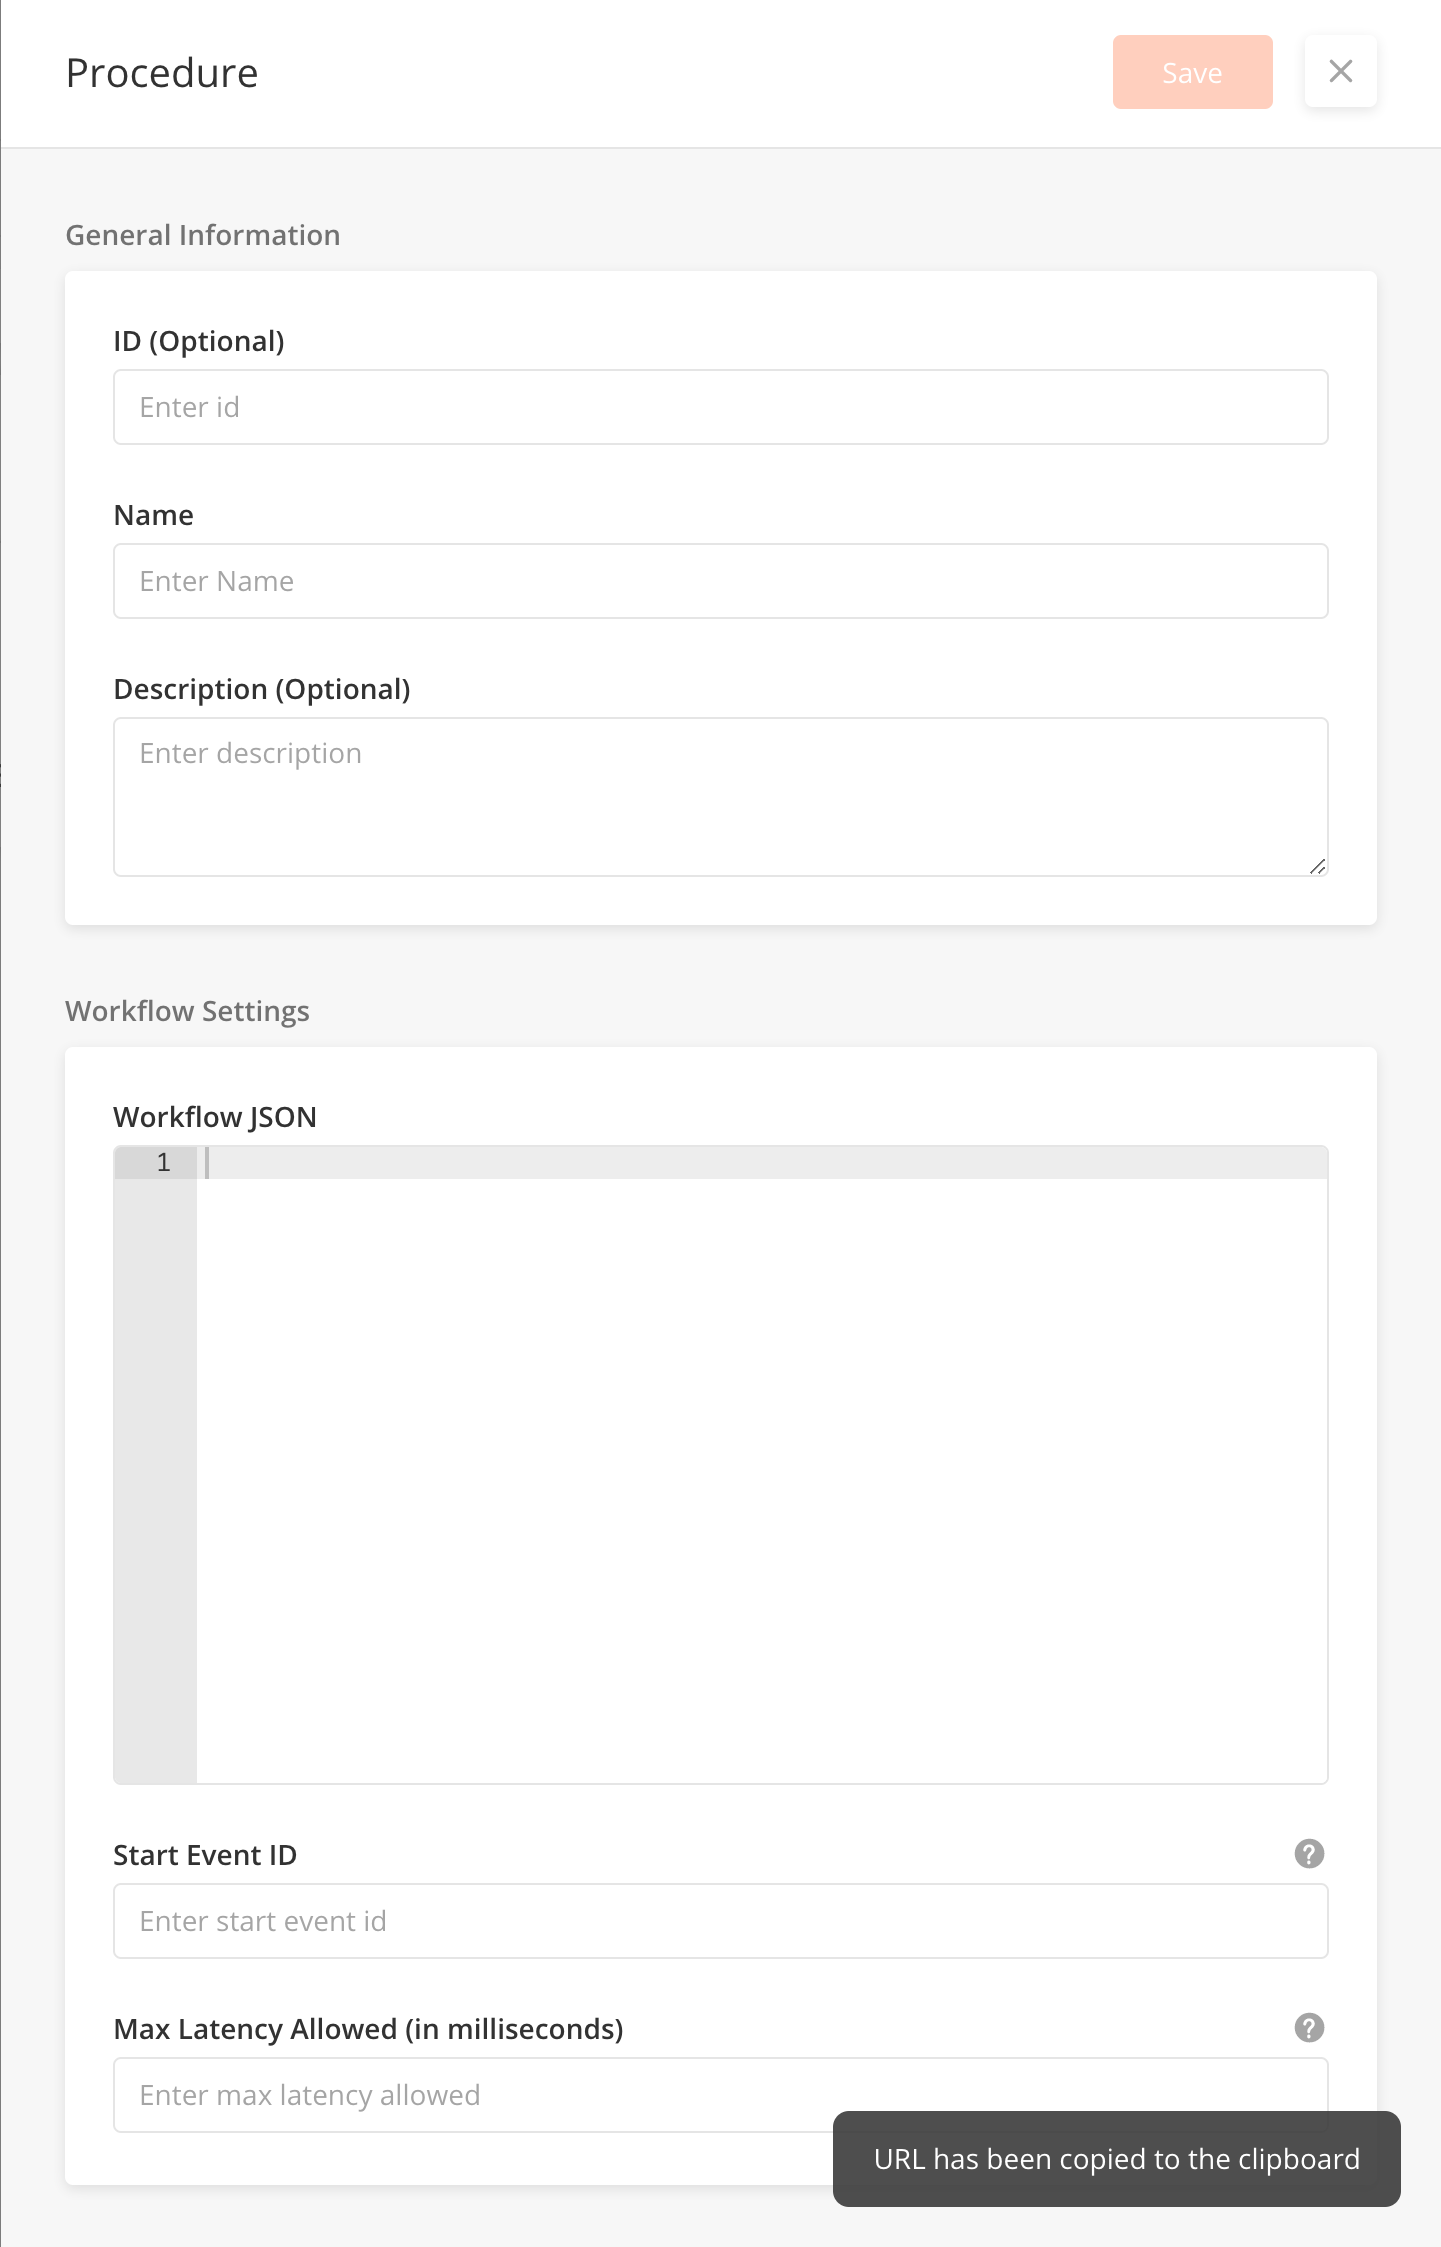
Fields in the side panel
|
Field Name |
Description |
Example |
|---|---|---|
|
Name |
Name of workflow |
|
|
Description |
Describe what the workflow does when executed |
|
|
Workflow JSON |
The JSON where you build a workflow |
|
|
Start Event ID (Optional) |
Insert the workflow you want to trigger based on the event |
|
|
Max Latency Allowed (In Milliseconds) |
Maximum time (in miliseconds) allowed for workflow execution. The workflow will be terminated after. Minimum value is 100. Do not insert less than 100. |
Overview
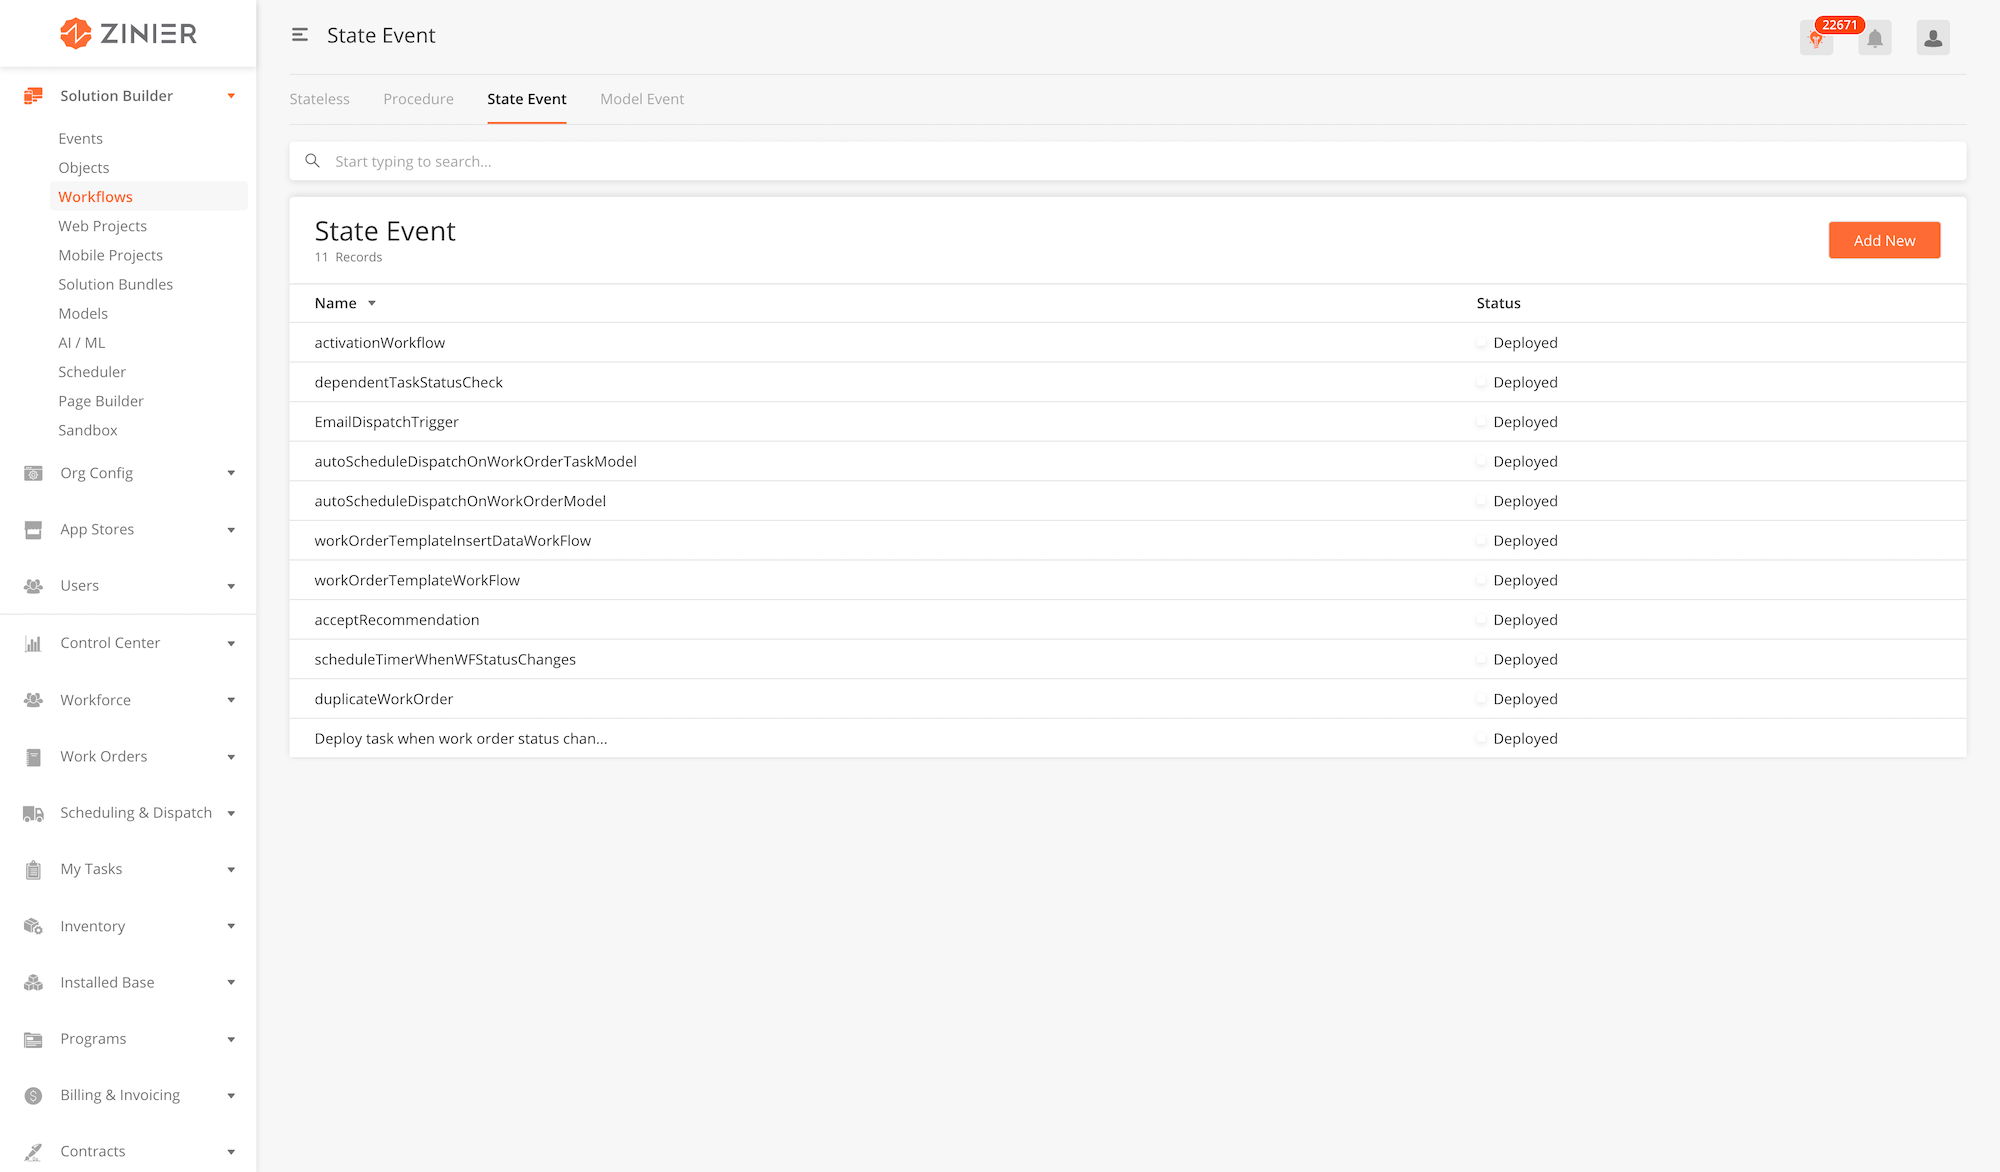
State Event Workflows are workflows linked to a field of a model. They are triggered by State Events. State Events can be configured in the Events Module within Solution Builder and are linked to a change in a field's value in a model.
These changes could be
-
AFTER_INSERT - after a new field value was inserted into the model
-
AFTER_UPDATE - after a field value was updated into the model
-
AFTER_DELETE - after a field value was deleted in the model
Examples of state event workflows include
-
Deploying a task when work order status changes (after_update)
-
Workflow when a work order is duplicated (after_insert)
-
Updating stock and inventory once work order status changes (after_update)
-
Send Feedback form once a work order status is changed to completed (after_update)
Relationship to other modules
|
Module |
Description |
|---|---|
|
Add Workflows into a solution bundle |
|
|
Create State Events that will trigger corresponding State Event Workflow(s). |
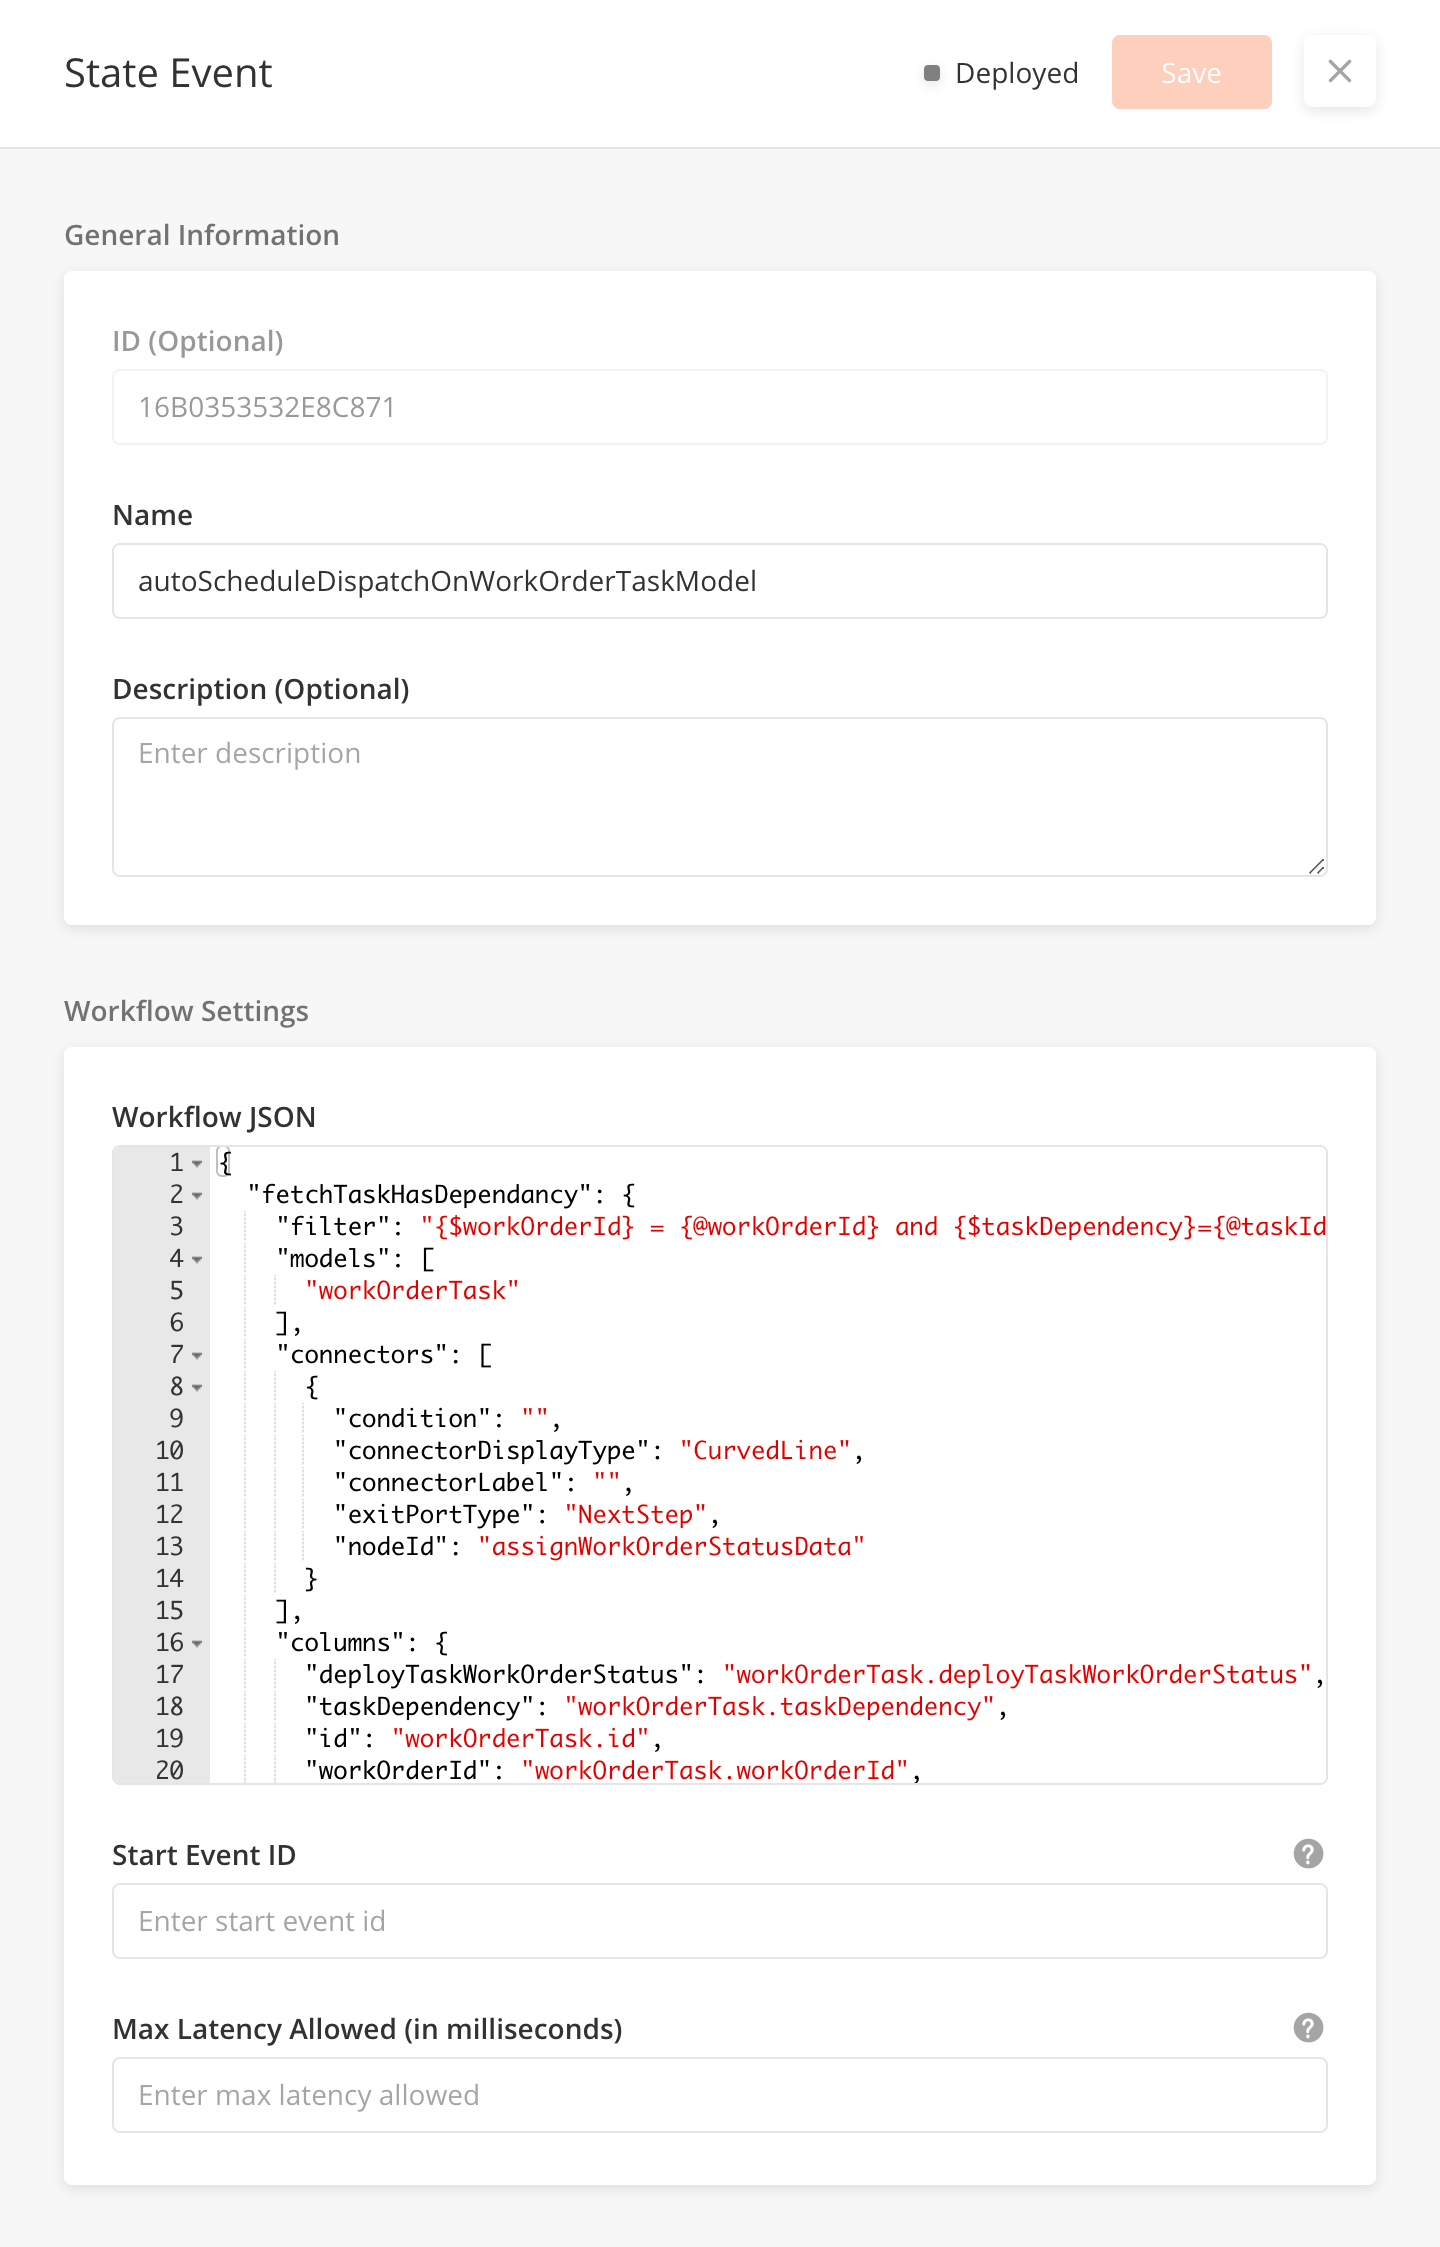
Adding State Event Workflow
-
From the main page, click Add New to open the side panel.
-
Enter a Name and an optional Description for the state event workflow.
-
Enter the Workflow Settings section, which includes the JSON object which contains the entire workflow
-
Include other Workflow settings including Start Event ID and Max Latency. Details of these fields are found below.
-
Click Save to save the workflow. Once a new workflow is saved, it will be in Draft state by default.
-
Click Publish to publish the workflow or close the sidepanel to remain in Draft status.
-
In Published state, click Deploy to deploy the workflow in the organisation. Once deployed, the workflow will be active.
Edit or Delete State Event Workflows
-
You can edit a record by hovering over the row of the desired record from the main page table and clicking the Edit icon. When you click Edit, the side panel will appear. Editing any workflow in Published or Deployed state will revert the workflow to Draft status.
-
You cannot delete state event workflows.
Use Workflow Builder
-
You can use Workflow Builder to build and simulate your workflows in a drag-and-drop GUI interface. You can enter Workflow Builder by hovering over the row of the desired record from the main page table and clicking the
Workflow Buildericon. -
For more details on how to use Workflow Builder, go to Solution Builder > Workflow Builder
State Event Workflow Fields
|
Field Name |
Description |
Example |
|---|---|---|
|
Name |
Name of the workflow. It must be in camel case. |
autoScheduleDispatchWorkOrder |
|
Description |
Describe what the workflow is supposed to do |
This workflow automatically schedules and dispatches new work orders |
|
Workflow JSON |
This is where the Workflow is built |
{
  "processData": {
    "connectors": [
      {
        "exitPortType": "NextStep",
        "nodeId": "getworkOrderStatus"
      }
    ],
    "contextChangePermitted": true,
    "name": "processData",
    "description": "processData",
    "processRule": "{contextVar.workOrderId = contextVar.data.id; contextVar.workOrderStatus = contextVar.data.status;}",
    "nodeType": "PROCESS"
  },
  "decisionTaskCheck": {
    "connectors": [
      {
        "exitPortType": "TrueStep",
        "nodeId": "processedRecords"
      },
      {
        "exitPortType": "FalseStep",
        "nodeId": "end"
      }
    ],
    "name": "decision",
    "description": "decision",
    "processRule": "(contextVar.idWorkOrderTask != undefined && contextVar.idWorkOrderTask != '' && contextVar.workOrderStatus === contextVar.statusWorkOrderTask)",
    "nodeType": "DECISION"
  },
  "workflowContext": {},
  "processedRecords": {
    "connectors": [
      {
        "exitPortType": "NextStep",
        "nodeId": "login"
      }
    ],
    "contextChangePermitted": true,
    "name": "processData",
    "description": "processData",
    "processRule": "{contextVar.payload = {};contextVar.payload['columns'] = ['deployable'];data = [];for(i=0;i<contextVar.queryData.length;i++){contextVar.queryData[i]['modelName'] = 'workOrderTask'; contextVar.queryData[i]['deployable'] = true;}contextVar.payload['data'] = contextVar.queryData;}",
    "nodeType": "PROCESS"
  },
  "start": {
    "connectors": [
      {
        "exitPortType": "NextStep",
        "nodeId": "processData"
      }
    ],
    "name": "start",
    "description": "start",
    "nodeType": "START"
  },
  "getRecords": {
    "connectors": [
      {
        "exitPortType": "NextStep",
        "nodeId": "decisionTaskCheck"
      }
    ],
    "contextChangePermitted": true,
    "name": "getRecords",
    "description": "getRecords",
    "processRule": "{contextVar.idWorkOrderTask = contextVar.queryData[0].id; contextVar.recver = contextVar.queryData[0].recver; contextVar.statusWorkOrderTask = contextVar.queryData[0].workOrderTaskStatus;}",
    "nodeType": "PROCESS"
  },
  "end": {
    "name": "end",
    "description": "end",
    "inputVarMap": {},
    "outputVarMap": {},
    "nodeType": "END"
  },
  "getworkOrderStatus": {
    "filter": "{$idWorkOrder} = {@workOrderId} and {$statusW} =  {$workOrderTaskStatus}",
    "models": [
      "workOrder",
      "workOrderTask"
    ],
    "connectors": [
      {
        "exitPortType": "NextStep",
        "nodeId": "getRecords"
      }
    ],
    "columns": {
      "recver": "workOrderTask.recver",
      "workOrderTaskStatus": "workOrderTask.deployTaskWorkOrderStatus",
      "statusW": "workOrder.status",
      "id": "workOrderTask.id",
      "idWorkOrder": "workOrder.id"
    },
    "name": "getworkOrderStatus",
    "description": "Get workOrder and workOrderTask status",
    "inputVarMap": {
      "workOrderId": "workOrderId"
    },
    "outputVarMap": {
      "data": "queryData"
    },
    "nodeType": "QUERY"
  },
  "getAuthrizationTokenAndData": {
    "connectors": [
      {
        "exitPortType": "NextStep",
        "nodeId": "updateDeployable"
      }
    ],
    "contextChangePermitted": true,
    "name": "getAuthrizationTokenAndData",
    "description": "getAuthrizationTokenAndData",
    "processRule": "{contextVar.token = contextVar.autorizationToken[0].token; contextVar.loginId = contextVar.autorizationToken[0].loginId; contextVar.orgId = contextVar.autorizationToken[0].orgId;}",
    "nodeType": "PROCESS"
  },
  "updateDeployable": {
    "connectors": [
      {
        "exitPortType": "NextStep",
        "nodeId": "end"
      }
    ],
    "name": "updateDeployable",
    "description": "updateDeployable",
    "networkId": "16971DC5A3A52CD5",
    "inputVarMap": {
      "loginId": "loginId",
      "payload": "payload",
      "orgId": "orgId",
      "token": "token"
    },
    "outputVarMap": {},
    "nodeType": "NETWORK"
  },
  "login": {
    "connectors": [
      {
        "exitPortType": "NextStep",
        "nodeId": "getAuthrizationTokenAndData"
      }
    ],
    "name": "login",
    "description": "login",
    "networkId": "169756B15B780A83",
    "inputVarMap": {},
    "outputVarMap": {
      "data": "autorizationToken"
    },
    "nodeType": "NETWORK"
  },
  "workflowNodes": [
    "start",
    "processData",
    "getworkOrderStatus",
    "getRecords",
    "decisionTaskCheck",
    "processedRecords",
    "login",
    "getAuthrizationTokenAndData",
    "updateDeployable",
    "end"
  ]
}
|
|
Start Event ID (Optional) |
Define the workflow to be triggered based on the event. |
|
|
Max Latency Allowed (In Milliseconds) |
Maximum time (in miliseconds) allowed for workflow execution. The workflow will be terminated after. Minimum value is 100. Do not insert less than 100. |
100 |
Overview
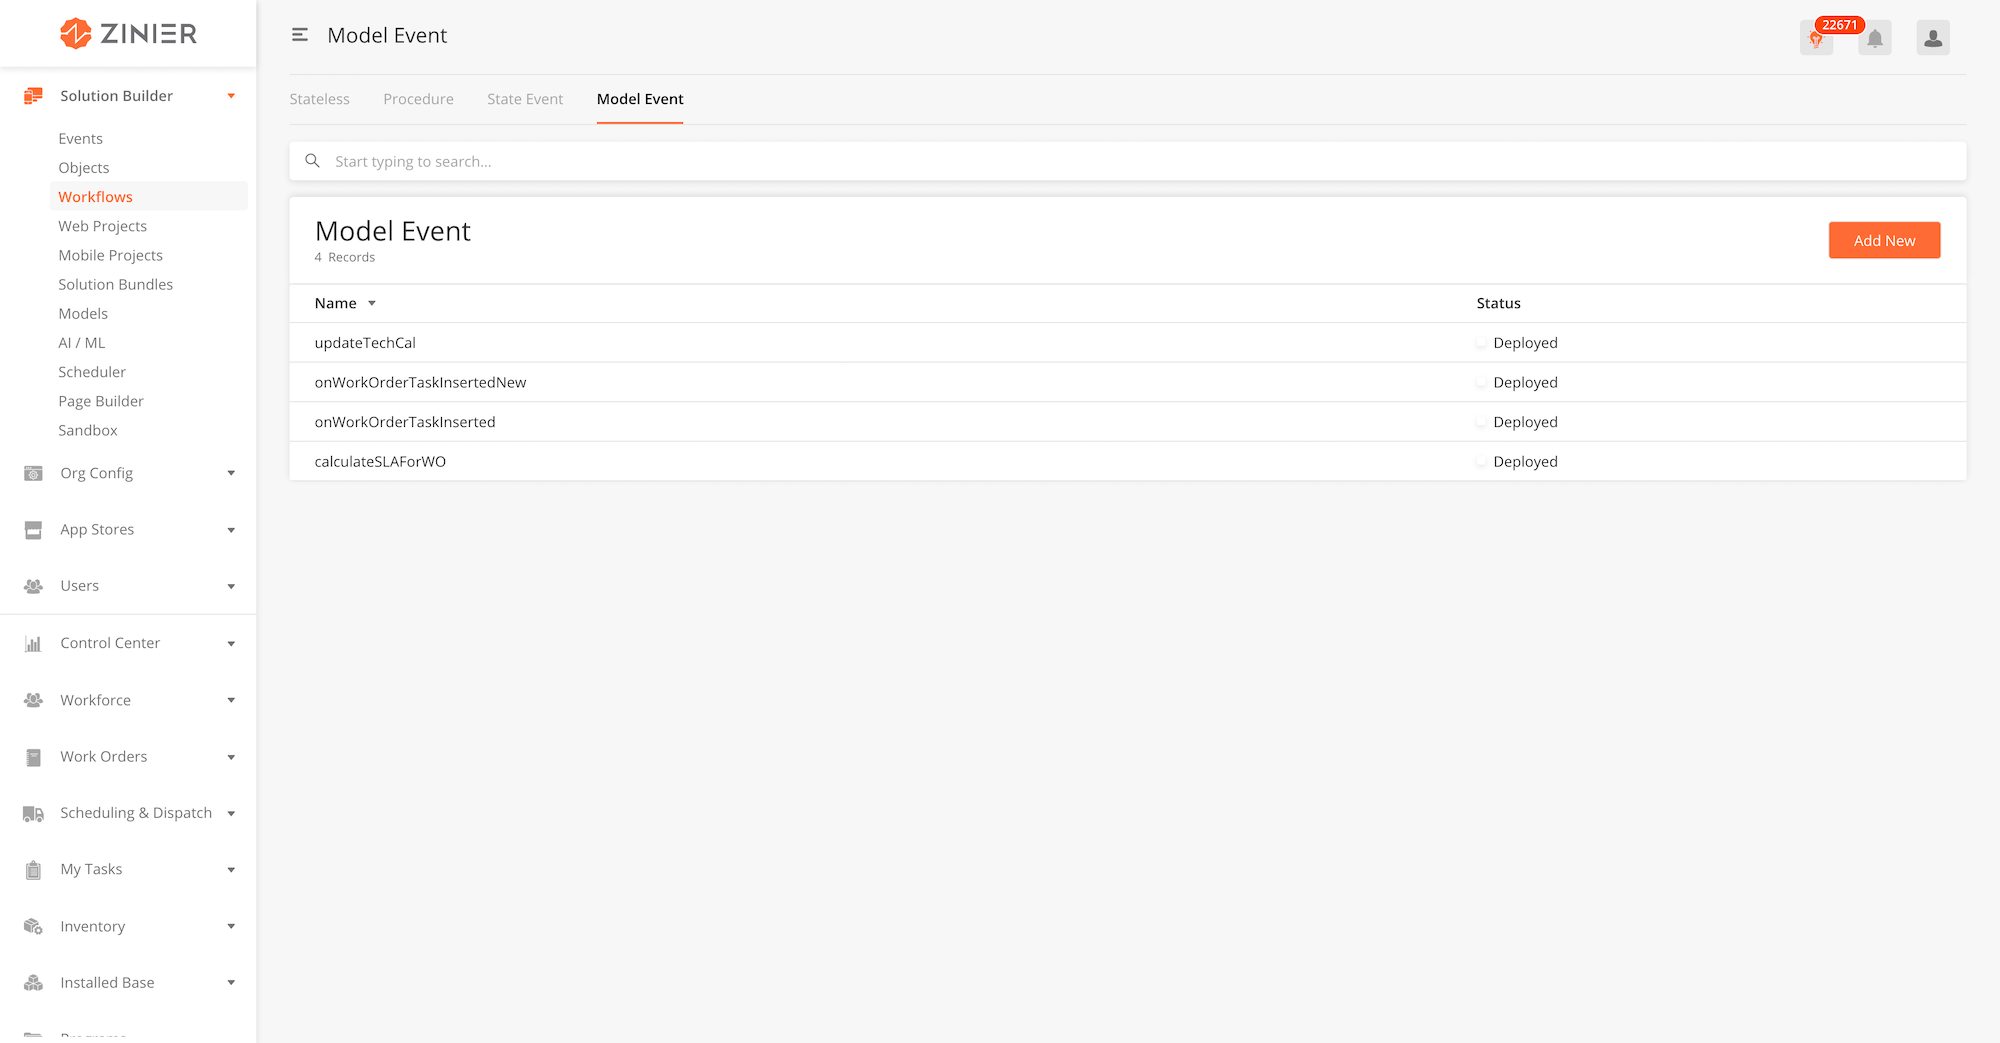
Model Events Workflows are linked with models. They are triggered by Model Events configured in the Events module within Solution Builder and are linked to changes to a model.
These changes to a model could be;
-
BEFORE_INSERT
-
BEFORE_UPDATE
-
BEFORE_DELETE
-
AFTER_INSERT
-
AFTER_UPDATE
-
AFTER_DELETE
Examples of Model Event Workflows include;
-
Send an email when a new user is created (after_insert)
Relationship to other modules
|
Module |
Description |
|---|---|
|
Add Workflows into a solution bundle |
|
|
Create Model Events that will trigger corresponding State Event Workflow(s). |
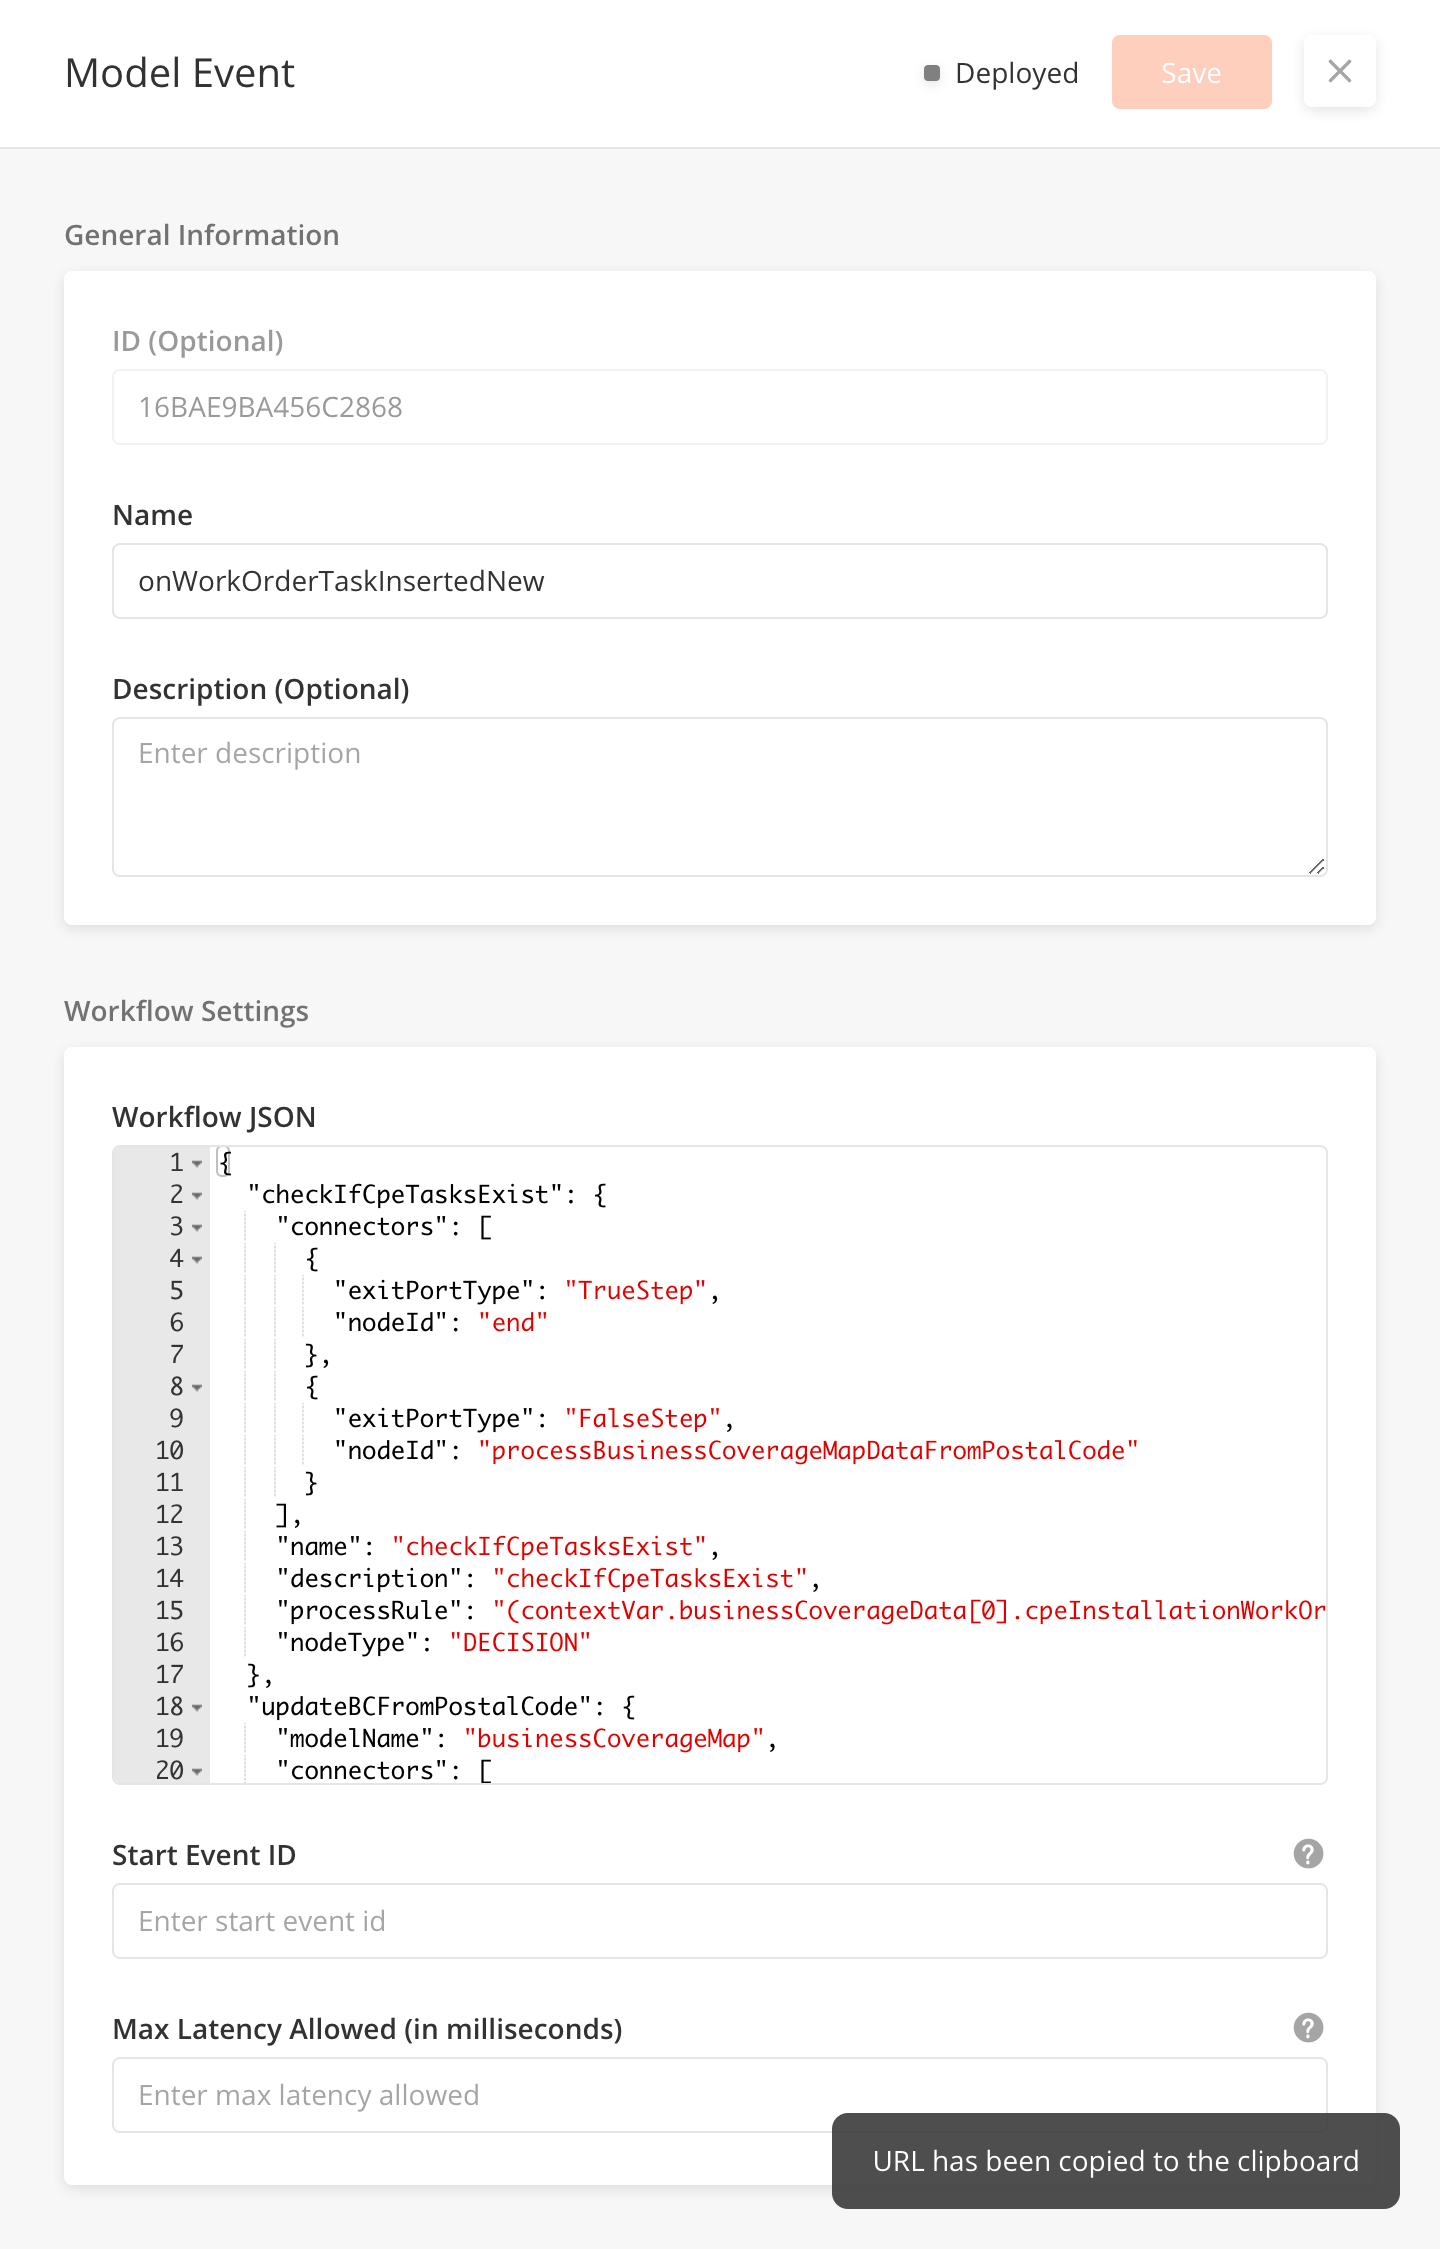
Adding Model Event Workflow
-
From the main page, click Add New to open the side panel.
-
Enter a Name and an optional Description for the state event workflow.
-
Enter the Workflow Settings section, which includes the JSON object which contains the entire workflow
-
Include other Workflow settings including Start Event ID and Max Latency. Details of these fields are found below.
-
Click Save to save the workflow. Once a new workflow is saved, it will be in Draft state by default.
-
Click Publish to publish the workflow or close the sidepanel to remain in Draft status.
-
In Published state, click Deploy to deploy the workflow in the organisation. Once deployed, the workflow will be active.
Edit or Delete Model Event Workflows
-
You can edit a record by hovering over the row of the desired record from the main page table and clicking the Edit icon. When you click Edit, the side panel will appear. Editing any workflow in Published or Deployed state will revert the workflow to Draft status.
-
You cannot delete model event workflows.
Use Workflow Builder
-
You can use Workflow Builder to build and simulate your workflows in a drag-and-drop GUI interface. You can enter Workflow Builder by hovering over the row of the desired record from the main page table and clicking the
Workflow Buildericon. -
For more details on how to use Workflow Builder, go to Solution Builder > Workflow Builder
Fields in the Side Panel
|
Field Name |
Description |
Example |
|---|---|---|
|
Name |
Name of the workflow. It must be in camel case. |
onWorkOrderTaskInsertNew |
|
Description |
Describe what the workflow is supposed to do |
|
|
Workflow JSON |
This is where the workflow is built |
{
  "workflowContext": {
    "targetType": "USER",
    "userId": "16716529E523CB43"
  },
  "start": {
    "connectors": [
      {
        "exitPortType": "NextStep",
        "nodeId": "notify"
      }
    ],
    "name": "start",
    "description": "Create a new",
    "nodeType": "START"
  },
  "end": {
    "name": "end",
    "description": "End",
    "processRule": "",
    "nodeType": "END"
  },
  "workflowNodes": [
    "start",
    "notify",
    "end"
  ],
  "notify": {
    "connectors": [
      {
        "exitPortType": "NextStep",
        "nodeId": "end"
      }
    ],
    "name": "notify",
    "description": "Notify via email",
    "inputVarMap": {
      "targetType": "targetType",
      "userId": "userId"
    },
    "notificationType": "email",
    "outputVarMap": {},
    "nodeType": "NOTIFY",
    "templateId": "testDoc"
  }
}
|
|
Start Event ID (Optional) |
Define the workflow to be triggered based on the event |
|
|
Max Latency Allowed (In Milliseconds) |
Maximum time (in miliseconds) allowed for workflow execution. The workflow will be terminated after. Minimum value is 100. Do not insert less than 100. |
the content in this page is not ready
Every workflow requires an entry point. The entry point for every workflow is this node.
Start node json requires name, node type, and one connector for the next node to execute in a workflow.
Attributes
|
Attribute |
Type |
Description |
|---|---|---|
|
Name |
string |
Name for the start node |
|
Description (optional) |
string |
Informational text for the functionality of this node. |
|
id |
string |
Id for the start node |
|
nodeType |
string |
‘START’ |
|
Connectors |
JSONArray |
for next node details |
Sample JSON
{
  "name": "startZW3ef",
  "description": "Entry point for a workflow",
  "id": "startZW3ef",
  "nodeType": "START",
  "connectors": [
    {
      "exitPortType": "NextStep",
      "nodeId": "nextNodeId"
    }
  ]
}
Page node allows us to collect data with multiple user inputs. Page node renders a page created from available input field components.
Attributes
|
Attribute |
Type |
Description |
|---|---|---|
|
*name |
string |
Name for page node |
|
description (optional) |
string |
Informational text for functionality of this node |
|
*nodeType |
string |
‘PAGE’ |
|
*connectors |
JSONArray |
Details of the next node |
|
processPage |
string |
Id of the page to render. |
|
inputVarMap |
Sends inputs to the page. |
|
|
*outputVarMap |
JSONObject |
Gets all user inputs from the page. |
Sample JSON
{
  "name": "pageUIH2a",
  "description": "Provide some description for your page",
  "id": "pageUIH2a",
  "nodeType": "PAGE",
  "connectors": [
    {
      "exitPortType": "NextStep",
      "nodeId": "nextNodeId"
    }
  ],
  "inputVarMap": {},
  "outputVarMap": {},
  "processPage": "Id of page to render for this node"
}
As the node name suggests, with this we can decide workflow's next node for execution.
Condition validation for True/False.
Attributes
|
Attribute |
Type |
Description |
|---|---|---|
|
*name |
string |
Name of the Decision Node. |
|
description |
string |
More information on the node’s functionality |
|
*nodeType |
string |
Decision |
|
*connectors |
JSONArray |
Details for the next node |
|
processRule |
Optional. Use when you want to send some dynamic inputs. Specify an existing rule or an inline rule definition |
Sample JSON
{
  "name": "decisionZJh0q",
  "description": "Use this for decision in workflow",
  "id": "decisionZJh0q",
  "nodeType": "DECISION",
  "connectors": [
    {
      "exitPortType": "TrueStep",
      "nodeId": "nodeForTrueStep"
    },
    {
      "exitPortType": "FalseStep",
      "nodeId": "nodeForFalseStep"
    }
  ],
  "processRule": "Specify an existing rule or an inline rule definition"
}
The process node allows a user to process workflow data using javascript code. Users can write and pass their javascript logic with the process rule key. The system will execute this using javascript engine.
Attributes
|
Attribute |
Type |
Description |
|---|---|---|
|
*name |
string |
Name of the process node. |
|
description |
string |
(Optional) Details of the process node. Use this for processing data in workflow. |
|
*nodeType |
’PROCESS’ |
|
|
Connectors |
JSONARRAY |
Details of the next node |
|
processRule |
Specify an existing rule on an inline rule definition. This holds the JavaScript logic for execution. |
|
|
contextChangePermitted |
boolean |
To reflect processRule changes in workflow data, set to True. |
Sample JSON
{
  "name": "processnWRtW",
  "description": "Use this for processing data in workflow",
  "id": "processnWRtW",
  "nodeType": "PROCESS",
  "connectors": [
    {
      "exitPortType": "NextStep",
      "nodeId": "nextNodeId"
    }
  ],
  "processRule": "Specify an existing rule or an inline rule definition"
}
Query node allows us to fetch data from database tables. We can perform joins, filters, and get selected columns from multiple tables.
Attributes
|
Attributes |
Type |
Description |
|---|---|---|
|
*name |
string |
Name of the query node |
|
description |
string |
(Optional) Description of the query node. |
|
*nodeType |
string |
QUERY |
|
filter |
JSONARRAY |
Clause for data filter |
|
models |
JSONARRAY |
An array of models to get from the query |
|
*connectors |
JSONARRAY |
Details of the next node |
|
columns |
JSONARRAY |
A list of columns to get from the query |
|
inputVarMap |
JSONARRAY |
To send filter inputs to a query |
|
outputVarMap |
JSONARRAY |
To pass queried data to a workflow |
|
queryID |
string |
Specify existing queryID to use for query attributes |
Sample JSON
{
  "name": "querymBhBl",
  "description": "Provide some description for your query",
  "id": "querymBhBl",
  "nodeType": "QUERY",
  "filter": "{$field1Name}={@field1Filter}",
  "models": [
    "model1"
  ],
  "connectors": [
    {
      "exitPortType": "NextStep",
      "nodeId": "nextNodeId"
    }
  ],
  "columns": {
    "field2Name": "model1.field2",
    "field1Name": "model1.field1Name"
  },
  "inputVarMap": {
    "field1Filter": "field1FilterValue"
  },
  "outputVarMap": {
    "data": "outputContextVarKey"
  },
  "queryId": "specify existing queryId to use for query attributes"
}
Model node provides the functionality to perform DB level actions for data collected in the workflow. Available operations are read (0), create(1), update(2), delete(3), upset(4).
By default, the model node processes a single record. To process multiple records, the user needs to set the multi-record key as true.
With a multi record set as true, inputVarMap expects data to be an array of records.
Attributes
|
Attribute |
Type |
Description |
|---|---|---|
|
*name |
string |
Name of the Model Node. |
|
description |
string |
More information on the node’s functionality |
|
*nodeType |
string |
MODEL |
|
*connectors |
JSONArray |
Details for the next node |
|
modelName |
Model name is a model mapped to a database table. |
|
|
multiRecord |
boolean |
False is the default value. What happens when multirecord is set to false? |
|
operation |
int |
the operation to execute the data. Available operations:
|
|
inputVarMap |
JSONObject |
Pass data for model operations. |
|
*outputVarMap |
JSONObject |
Returns processed data from the database. Users can specify the mapping for different fields and this data will be available in workflow data for other nodes |
Sample JSON
{
  "name": "modelA6NFM",
  "description": "Provide some description for your model node",
  "id": "modelA6NFM",
  "nodeType": "MODEL",
  "connectors": [
    {
      "exitPortType": "NextStep",
      "nodeId": "nextNodeId"
    }
  ],
  "inputVarMap": {
    "field2Value": "field2AttributeName",
    "field1Value": "field1AttributeName"
  },
  "outputVarMap": {
    "field1AttributeName": "outputField1contextVarKey"
  },
  "operation": 1,
  "modelName": "",
  "multiRecord": false
}
With a notify node, a user can send an email or push notifications to users. Notify node works with a pre-configured template and a user can pass dynamic inputs to this template using input var map.
Attributes
|
Attribute |
Type |
Description |
|---|---|---|
|
*name |
string |
Name of the notify node. |
|
description |
string |
Description of the notify node. |
|
*nodeType |
string |
NOTIFY |
|
*connectors |
JSONArray |
Details for the next node. |
|
inputVarMap |
JSONArray |
Optional. Use to pass tasks and new assigned details. |
|
*outputVarMap |
string |
Returns output context. |
|
*notificationType |
string |
emailpush |
|
templateId |
string |
The Id of the document template to use for this notification. |
Sample JSON
{
  "name": "notifyctKKq",
  "description": "Provide some description for your notify node",
  "id": "notifyctKKq",
  "nodeType": "NOTIFY",
  "connectors": [
    {
      "exitPortType": "NextStep",
      "nodeId": "nextNodeId"
    }
  ],
  "inputVarMap": {
    "templateField1": "templateField1",
    "templateField2": "templateField2"
  },
  "outputVarMap": {
    "data": "outputContextVarKey"
  },
  "notificationType": "email|push",
  "templateId": "Doc template to use for this notification"
}
With PDF node, the user can generate a pdf for the pre-configured template by passing dynamic values using inputVarMap.
Attributes
|
Attribute |
Type |
Description |
|---|---|---|
|
*name |
string |
Name of the PDF Node |
|
description |
string |
More information on the node’s functionality |
|
*nodeType |
string |
|
|
connectors |
JSONArray |
Details for the next node |
|
templateId |
string |
Id of the template to be used for this pdf |
|
inputVarMap |
JSONArray |
Optional. Use when you want to send some dynamic inputs. |
|
*outputVarMap |
string |
Use it to pass received data from the network call |
Sample JSON
{
  "name": "pdfvAicX",
  "description": "Provide some description for your pdf node",
  "id": "pdfvAicX",
  "nodeType": "PDF",
  "connectors": [
    {
      "exitPortType": "NextStep",
      "nodeId": "nextNodeId"
    }
  ],
  "inputVarMap": {
    "templateField1": "templateField1",
    "templateField2": "templateField2"
  },
  "outputVarMap": {
    "pdfFile": "outputContextVarKey"
  },
  "templateId": "Doc template to use for this pdf"
}
Use a network node when you want to get some data from an external system to use in workflow or to send some data to an external system collected through the workflow.
Page node allows us to collect data with multiple user inputs. Page node renders a page created from available input field components.
Attributes
|
Attribute |
Type |
Description |
|---|---|---|
|
*name |
string |
|
|
description |
string |
More information on the node’s functionality |
|
*nodeType |
string |
NETWORK |
|
*connectors |
JSONArray |
Details for the next node |
|
networkId |
stringpageId |
Id of the network that contains connection |
|
inputVarMap |
Optional. Use when you want to send some dynamic inputs. |
|
|
*outputVarMap |
JSONObject |
Use it to pass received data from the network call |
Sample JSON
{
  "name": "networkgTZAq",
  "description": "Provide some description for your network node",
  "id": "networkgTZAq",
  "nodeType": "NETWORK",
  "connectors": [
    {
      "exitPortType": "NextStep",
      "nodeId": "nextNodeId"
    }
  ],
  "networkId": "id of ZNetwork to use with this network node",
  "inputVarMap": {
    "parameter2": "networkParameter2",
    "parameter1": "networkParameter1"
  },
  "outputVarMap": {
    "data": "outputContextVarKey"
  }
}
Workflow node allows to execute a child workflow within the main workflow and use the response of child workflow in the main workflow.
Attributes
|
Attribute |
Type |
Description |
|---|---|---|
|
*name |
string |
|
|
description |
string |
More information on the node’s functionality |
|
*nodeType |
string |
WORKFLOW |
|
*connectors |
JSONArray |
Details for the next node |
|
*processId |
string |
Process ID to execute in this node |
|
inputVarMap |
string |
Optional. Use when you want to send some dynamic inputs. |
|
outputVarMap |
string |
Use it to pass received data from the network call |
Sample JSON
{
  "name": "workflowaTtfP",
  "description": "Provide some description for your workflow node",
  "id": "workflowaTtfP",
  "nodeType": "WORKFLOW",
  "connectors": [
    {
      "exitPortType": "NextStep",
      "nodeId": "nextNodeId"
    }
  ],
  "processId": "process id to execute in this node",
  "inputVarMap": {
    "parameter2": "processParameter2",
    "parameter1": "processParameter1"
  },
  "outputVarMap": {
    "data": "outputContextVarDataKey"
  }
}
Use it for Nested Condition validation similar to CASE
Multi-decision is similar to decision node, except this allows us to select from more than two steps. It's similar to the switch statement of javascript. You need to define a default node connector to handle false condition of all connectors. In multi decision condition needs to be defined inside connector definition.
Attributes
|
Attribute |
Type |
Description |
|---|---|---|
|
*name |
string |
|
|
description |
string |
More information on the node’s functionality |
|
*nodeType |
string |
MULTIDECISION |
|
*connectors |
JSONArray |
Details for the next node |
Sample JSON
{
  "name": "multidecisionEqTbP",
  "description": "Provide some description for your multidecision node",
  "id": "multidecisionEqTbP",
  "nodeType": "MULTIDECISION",
  "connectors": [
    {
      "DefaultStep": true,
      "condition": "condition for decision making",
      "exitPortType": "NextStep",
      "nodeId": "nodeIdForThisCondition"
    },
    {
      "DefaultStep": false,
      "condition": "condition for decision making",
      "exitPortType": "NextStep",
      "nodeId": "nodeIdForThisCondition"
    },
    {
      "DefaultStep": false,
      "condition": "condition for decision making",
      "exitPortType": "NextStep",
      "nodeId": "nodeIdForThisCondition"
    }
  ]
}
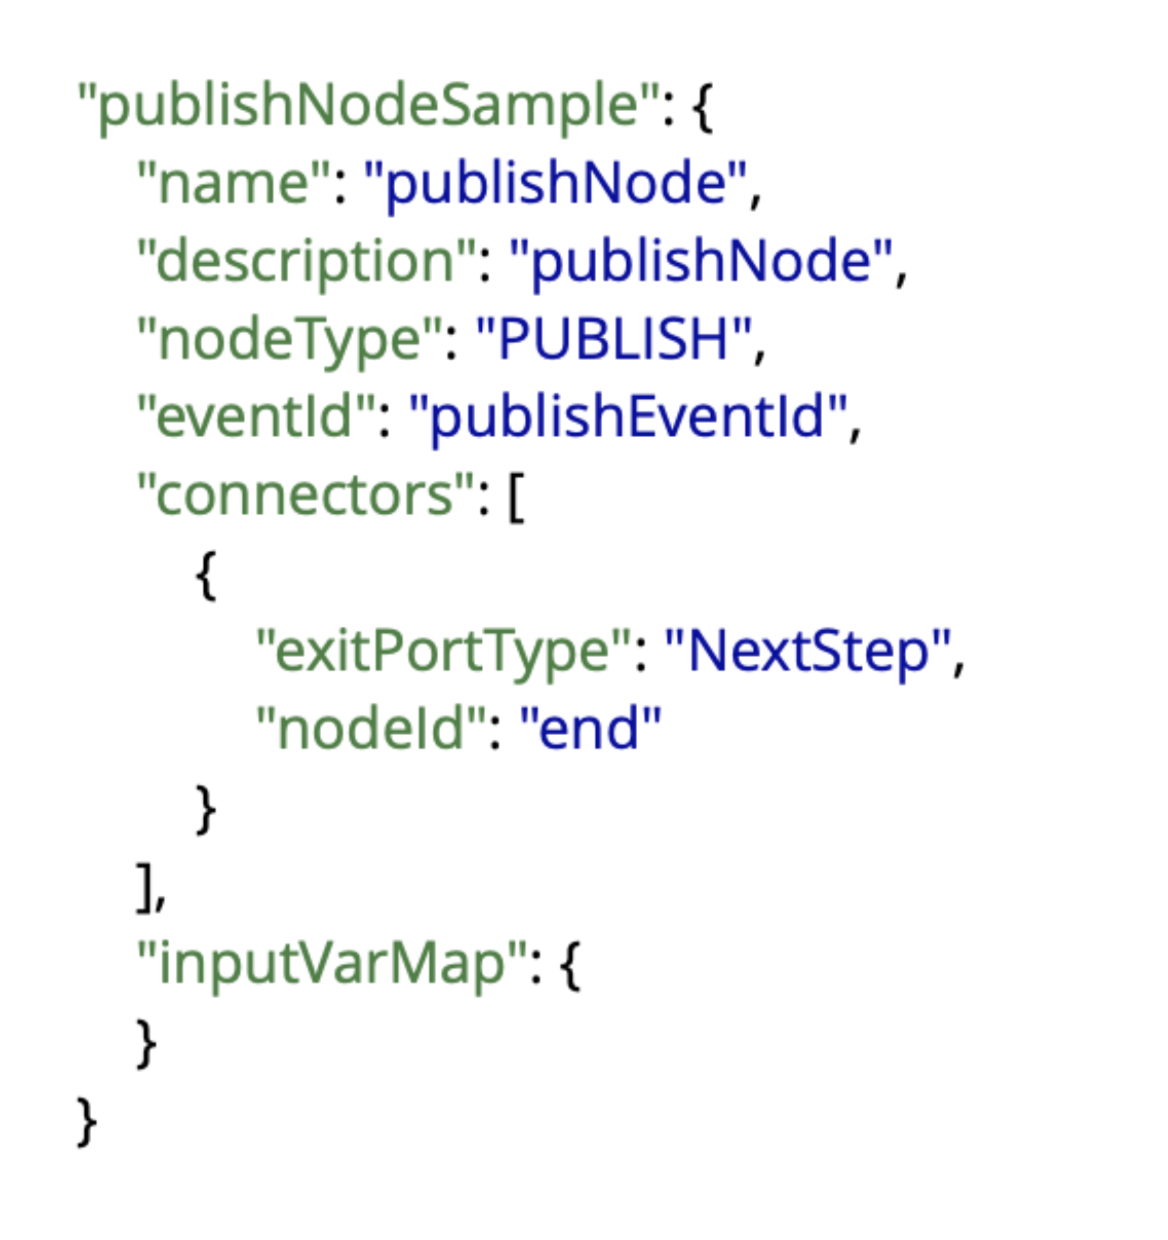
With the publish node, we can publish an event and all the workflows linked to that event will be executed. This will trigger the start call for all workflows which are monitoring this event and start all paused instances which are waiting for this event.
Attributes
|
Attribute |
Type |
Description |
|---|---|---|
|
*name |
string |
Name of the publish node. |
|
description |
string |
Description of the publish node. |
|
*nodeType |
string |
PUBLISH |
|
*eventId |
string |
Id of the event to publish in this node. |
|
*connectors |
JSONArray |
Details for the next node. |
|
inputVarMap |
JSONArray |
Optional. Use to pass tasks and new assigned details. |
|
*outputVarMap |
string |
Returns output context. |
Sample JSON
{
  "name": "publishEJg2I",
  "description": "Provide some description for your publish node",
  "id": "publishEJg2I",
  "nodeType": "PUBLISH",
  "eventId": "event to publish in this node",
  "connectors": [
    {
      "exitPortType": "NextStep",
      "nodeId": "nextNodeId"
    }
  ],
  "inputVarMap": {
    "parameter2": "processParameter2",
    "parameter1": "processParameter1"
  },
  "outputVarMap": {
    "data": "outputContextVarKey"
  }
}
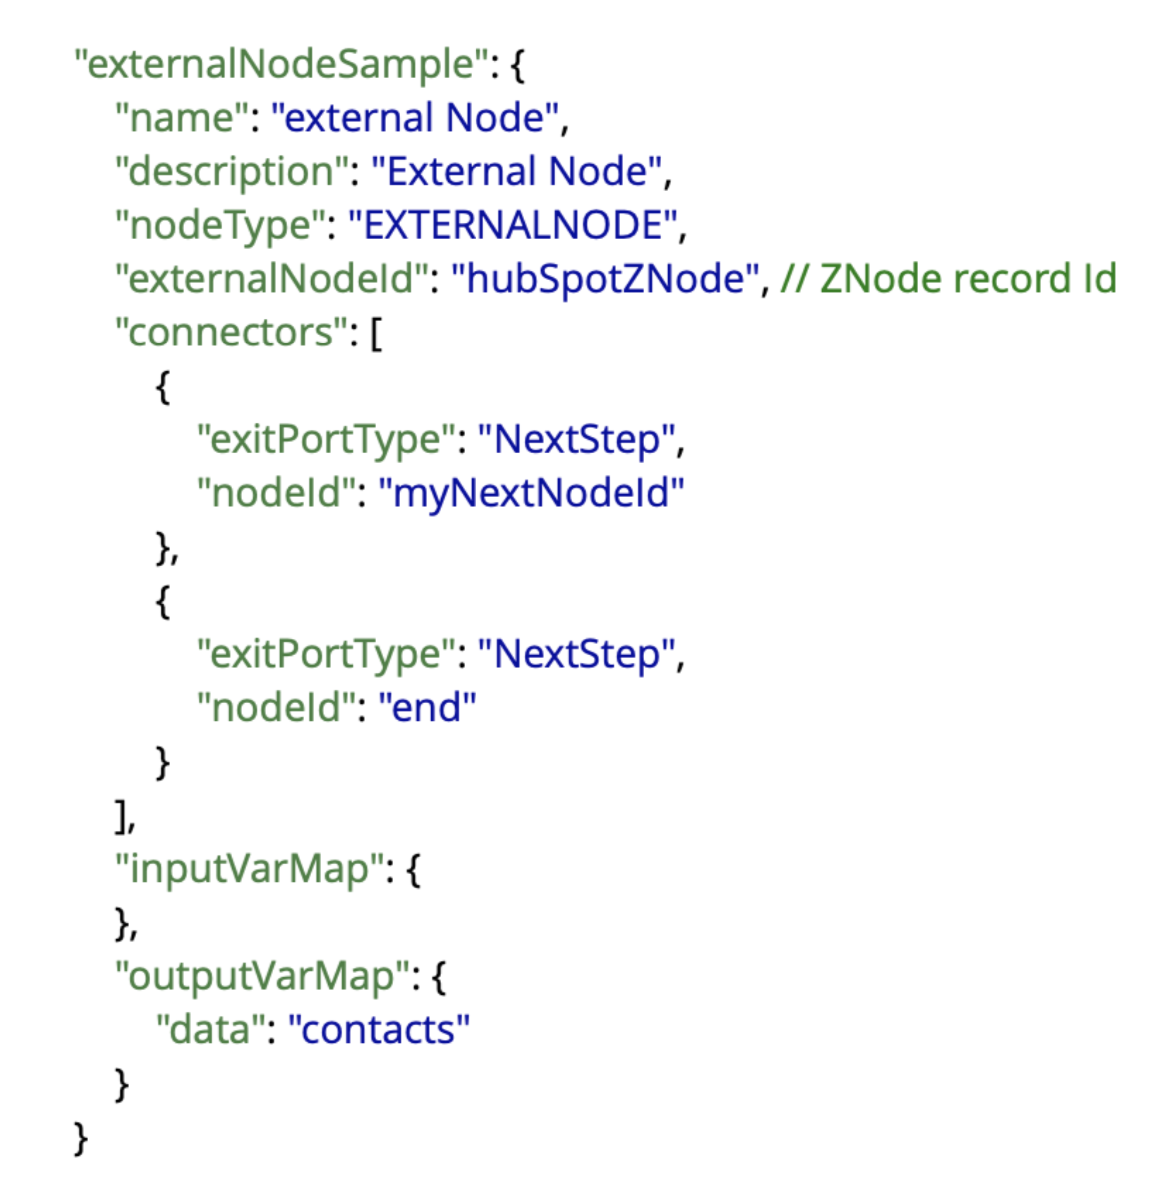
With the external node, a user can call reusable user-defined nodes to get result data and next node details as well.
This will trigger start call for all workflows which are monitoring this event and will start all paused instances which are waiting for this event.
Attributes
|
Attribute |
Type |
Description |
|---|---|---|
|
*name |
string |
Name of the external node. |
|
description |
string |
Description of the external node. |
|
*nodeType |
string |
EXTERNAL |
|
*externalNodeId |
string |
Id of the external node to execute in this node. |
|
*connectors |
JSONArray |
Details for the next node. |
|
inputVarMap |
JSONArray |
Optional. |
|
outputVarMap |
string |
This contains the result from the user-defined node, user can define the mapping in outputVarMap to save and access this in workflow data. |
Sample JSON
{
  "name": "externaltX4uH",
  "description": "Provide some description for your external node",
  "id": "externaltX4uH",
  "nodeType": "EXTERNAL",
  "externalNodeId": "external node id to execute in this node",
  "connectors": [
    {
      "exitPortType": "NextStep",
      "nodeId": "nextNodeId"
    }
  ],
  "inputVarMap": {
    "parameter2": "inputParameter2",
    "parameter1": "inputParameter1"
  },
  "outputVarMap": {
    "data": "outputContextVarDataKey"
  }
}
Instance node allows reassigning an existing task instance to another field engineer.
Attributes
|
Attribute |
Type |
Description |
|---|---|---|
|
*name |
string |
Name of the instance node. |
|
description |
string |
Description of the instance node. |
|
*nodeType |
string |
INSTANCE |
|
*connectors |
JSONArray |
Details for the next node. |
|
instanceId |
string |
The ID of the instance to update. |
|
inputVarMap |
JSONArray |
Optional. Use to pass tasks and new assigned details. |
|
*outputVarMap |
string |
Returns |
|
operation |
integer |
|
Sample JSON
{
  "name": "instanceeN2uW",
  "description": "Provide some description for your instance node",
  "id": "instanceeN2uW",
  "nodeType": "INSTANCE",
  "connectors": [
    {
      "exitPortType": "NextStep",
      "nodeId": "nextNodeId"
    }
  ],
  "instanceId": "id of instance to update",
  "inputVarMap": {
    "assignedToUserId": "IdOfNewUser",
    "instanceId": "instanceId",
    "zProcessInstanceid": "id"
  },
  "outputVarMap": {
    "data": "outputContextVarKey"
  },
  "operation": 2
}
A node to allow an end user to iterate through a list of records.
Attributes
|
Attribute |
Type |
Description |
|---|---|---|
|
*name |
string |
Name of the node. |
|
description |
string |
Description of the node. |
|
*nodeType |
string |
WHILELOOP |
|
*connectors |
JSONArray |
Details for the next node. |
|
data |
JSONObject |
contextVarDataKey |
|
inputVarMap |
JSONArray |
Optional. |
|
outputVarMap |
string |
This contains the result from the user-defined node, user can define the mapping in outputVarMap to save and access this in workflow data. |
|
processRule |
ID, boolean |
An existing rule or an inline rule definition |
Sample JSON
|
current Index key in contextVar: {nodeId}_index current Element in contextVar: {nodeId}_currentElement |
{
  "name": "whileloopi7XZH",
  "description": "Provide some description for your while node",
  "id": "whileloopi7XZH",
  "nodeType": "WHILELOOP",
  "connectors": [
    {
      "exitPortType": "TrueStep",
      "nodeId": "nodeForTrueStep"
    },
    {
      "exitPortType": "FalseStep",
      "nodeId": "nodeForFalseStep"
    }
  ],
  "data": "contextVarDataKey",
  "inputVarMap": {
    "parameter2": "loopParameter1",
    "parameter1": "loopParameter2"
  },
  "outputVarMap": {
    "data": "outputContextVarKey"
  },
  "processRule": "Specify an existing rule or an inline rule definition"
}
A new node to allow an end user to iterate through a list of records.
Attributes
|
Attribute |
Type |
Description |
|---|---|---|
|
*name |
string |
Name of the node. |
|
description |
string |
Description of the node. |
|
*nodeType |
string |
FOREACHLOOP |
|
*connectors |
JSONArray |
Details for the next node. |
|
inputVarMap |
JSONArray |
Optional. |
|
outputVarMap |
string |
This contains the result from the user-defined node, user can define the mapping in outputVarMap to save and access this in workflow data. |
|
data |
Sample JSON
|
current Index key in contextVar: {nodeId}_index current Element in contextVar: {nodeId}_currentElement |
{
  "name": "foreachloopDaoNx",
  "description": "Provide some description for your for each node",
  "id": "foreachloopDaoNx",
  "nodeType": "FOREACHLOOP",
  "connectors": [
    {
      "exitPortType": "TrueStep", // next step in interation
      "nodeId": "nodeForTrueStep"
    },
    {
      "exitPortType": "FalseStep", // exit node after processing all elements
      "nodeId": "nodeForFalseStep"
    }
  ],
  "inputVarMap": {
    "parameter2": "loopParameter1",
    "parameter1": "loopParameter2"
  },
  "outputVarMap": {
    "data": "outputContextVarKey"
  },
  "data": "contextVarDataKey" //key containing data list in contextVar
}
With the logger node, a user can save logs in the system. These logs will be available to org admins in the logs section of the web app.
This node is used for all Alert, Error, Warning, and Debug information.
Attributes
|
Attribute |
Type |
Description |
|---|---|---|
|
*name |
string |
Name of the instance node. |
|
description |
string |
Description of the logger node. |
|
*nodeType |
string |
LOGGER |
|
*connectors |
JSONArray |
Details for the next node. |
|
inputVarMap |
JSONArray |
Optional. Use to pass tasks and new assigned details. |
Sample JSON
{
  "name": "loggerhv7fQ",
  "description": "Provide some description for your logger node",
  "id": "loggerhv7fQ",
  "nodeType": "LOGGER",
  "connectors": [
    {
      "exitPortType": "NextStep",
      "nodeId": "nextNodeId"
    }
  ],
  "inputVarMap": {
    "logLevel": "logLevel",
    "message": "message"
  }
}
![[Note]](../css/image/note.png)
Exit point for a workflow. To pass some workflow data to the final output var, a user needs to input those keys from workflow data to the end node as input and pass the same keys from the output of this node.
Attributes
|
Attribute |
Type |
Description |
|---|---|---|
|
*name |
string |
Name of the notify node. |
|
description |
string |
Description of the notify node. |
|
*nodeType |
string |
END |
|
inputVarMap |
JSONArray |
|
|
*outputVarMap |
string |
Returns output context. |
Sample JSON
{
  "name": "endo3q7b",
  "description": "Exit point for a workflow",
  "id": "endo3q7b",
  "nodeType": "END",
  "inputVarMap": {
    "assignedToUserId": "IdOfNewUser",
    "instanceId": "instanceId",
    "zProcessInstanceid": "id"
  },
  "outputVarMap": {
    "data": "outputContextVarKey"
  }
}
The Workflow Builder helps Solution Admins to build and simulate any workflow in a drag and drop GUI interface. Users can navigate to the Workflow Builder by clicking on the 'Workflow Builder' tool tip within the main table of any Workflow module (Stateless Workflows, Procedure Workflows, State Event Workflows, Model Event Workflows and Mobile Workflows).
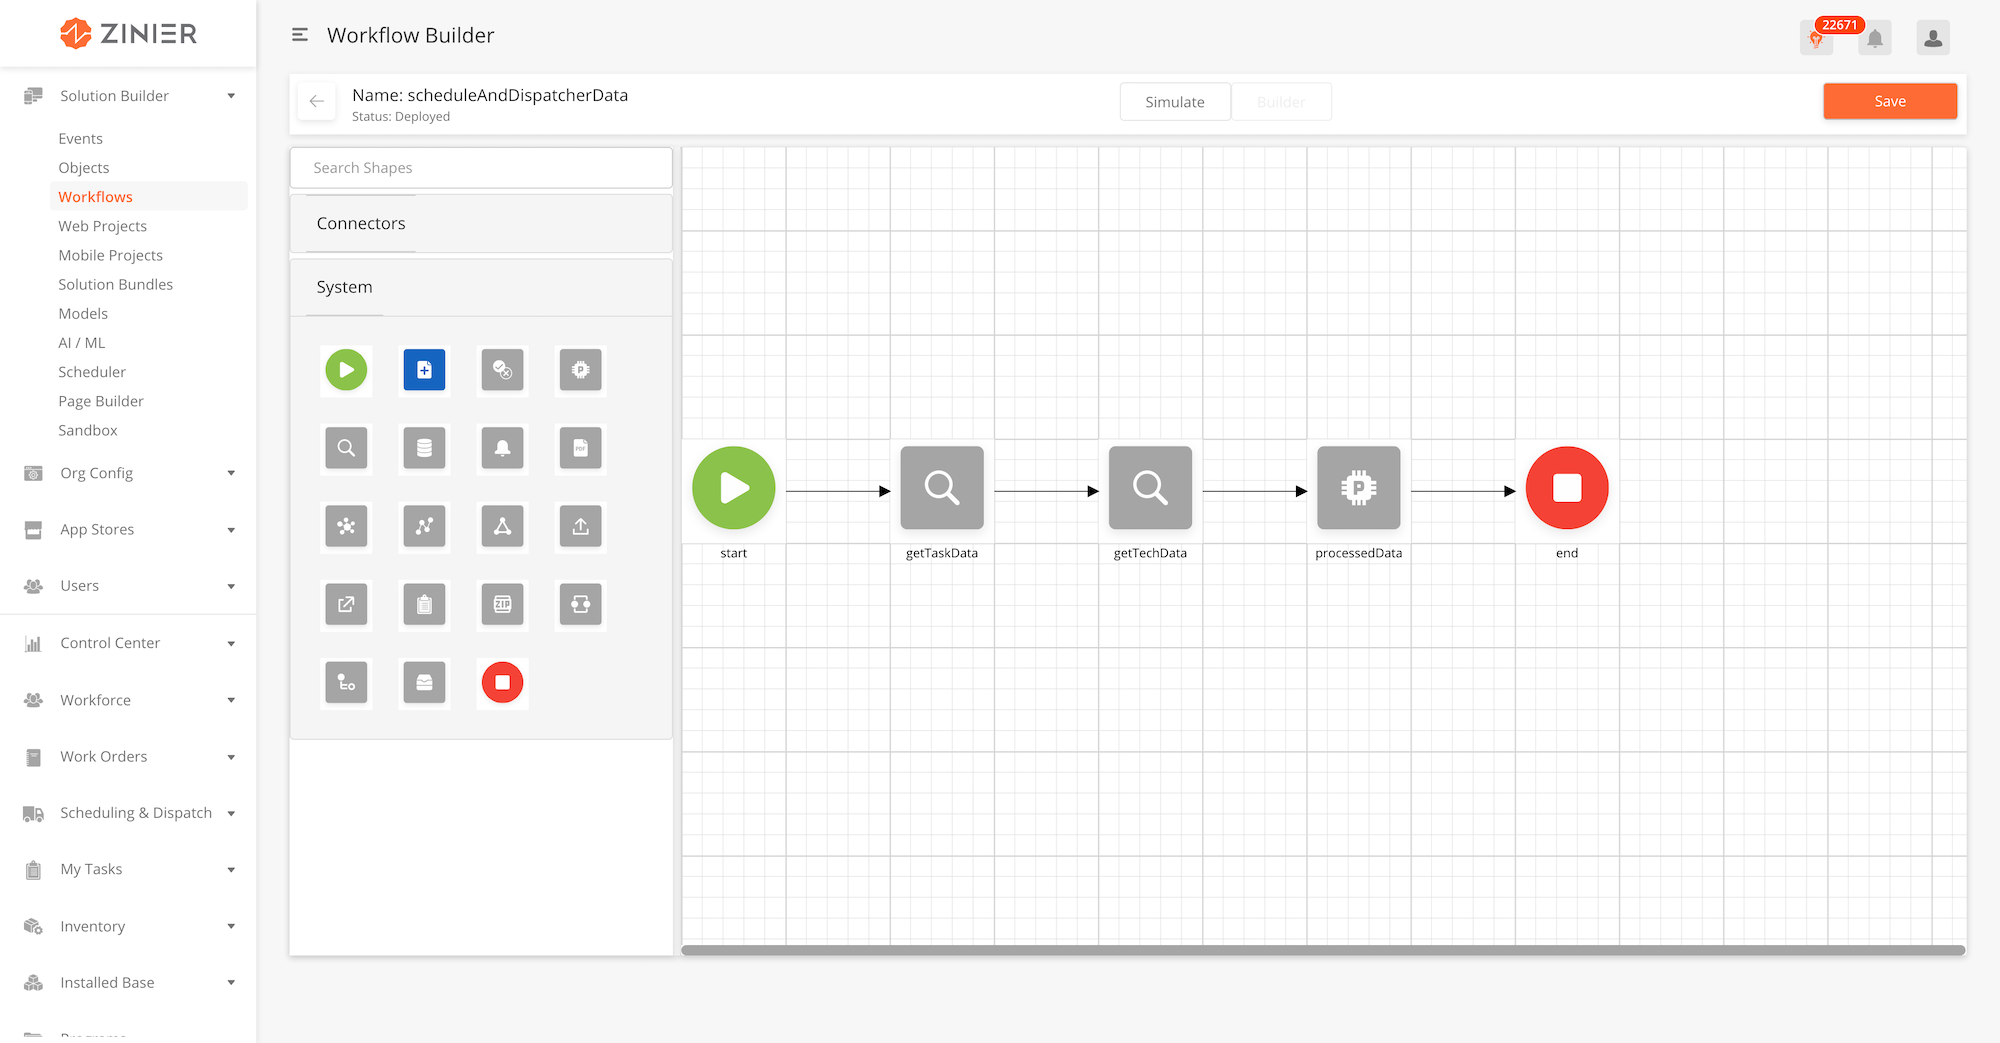
-
From the main workflow builder page, ensure that you are on 'Builder' mode by toggling the Simulate/Builder toggle on the header of the Workflow Builder.
-
Drag a Node from the left panel into the canvas.
-
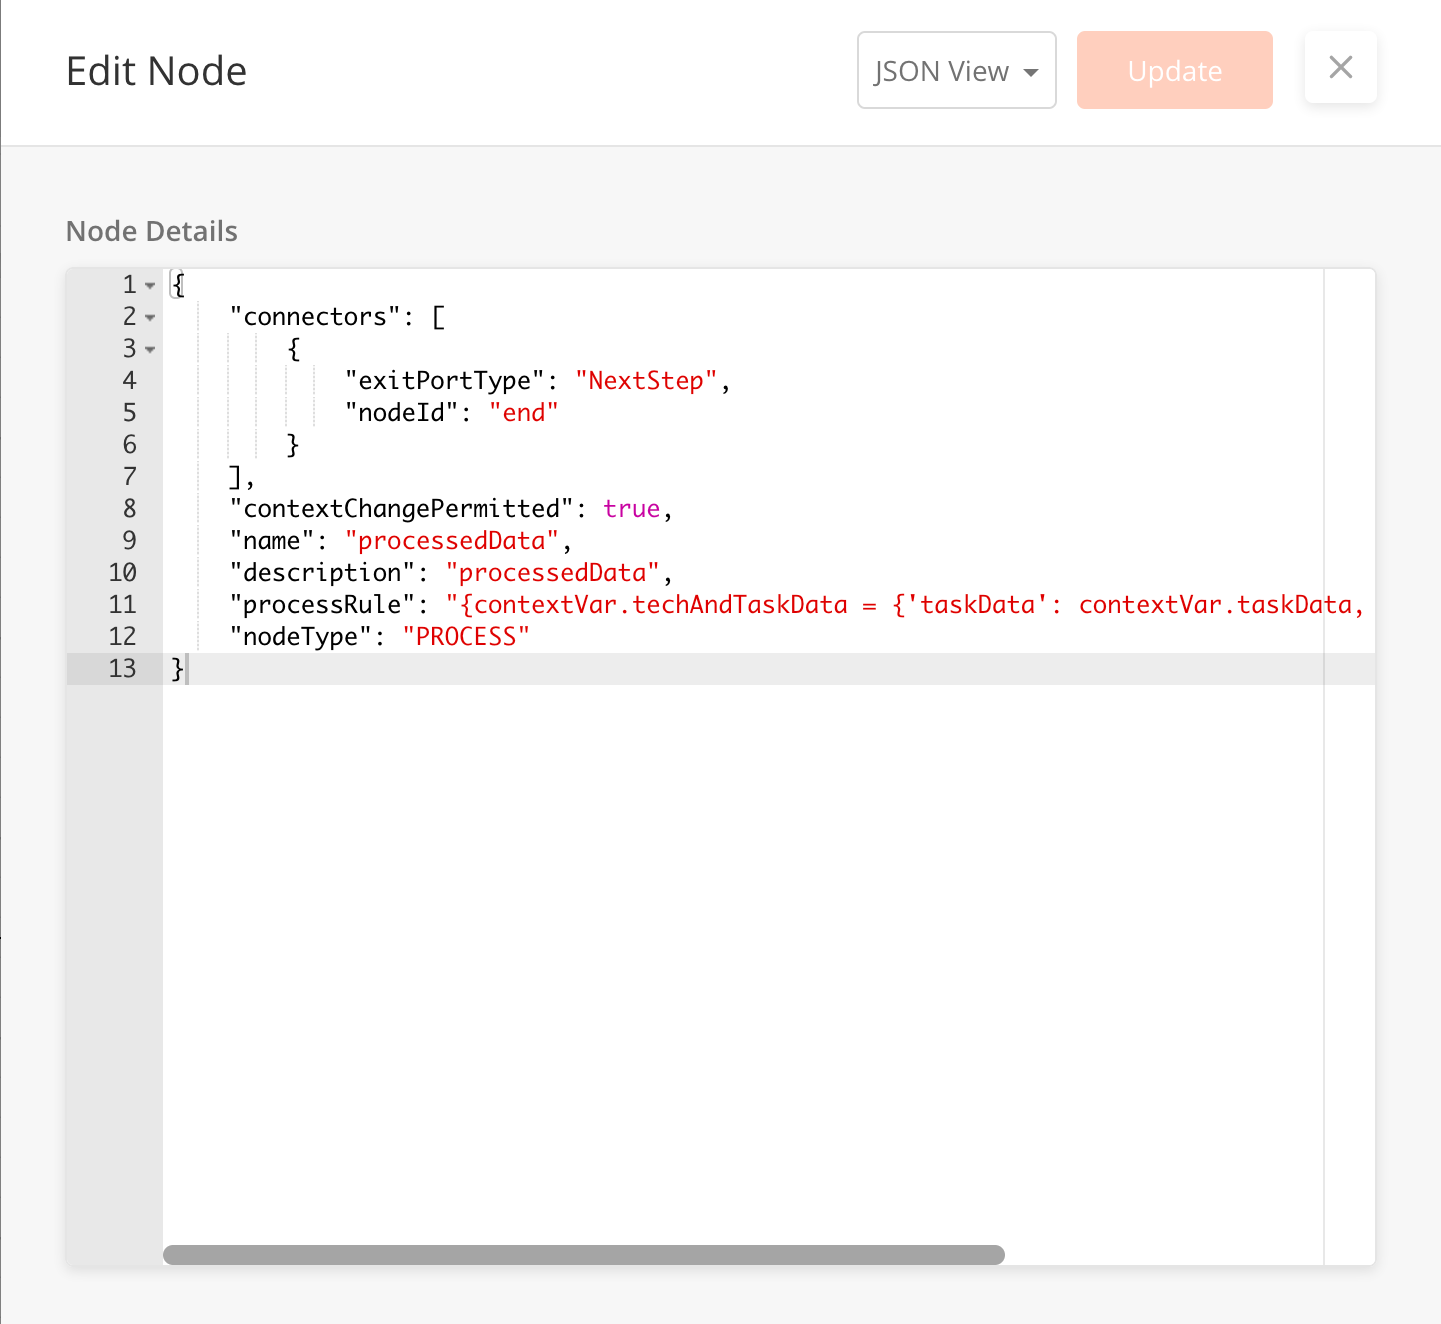
Once a node is successfully added to the canvas, double click on the node to open the Edit Node side panel.
-
The default Edit Node sidepanel will be on JSON View. You can edit the Node Details through JSON input.
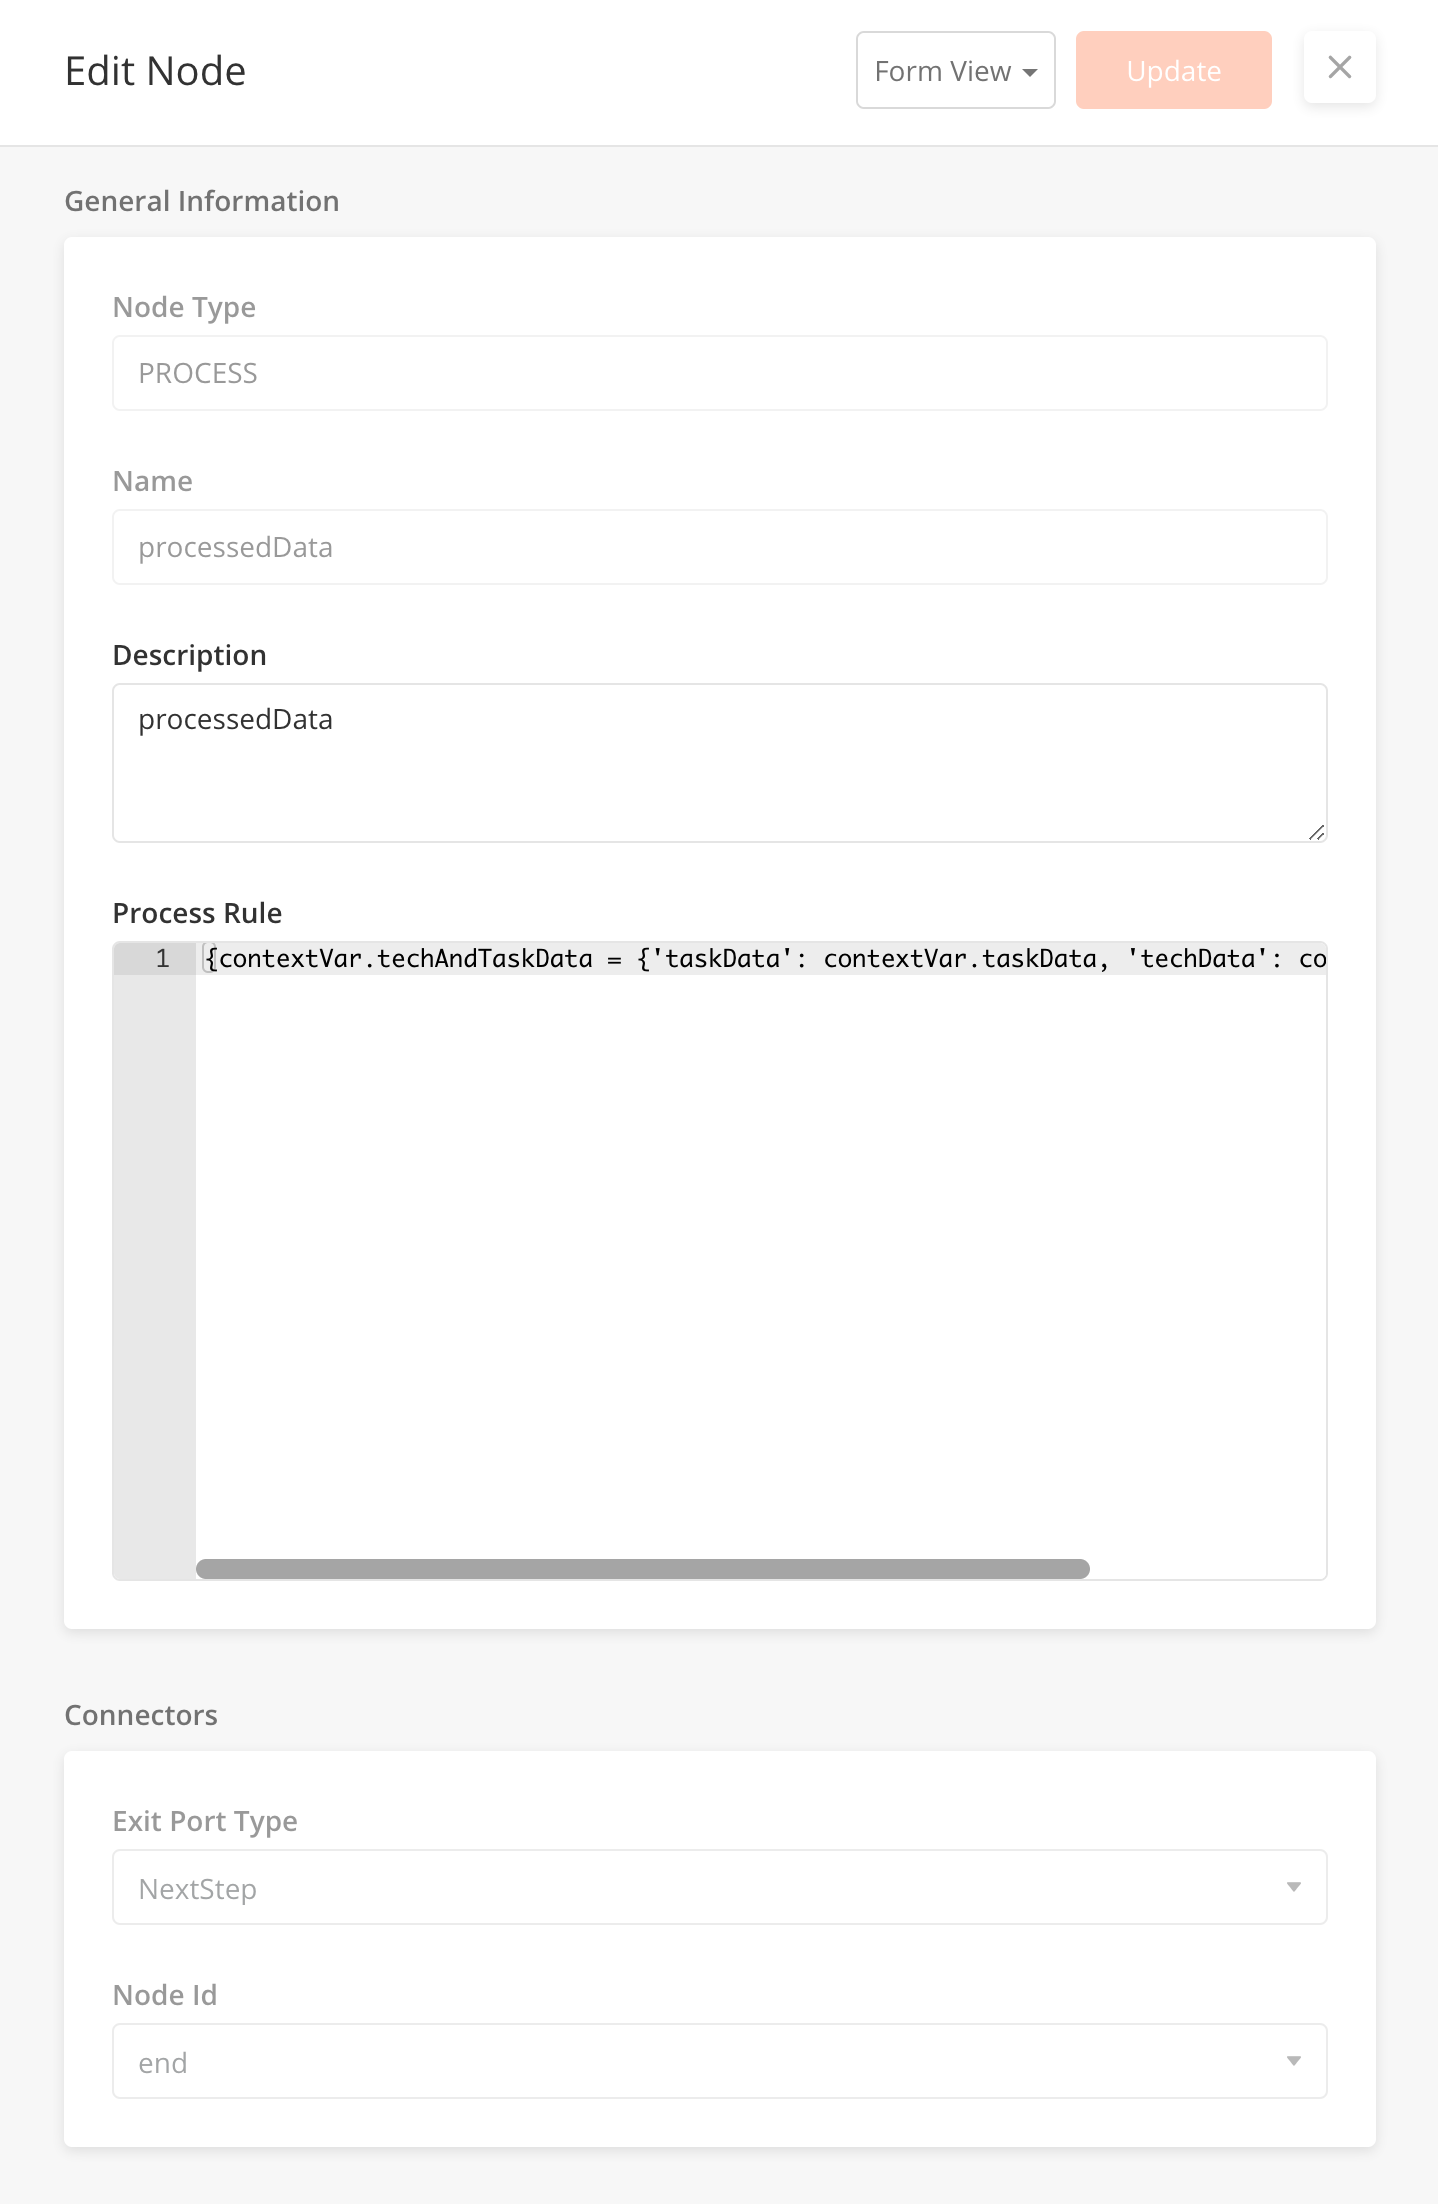
-
You can also toggle to a Form View, by selecting the option from a dropdown button on the sidepanel header. Form view breaks down required node details without using many JSON input.
-
Toggling between JSON View and Form View will not impact any unsaved changes made. All changes will be carried over when toggling between views.
-
Once you are complete, click on Update to save the node and close the sidepanel.
-
To lock in changes made to a workflow, click the Save button on the main workflow builder page.
-
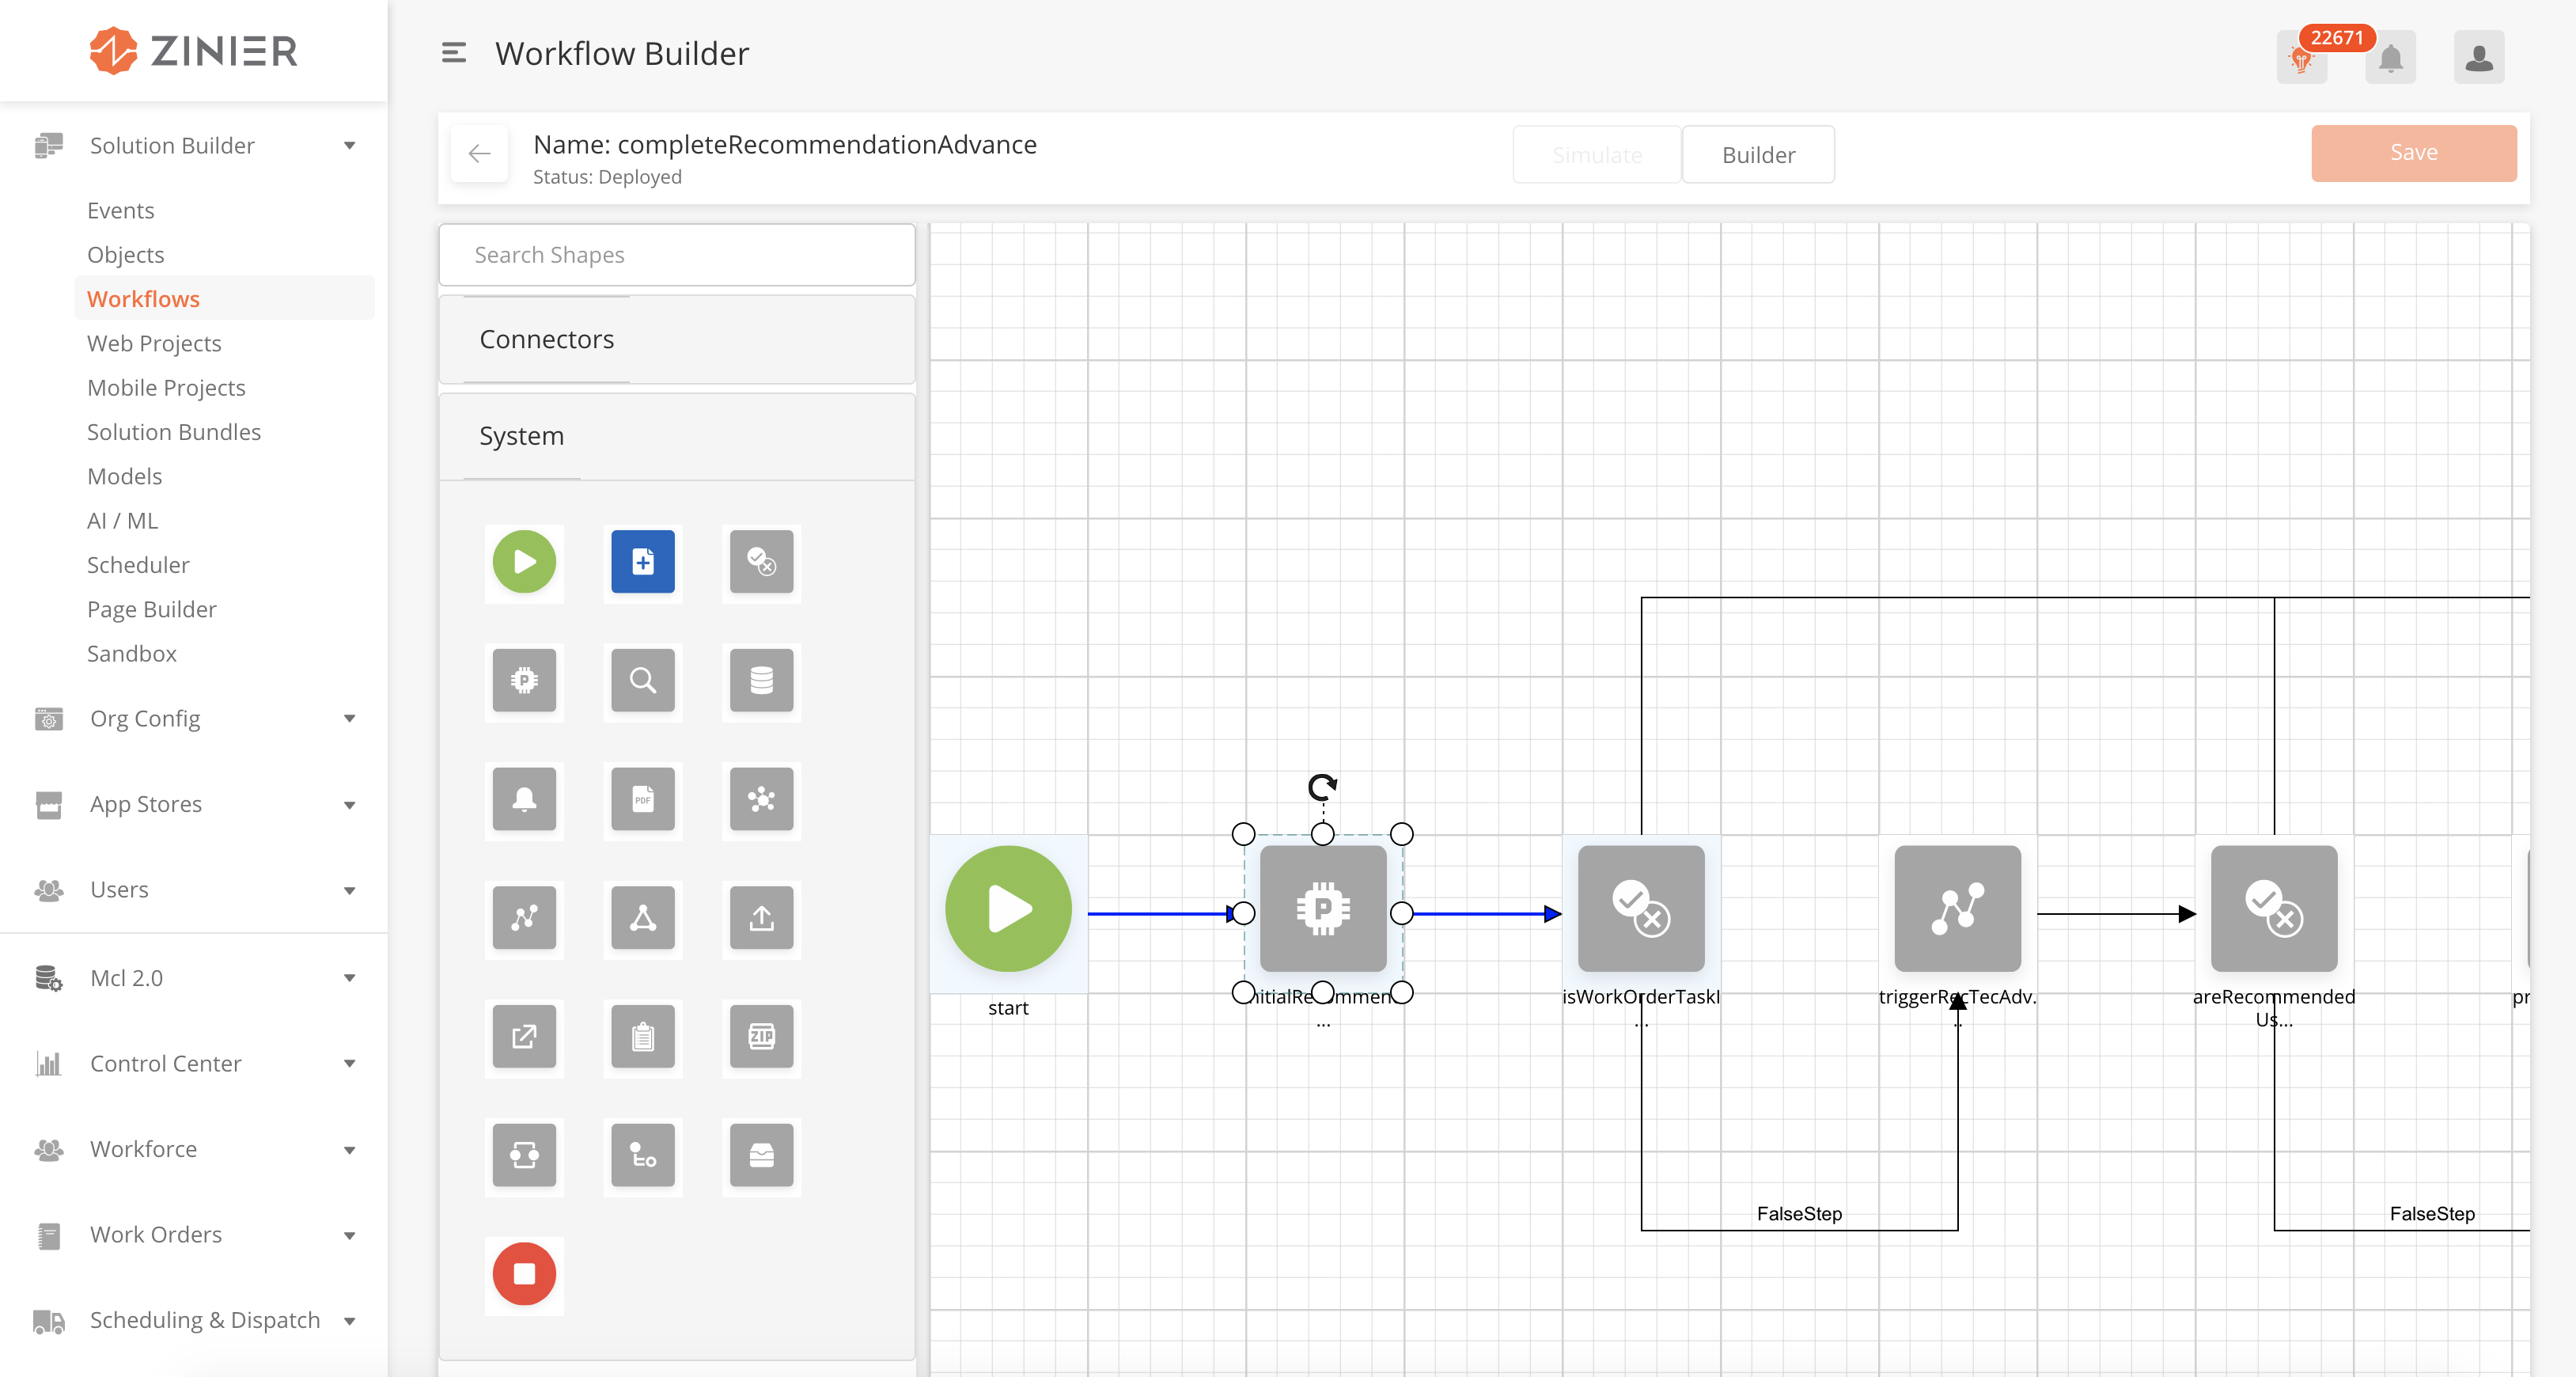
From the main workflow builder page, ensure that you are on 'Builder' mode by toggling the Simulate/Builder toggle on the header of the Workflow Builder.
-
To edit an existing node, double click the node in the canvas to open the Edit Node Sidepanel
-
You can edit the node through the JSON view or Form view as mentioned above.
-
Once you are complete, click on Update to save the node and close the sidepanel.
-
To lock in changes made to a workflow, click the Save button on the main workflow builder page.
*Important Note : The workflow will not be updated with any node changes until you click the Save button on the main workflow builder page.
-
From the main workflow builder page, ensure that you are on 'Builder' mode by toggling the Simulate/Builder toggle on the header of the Workflow Builder.
-
Drag a Connector from the left panel into the canvas.
-
Once a connector is successfully added to the canvas, double click on the connector to open the Edit Node sidepanel.
-
The default Edit Node sidepanel will be on JSON View. You can edit the Node Details through JSON input.
-
You can also toggle to a Form View, by selecting the option from a dropdown button on the sidepanel header. Form view breaks down required node details without using many JSON input.
-
Toggling between JSON View and Form View will not impact any unsaved changes made. All changes will be carried over when toggling between views.
-
Once you are complete, click on Update to save the node and close the sidepanel.
-
Join a connector to nodes by dragging the connector to the corresponding nodes.
-
From the main workflow builder page, ensure that you are on 'Builder' mode by toggling the Simulate/Builder toggle on the header of the Workflow Builder.
-
To delete a node or connector, select it on the canvas, and press
deleteon your keyboard. -
Once you are complete, click on Save on the main workflow builder page to lock in changes.
-
You cannot undo a deletion after the workflow is Saved.
-
From the main workflow builder page, ensure that you are on 'Simulate' mode by toggling the Simulate/Builder toggle on the header of the Workflow Builder.
-
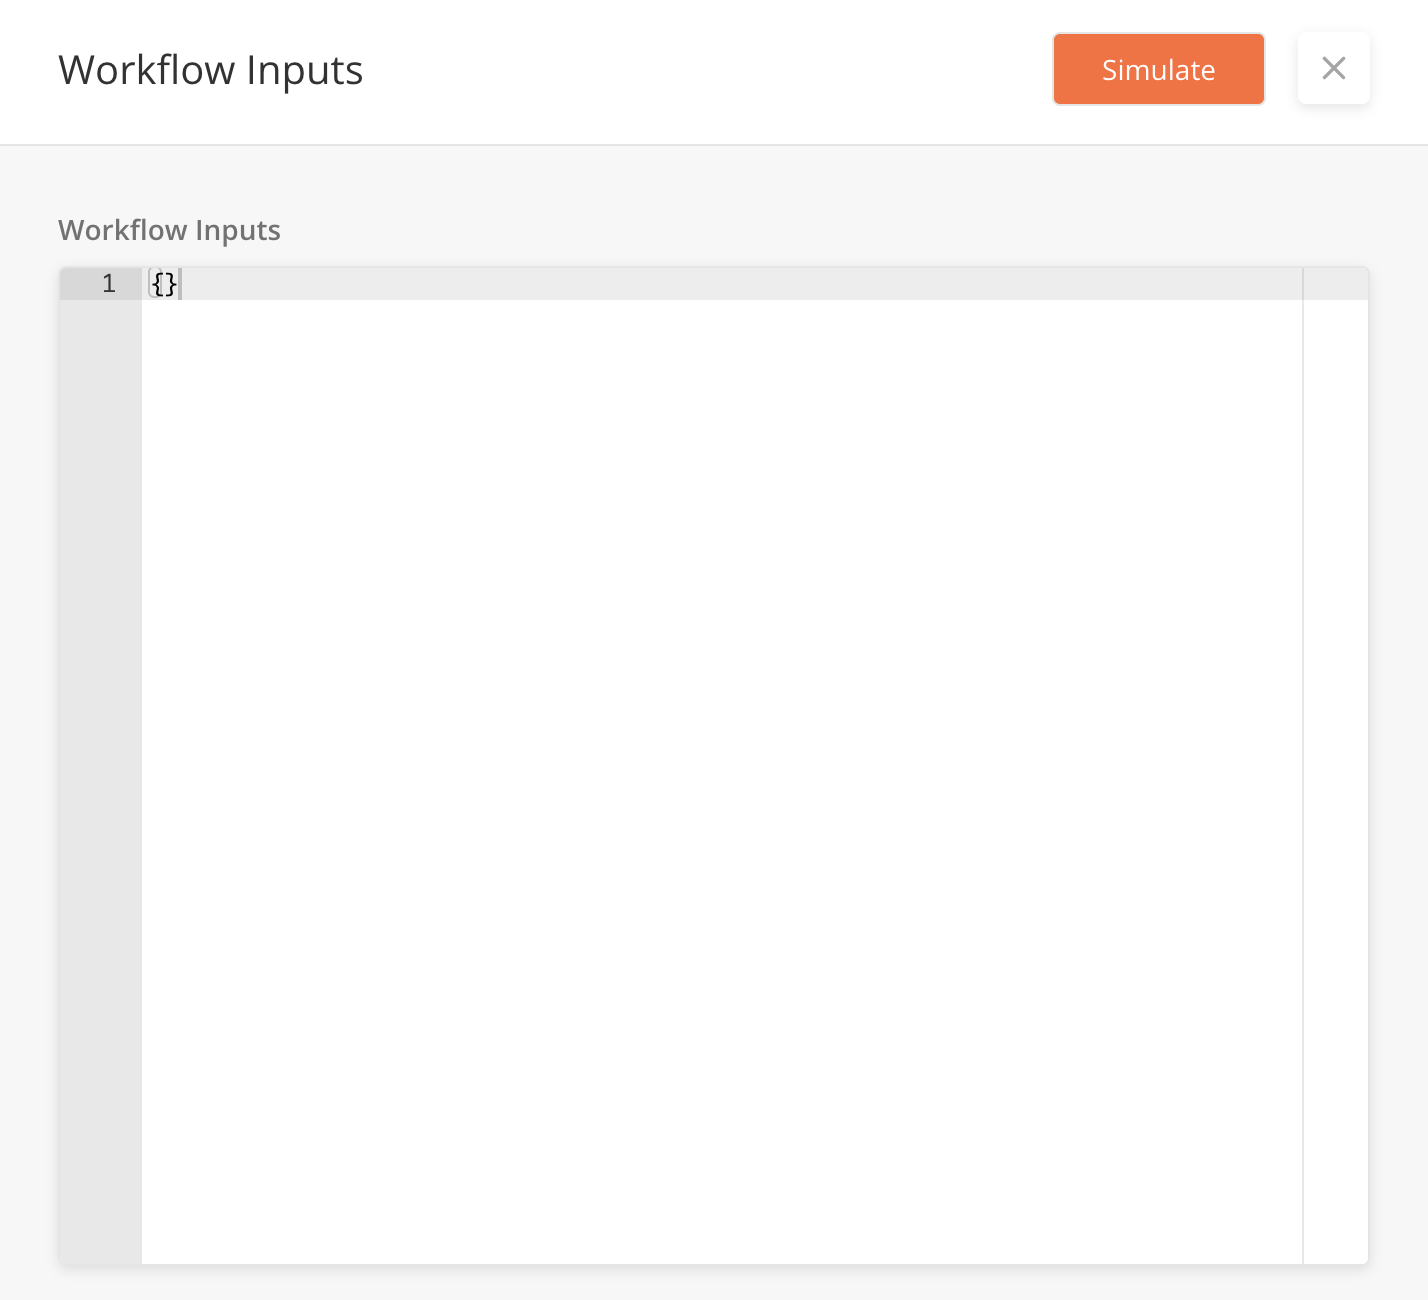
After clicking on 'Simulate' mode, a Workflow Inputs sidepanel will appear.
-
You can add in Workflow Inputs (if applicable) in JSON object if you wanted to test the workflow with particular data. This field is optional.
-
Click on 'Simulate' button to start executing the workflow.
-
From the main workflow builder page, ensure that you are on 'Simulate' mode by toggling the Simulate/Builder toggle on the header of the Workflow Builder.
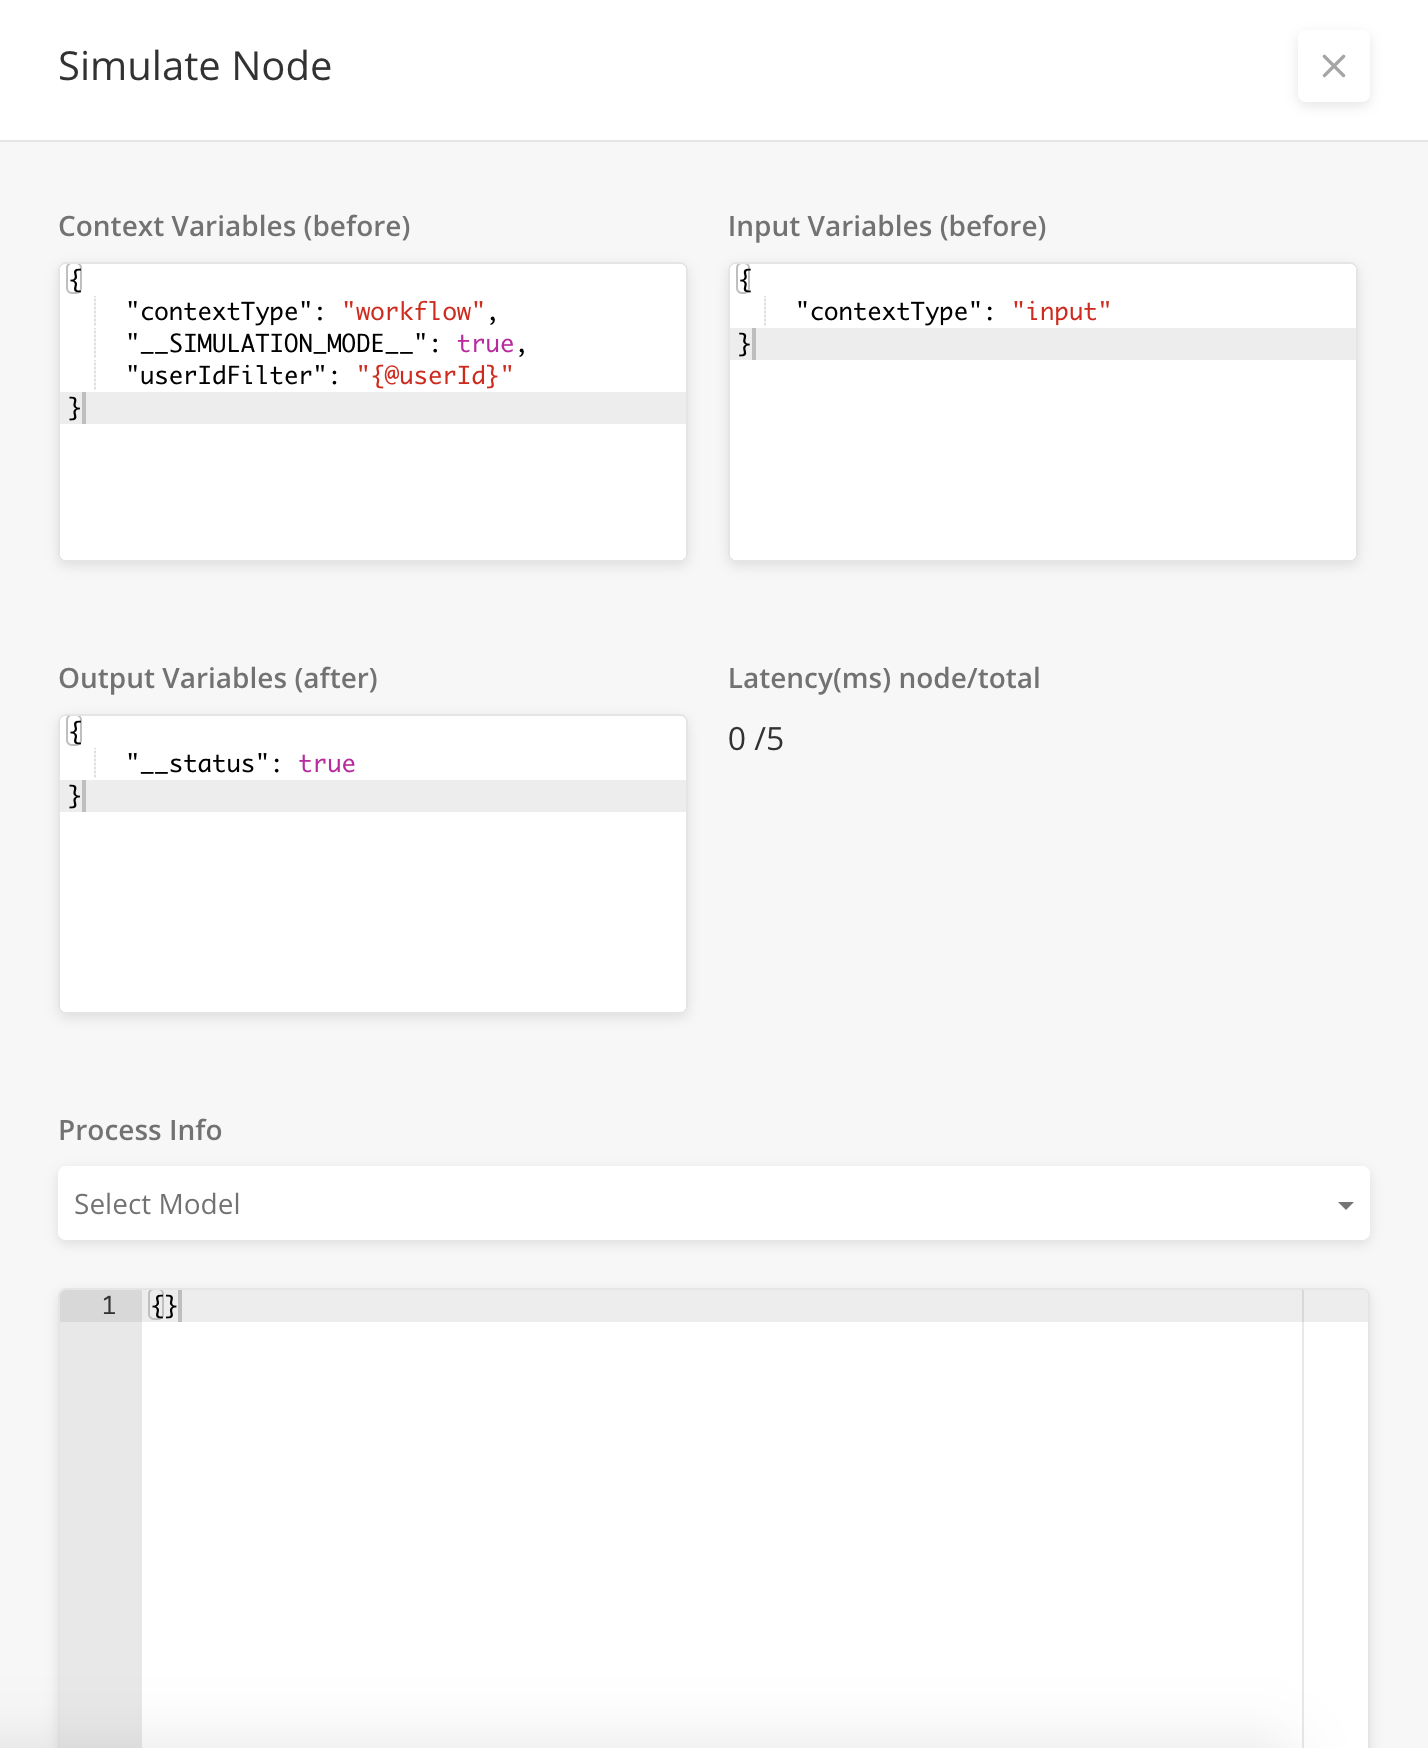
-
Double click on a node you want to Simulate, a side panel will appear with details on the performance of the node.
-
You can select Process Info from a dropdown list to get other information on the node execution.
-
Close the sidepanel by clicking on the X icon.
-
When simulating a node, the node and any outward connectors will be highlighted in the workflow builder canvas. (see screenshot above)
-
You cannot edit or delete nodes in Simulate mode.