Events provide a programming paradigm that decouples logic that initiates a particular action from the logic of the action itself, which allows for easier maintenance and extension of code.
Events can be configured from theSolutions Builder > Eventsmodule. Events are configured to look out for changes in models, fields, or specified timings to trigger one or more workflows. These events can be something the users are doing: clicking on a specific button, picking an option from a list, entering text into a field, or system-generated events such as a program loading.
Integrations are nothing more than workflows that contain a network node. Once an event is triggered, it invokes the integration workflow.
Events enable Touchless Automation for Zinier clients as they allow for workflows to work seamlessly without manual triggers built into workflows themselves.
|
Events |
Description |
|---|---|
|
Model Events |
Events that are triggered if there is any change in a Model |
|
State Events |
Events that are triggered if there is a change specific to a particular field in a Model |
|
Timer Events |
Events that are triggered based on time (fixed time or frequency) |
|
Process Events |
Events that can trigger multiple workflows in a sequential order |
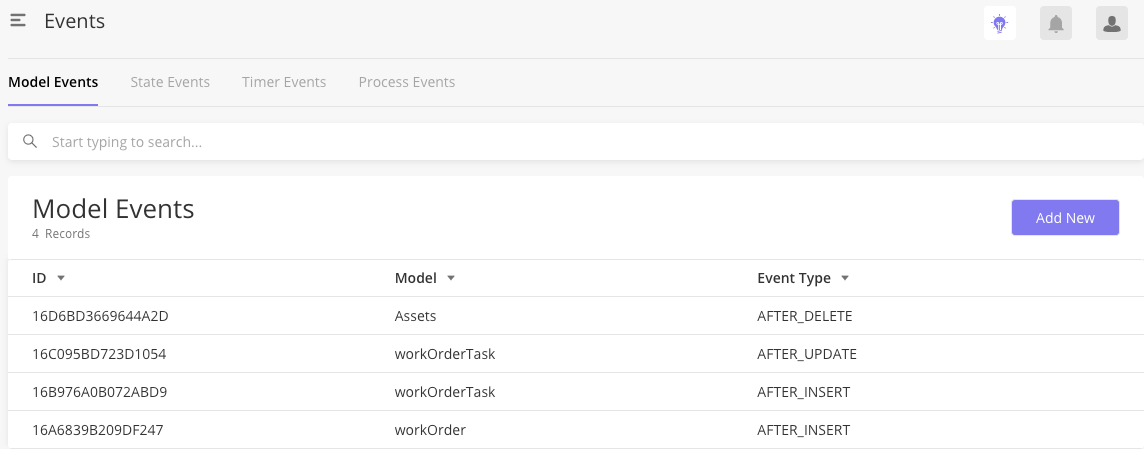
Model Events trigger a workflow when there is a change to a specific model. A solutions admin must create a model event workflow(s) to trigger before creating the corresponding model event.
|
When triggered, model events will run a workflow at one of the following times in relation to the model change:
-
BEFORE_INSERT
-
BEFORE_UPDATE
-
BEFORE_DELETE
-
AFTER_INSERT
-
AFTER_UPDATE
-
AFTER_DELETE
-
Go to Solution Builder > Events > Model Events tab and click Add New.
-
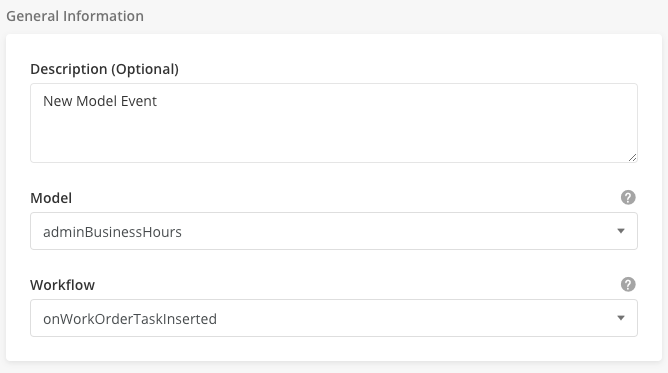
On the Model Event page, enter the General Information section.
-
Description (Optional): Description of the event.
-
Model: Select a model in which the event is tagged. If the required model is not on the list, go to Models to create one.
-
Workflow: Select a workflow that is triggered. If the required workflow is not on the list, create one at Model Events Workflow.
-
-
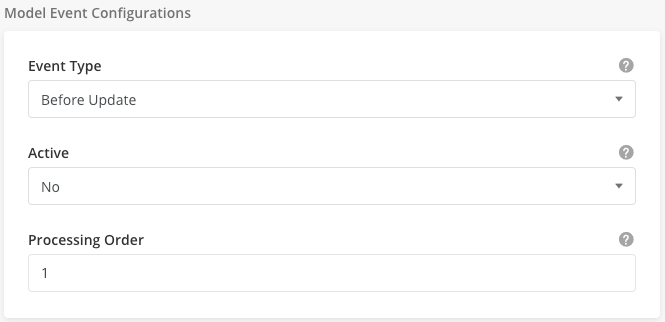
Enter the Model Event Configurations section:
-
Event Type: Select an event to configure when the event should happen. For example, after insert refers to an event that will be observed after insertion into the selected model.
-
Active: When you select Yes, the event is activated and the corresponding workflow is triggered.
-
Processing Order: Enter the sequence number of the event.
-
-
Click Save.
-
Go to Solution Builder > Events > Model Events tab.
-
Hover over the row of the desired record and click the edit icon.
-
On the Model Event page, edit the General Information section.
-
Description (Optional): Description of the event.
-
Model: Select a model in which the event is tagged. If the required model is not on the list, create one at Models.
-
Workflow: Select a workflow that is triggered. If the required workflow is not on the list, create one at Model Events Workflow.
-
-
Enter the Model Event Configurations section:
-
Event Type: Select an event to configure when the event should happen. For example, after insert refers to an event that will be observed after insertion into the selected model.
-
Active: When you select Yes, the event is activated and the corresponding workflow is triggered.
-
Processing Order: Enter the sequence number of the event.
-
-
Click Save.
You cannot delete a model event but you can deactivate it. When you deactivate the model event, the corresponding workflow is not triggered.
-
Go to Solution Builder > Events > Model Events tab.
-
Hover over the row of the desired record and click .
-
From the Active list, select No.
-
Click Save.
![[Note]](../css/image/note.png)
|
Doc Review (Rosliana) |
|---|---|
|
Review if this table can be removed. Require clarification on the field: Processing Order |
|
Field Name |
Description |
Example |
|---|---|---|
|
Description (Optional) |
Short description of model event. This field is optional. |
SLA Calculation based on created date and time based on priority |
|
Model |
Select the name of the Model you wish to associate with the event. Changes to the model (the change the event looks out for depends on the Event Type selected in the side panel) will then trigger the workflow specified in the Workflow dropdown. The dropdown lists contain Models for which the Attribute stateWorkflowEnabled = True in the Models module. |
workOrder |
|
Workflow |
Name of Workflow which is triggered by the event. The dropdown contains a list of Workflows for which the Process Type ID = Model Event, which is all located and created in the Workflows > Model Event module. |
calculateSLAforWO |
|
Event Type |
Dictates when the event occurs / when the workflow should run in relation to a change in the model. |
After Insert |
|
Active |
Select Yes to activate and No to deactivate the event. |
Yes |
|
Processing order |
When Async is No, Processing Order requires multiple events to be executed in a sequence. |
1 |
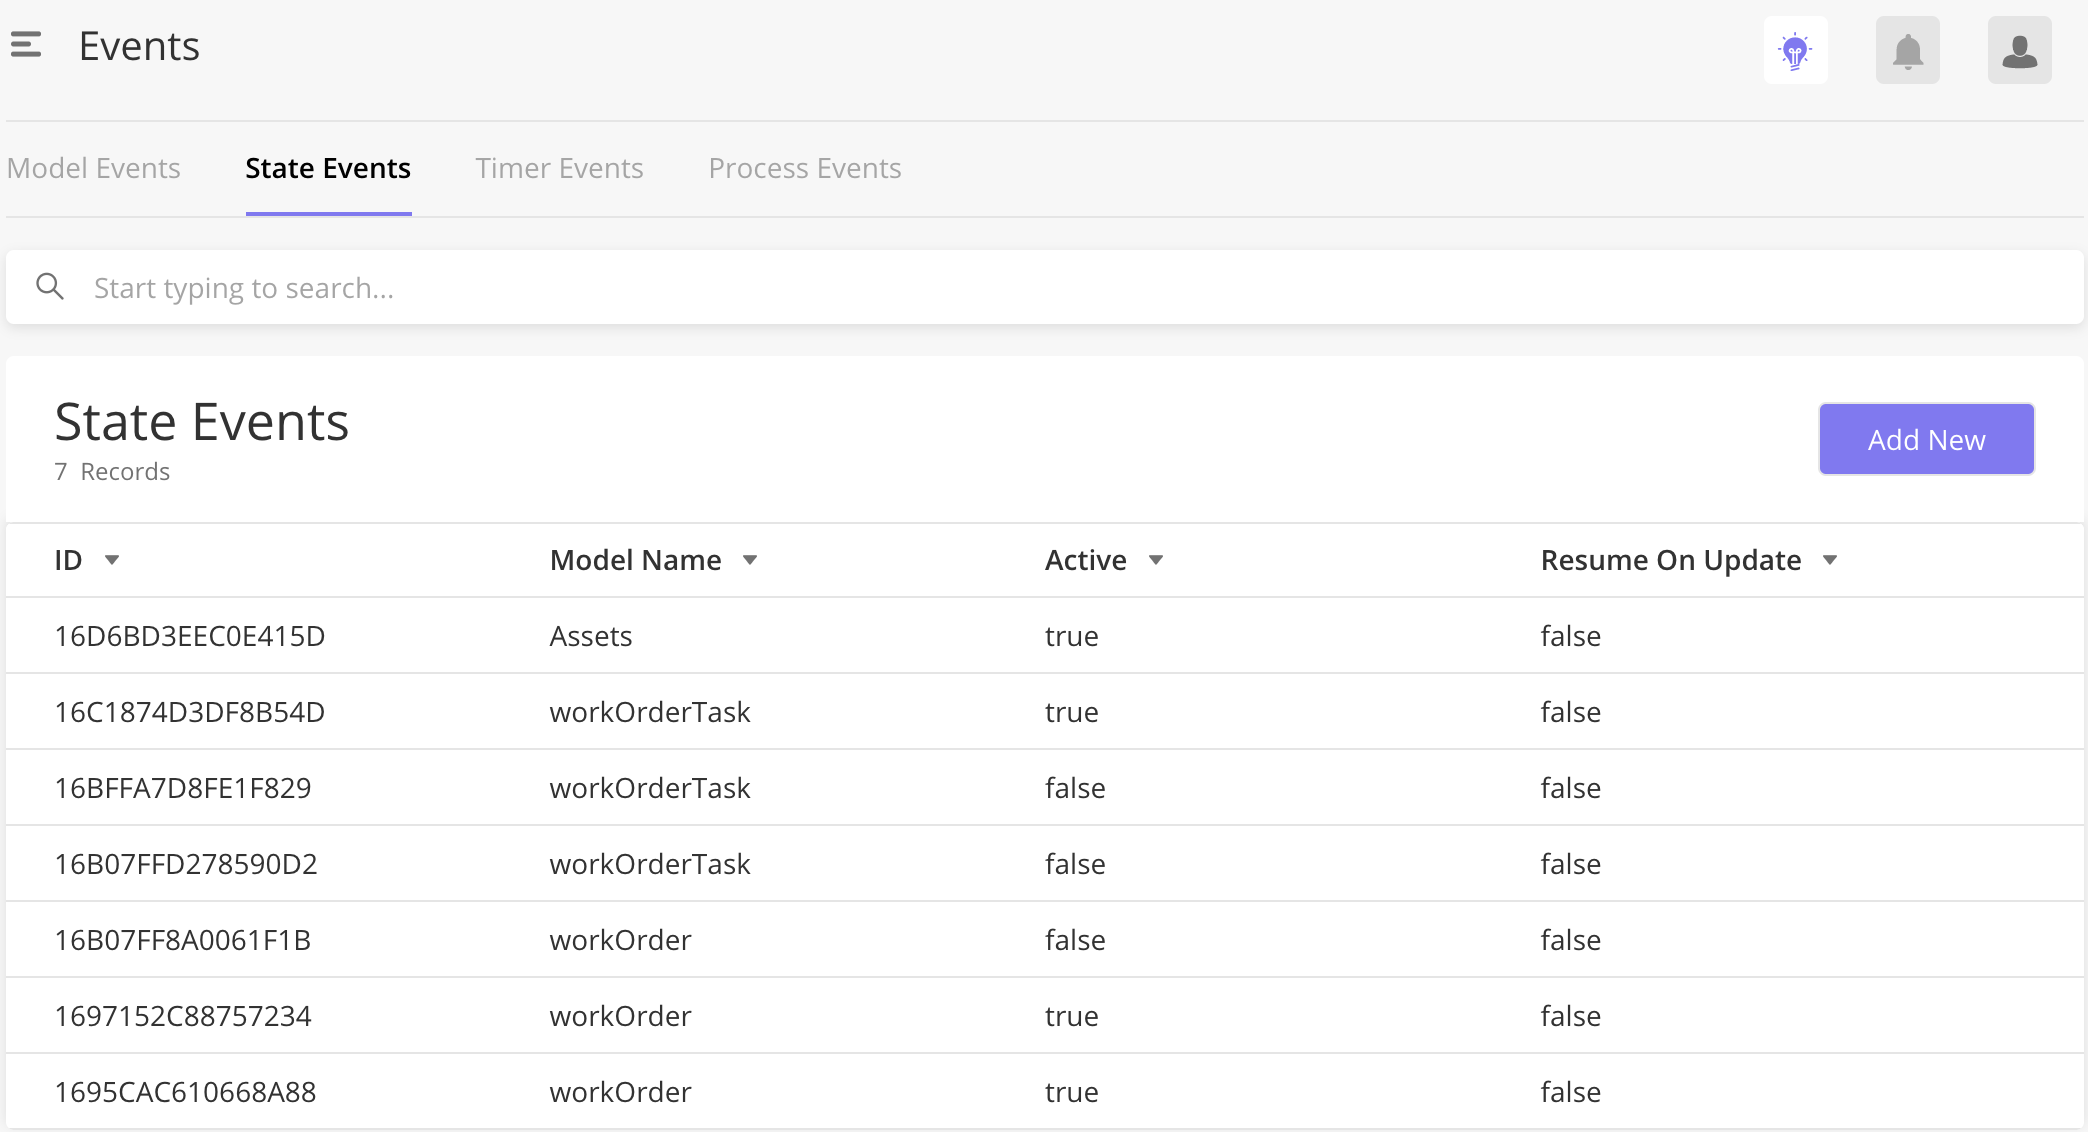
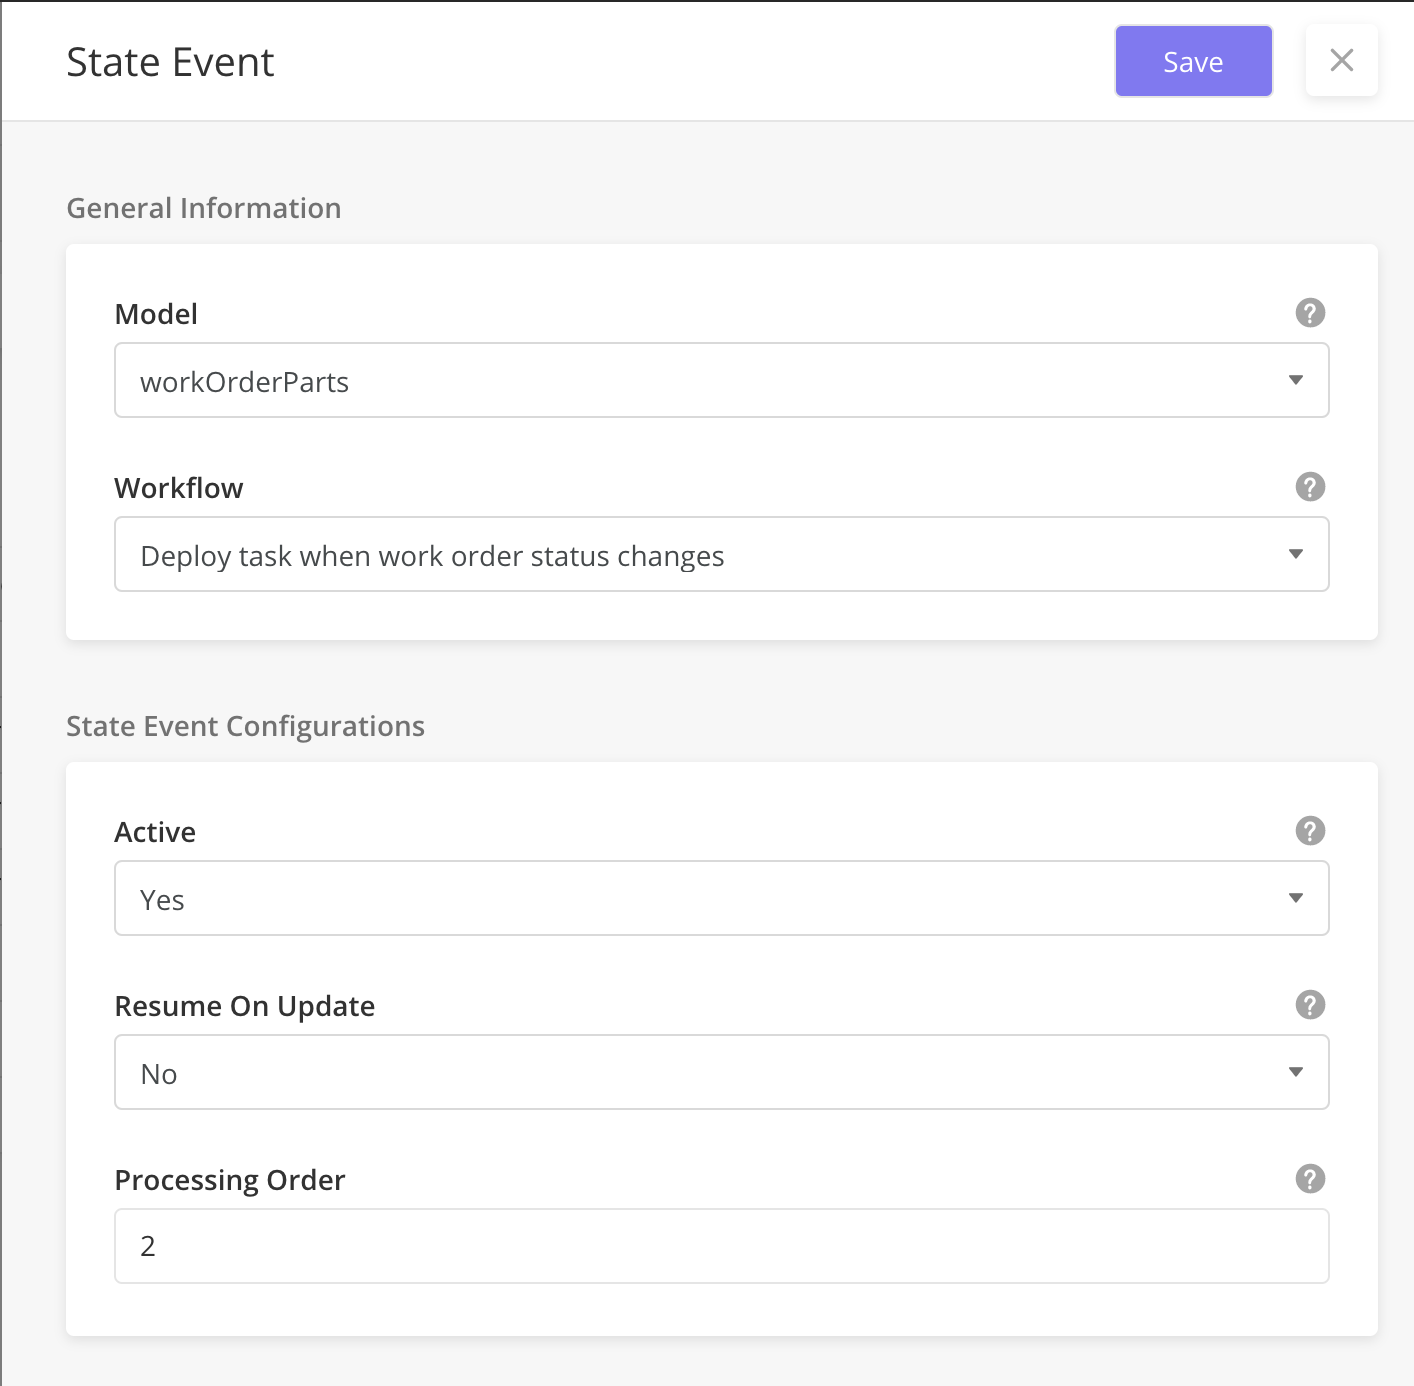
State Events trigger a workflow when there is a change to a specific field in a model.With this in mind, a Solution Admin must create the State Event Workflow(s) to trigger before creating the corresponding State Event. When triggered, state events will run a workflow at one of the following times in relation to the model field change:
-
AFTER_INSERT
-
AFTER_UPDATE
-
AFTER_DELETE
|
|
Doc Review (Rosliana) |
|---|---|
|
To explain the fields in the table here. Unclear on Resume on Update field: To test this out. |
|
-
Go to Solution Builder > Events > State Events tab and click Add New.
-
On the State Event page, enter the following:
-
Model: Select a model for the event. If the model is not on the list, create one at Models.
-
Workflow: If the workflow is not on the list, create one at Model Events Workflow.
-
Active: To activate the event and trigger the corresponding workflow, click Yes.
-
Resume on Update. Select Yes to continue using the instance in the previous State Change. Select No to move the instance to trash.
-
Processing Order: Processing order of the State Event, when there are more than 1 State Event, tagged to a Model.
-
-
Click Save.
-
Go to Solution Builder > Events > State Events tab and click Add New.
-
Hover over the row of the desired record and click
.
-
Edit the information:
-
Model: Select a model for the event. If the model is not on the list, create one at Models.
-
Workflow: If the workflow is not on the list, create one at Model Events Workflow.
-
Active: To activate the event and trigger the corresponding workflow, click Yes.
-
Resume on Update. Select Yes to continue using the instance in the previous State Change. Select No to move the instance to trash.
-
Processing Order: Processing order of the State Event, when there are more than 1 State Event, tagged to a Model.
-
-
Click Save.
You cannot delete a state event but you can deactivate it. When you deactivate the state event, the corresponding workflow is not triggered.
-
Go to Solution Builder > Events > State Events tab.
-
Hover over the row of the desired record and click
. -
From the Active list, select No.
-
Click Save.
|
|
Doc Review (Rosliana) |
|---|---|
|
To remove this table. A description of the fields here should be incorporated as part of the process. |
|
Field Name |
Description |
Example |
|---|---|---|
|
Model |
Select the name of the Model you wish to associate with the event. Changes to the field in the model (the change the event looks out for depends on the Event Type selected in the sidepanel) will then trigger the workflow specified in the Workflow dropdown. The dropdown lists contains Models for which the Attribute eventWorkflowEnabled = True in the Models module. The field to which the event is tied is also set in the Models configuration. In this example, the field = "status", so changes to the "status" field will trigger the event. |
workOrder |
|
Workflow |
The Workflow is triggered by the event. The dropdown contains a list of Workflows for which the Process Type ID = State Event, which are all located and created in the Workflows > State Event module |
Deploy task when work order status changes |
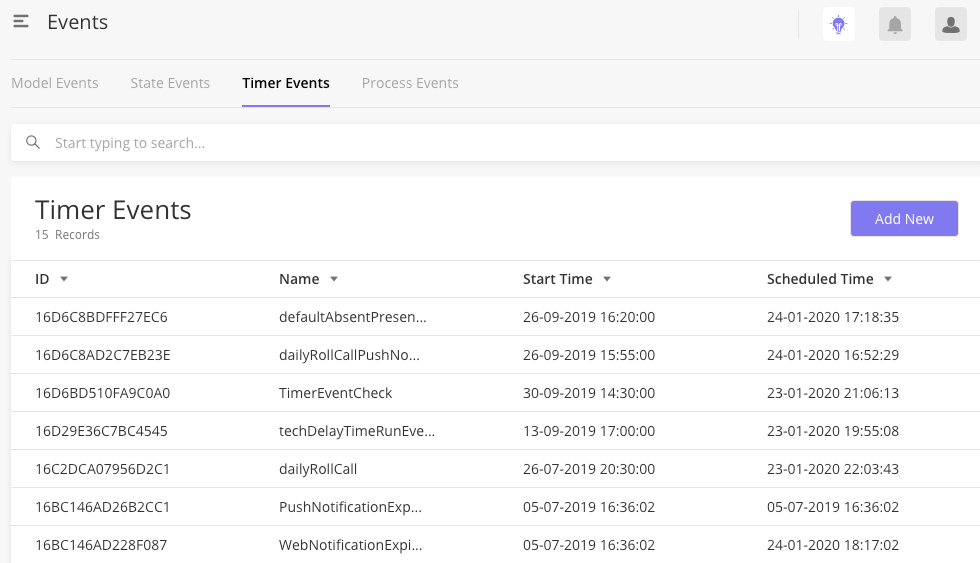
Timer Events trigger a Stateless Workflow at a specific time and frequency. With this in mind, Solutions Admins should create the Stateless Workflow(s) to trigger before creating the corresponding Timer Event. One example of how a timer event is used might be to check for Auto Approvals of Work Orders at a frequency of every hour and trigger the Update Auto Approval Status workflow.
Timer Events can be configured according to the following:
-
Fixed time: day of the month, hour of the day and start time
-
Frequency: occurs every hour, day or month
|
|
Module |
Relationship |
|---|---|
|
A user needs to select the corresponding Process (Workflow) which is triggered by the Event |
-
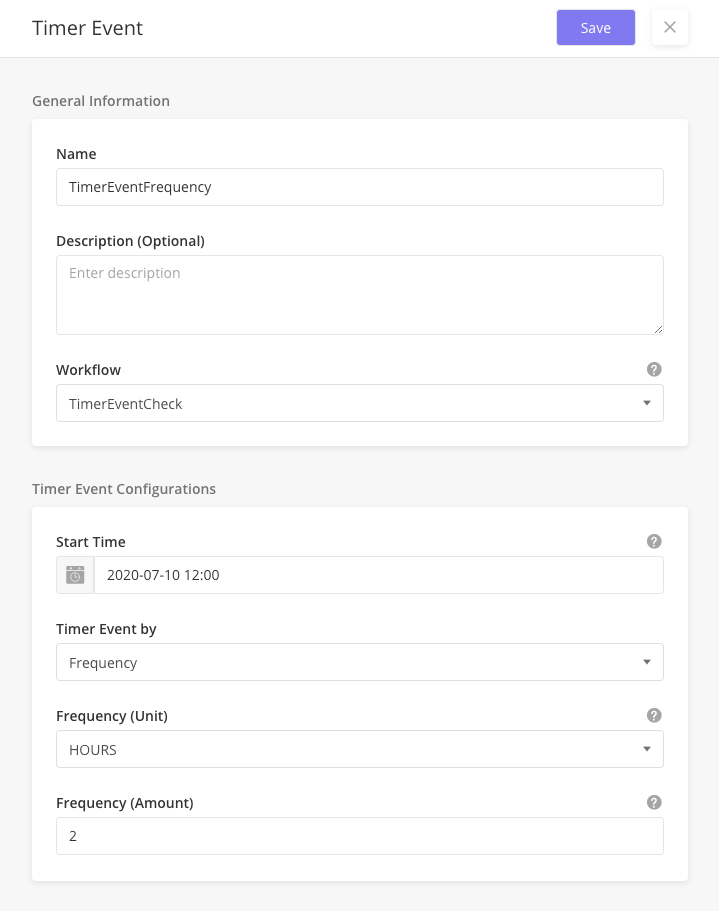
From the main page, click Solution Builder > Events. Add New to open the side panel.
-
Enter a Name and Description for the event
-
Select a Workflow to be triggered when that Event is observed from a dropdown. This workflow must already exist in Solution Builder > Workflows
-
Select the Start Time of the Event if relevant. This is optional.
-
Select if the Timer Event is by Frequency or Fixed Time.
-
If Frequency is chosen, you can select the unit (hours, days, month) and the amount (integer) of the timer event. For example, Hours, 3 means that the event will run every 3 hours.
-
If Fixed Time is chosen, you can select the Hour of the Day and Day of the Month. For example, 9 Hour of the Day on 12 Day of the month will mean that the Timer Event will run at 9 am every 12th day of the month.
-
Click Save once you are done.
-
Hover over the row of the desired record and click
. -
Edit the information and click Save.
|
Field Name |
Description |
Example |
|---|---|---|
|
Name |
Name for a timer event |
TimerEventFrequency |
|
Description (Optional) |
A short description of the event. This field is optional. |
|
|
Workflow |
Name of Workflow which is triggered by the event. The dropdown contains a list of Workflows for which the Process Type ID = Stateless, which are all located and created in the Workflows > Stateless module. |
TimerEventCheck |
|
Start Time |
Refers to the Enabled Time. |
2019-05-13 14:30 |
|
Timer Event By |
Frequency or Fixed time |
Frequency |
|
Frequency (Unit) |
Unit to measure the frequency of Event occurrence (i.e for every 1 hour: hour, every 2 minutes: minutes) |
HOURS |
|
Frequency (Amount) |
Numeric frequency of Event occurrence (i.e for every 1 hour: 1, every 2 hours: 2) |
3 |
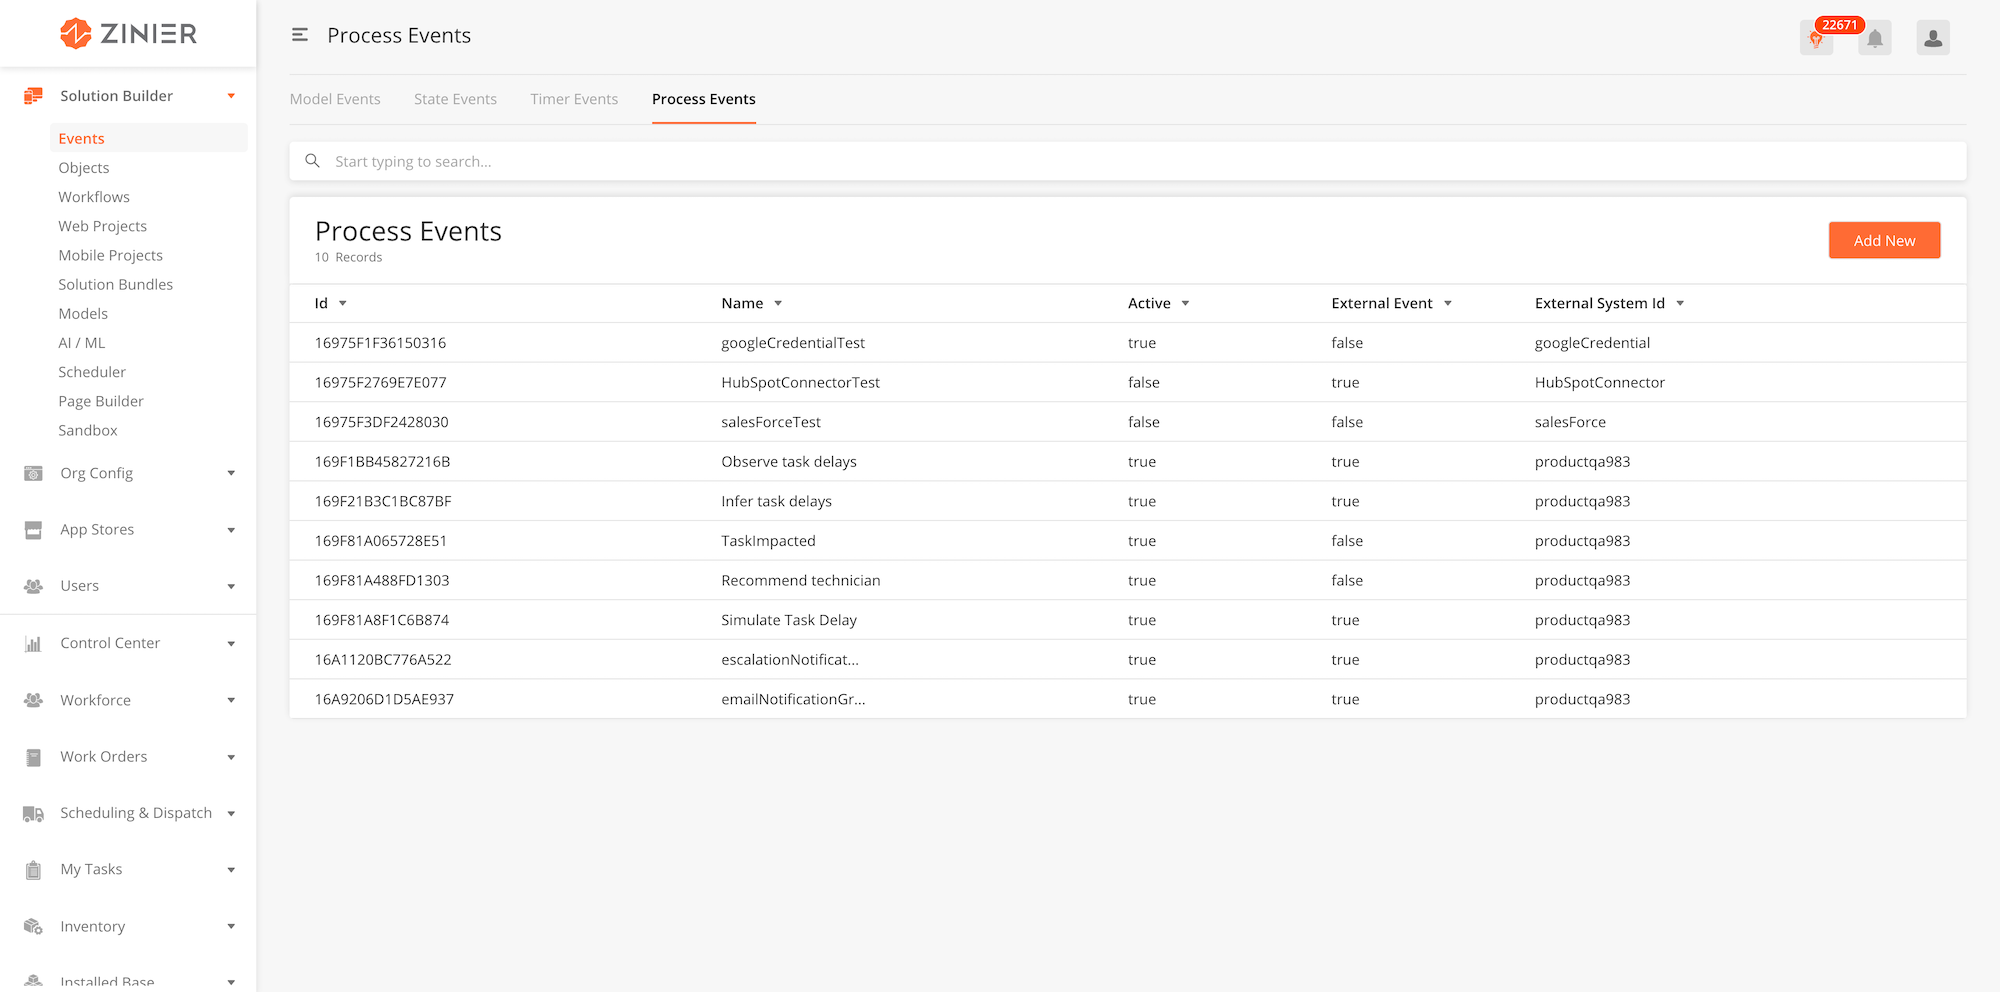
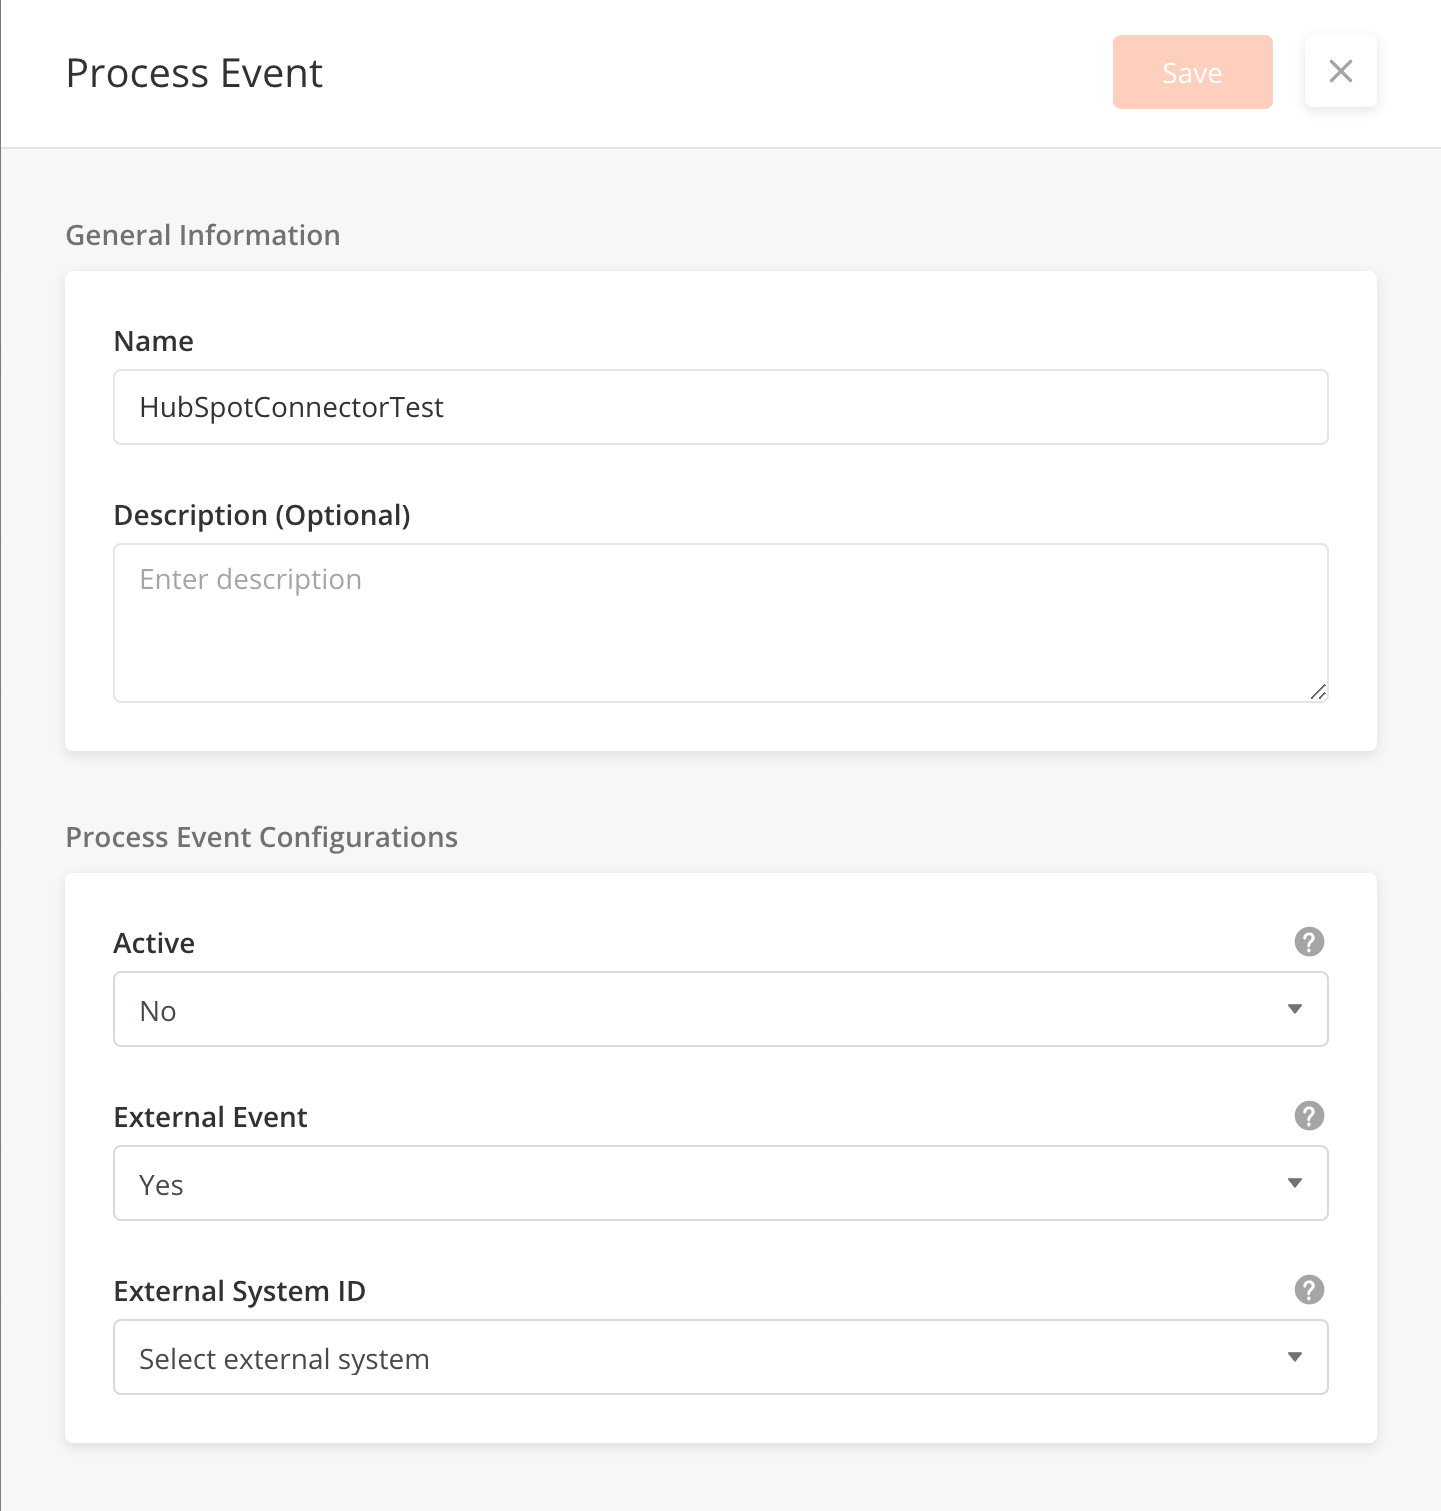
Process Events are events that can trigger multiple workflows in sequential order. For example, Process Events might be used in the following scenario: when executing a workflow to update inventory once a work order is completed, a process event can be created to trigger a sequential workflow to deduct the inventory items at the same time.
-
From the main page, click Add New to open the side panel.
-
Enter a Name and Description for the event
-
Select if the Event is Active. If No, the Event will be deactivated and the corresponding workflows will not be triggered.
-
Select if the Event is an External Event. If Yes, users will be able to publish the event in Zinier system using an API.
-
Select the External System ID connected to the event
-
You can edit or delete a record by hovering over the row of the desired record from the main page table and clicking the Edit icon. When you click Edit, the side panel will appear. Edit the information and click Save
-
You cannot delete Process Events. You can only Set Active to No to deactivate them.
-
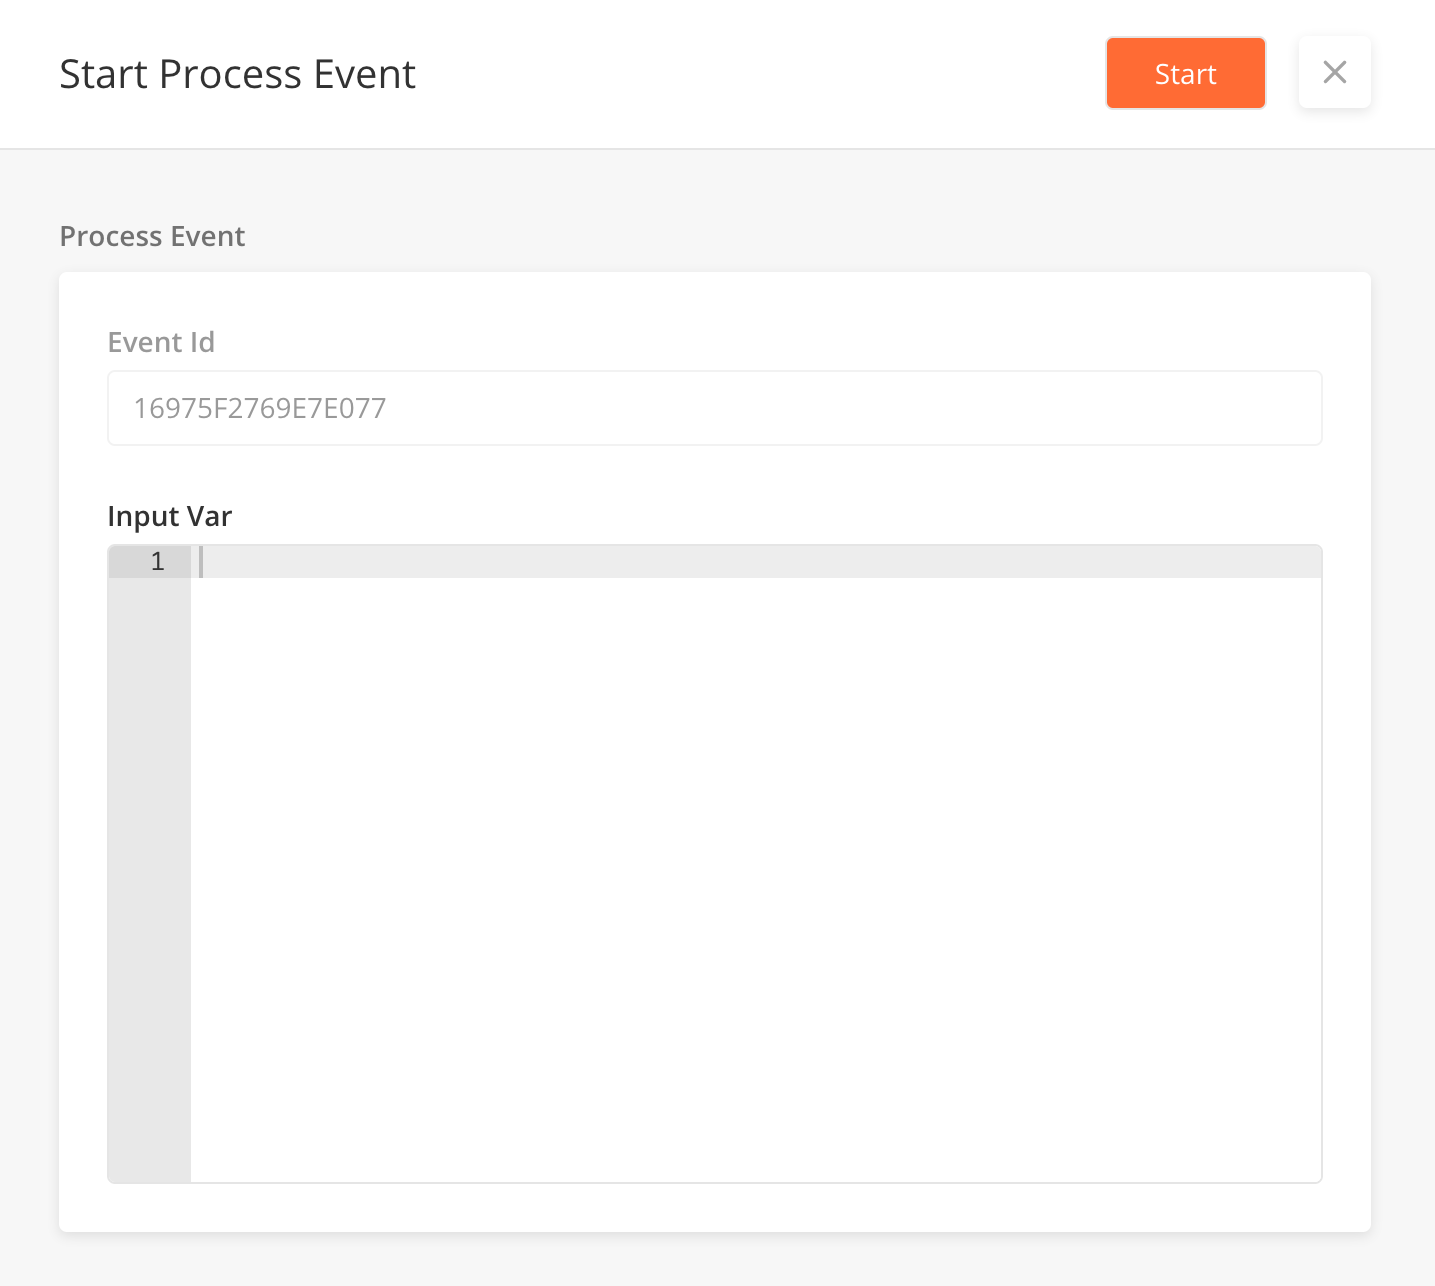
You can trigger a Process Event by hovering over the row of the desired record from the main page table and clicking the Trigger icon.
-
Enter the Input Var in the JSON editor, and click Start to trigger the event.
When adding a new Process Event
|
Field Name |
Description |
Example |
|---|---|---|
|
Name |
The name you wish to give the event. |
hubspotConnector |
|
Description |
A short description of the event. This field is optional. |
This event processes data from hubspot into Zinier |
|
Active |
To determine whether or not this event is enabled. Set as No to disable the Event. |
Yes |
|
External Event |
When External Event is True, Solutions Admin can publish an Event in the Zinier System using an API. |
Yes |
|
External System |
Displays a list of records from the External Systems that can be chosen. |
When triggering a Process Event
|
Field Name |
Description |
Example |
|---|---|---|
|
Event ID |
ID of the Event you are triggering. This is a read-only field. |
|
|
Input Var |